 JPY
JPY

Aloha and welcome back, everyone.
If this is your first time visiting and joining me at my work station, welcome. I hope you’ll enjoy following along with me today as I work through the process of sorting Momi shell colors.
Sorting Momi Shell Colors for New Pikake Earrings
As I’ve been working and sorting Momi shell colors for my new Pikake earrings, there was a quiet moment when everything naturally slowed down.
I found myself pausing — not because I planned to — but because a few shells simply started catching my attention. Colors I hadn’t been looking for at all somehow found their way into the pile.
Sometimes while sorting, this just happens. A few tones gently stand out, others blend together, and before you even realize it, you’re no longer just sorting — you’re simply noticing.
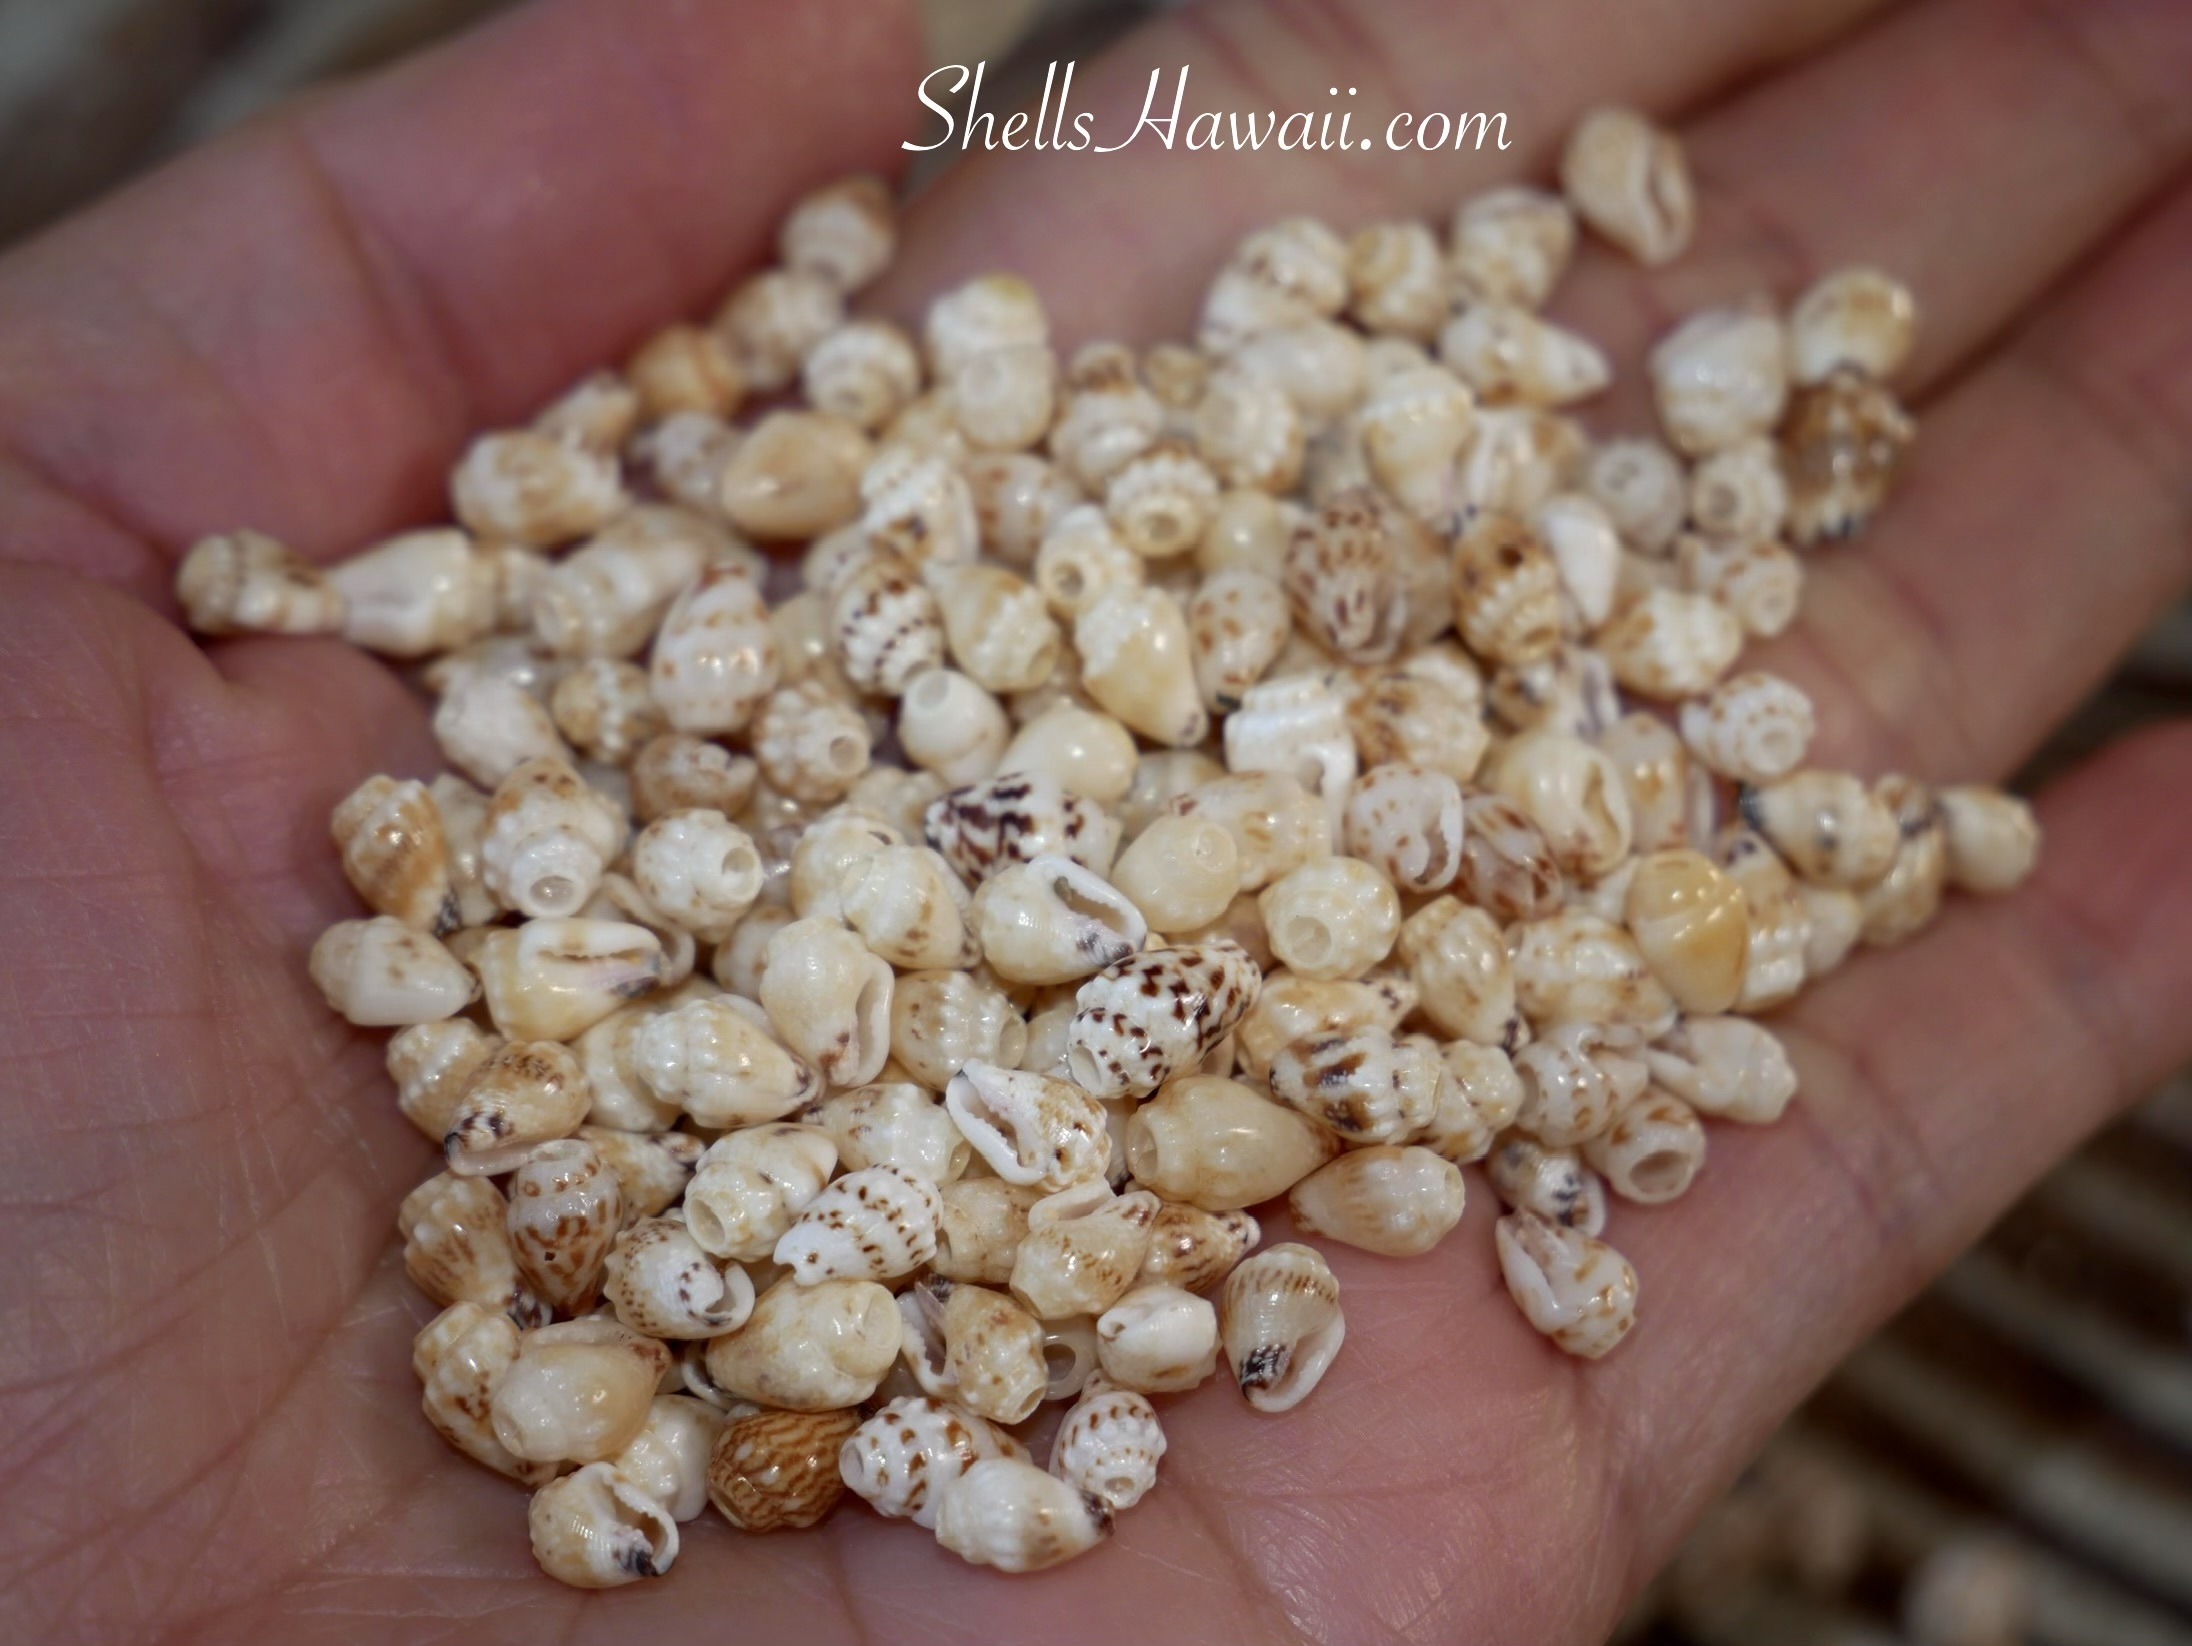
These Momi shells have all been cleaned and prepared by hand, with the sand fully removed. Once they’re clean, their natural tones, markings, and subtle differences become easier to see — the kind of details you notice when you slow down and let the work guide you a little.
Looking Closely at Patterns and Details in Momi Shells
Let’s pause for a second, everyone.
I would like you all to take a closer look at the photo and notice what catches your eye — how many different colors you see, and how many patterns you can separate. What stands out to you?
Did you see it?
This small moment is actually very important. Training your eyes to notice these differences makes a big difference, especially if you’d love to learn more about Momi shell color shades and details.
I personally love working with Momi shells. They’re very friendly to work with and can be used to create so many different patterns and design like Pikake or Kipona lei, earrings, or even pendants. Each style brings out something a little different in the shells.
If you’d like to spend a little more time learning about the styles of Niʻihau shell jewelry, you can click here whenever you feel ready.. When I sort them shell by shell, I’m always amazed by the beautiful details — the colors, the markings, and the subtle differences that make each one special.
That’s the part I truly enjoy — taking the time to notice those little details.
Seeing the Differences in Patterns Within These Momi Shells
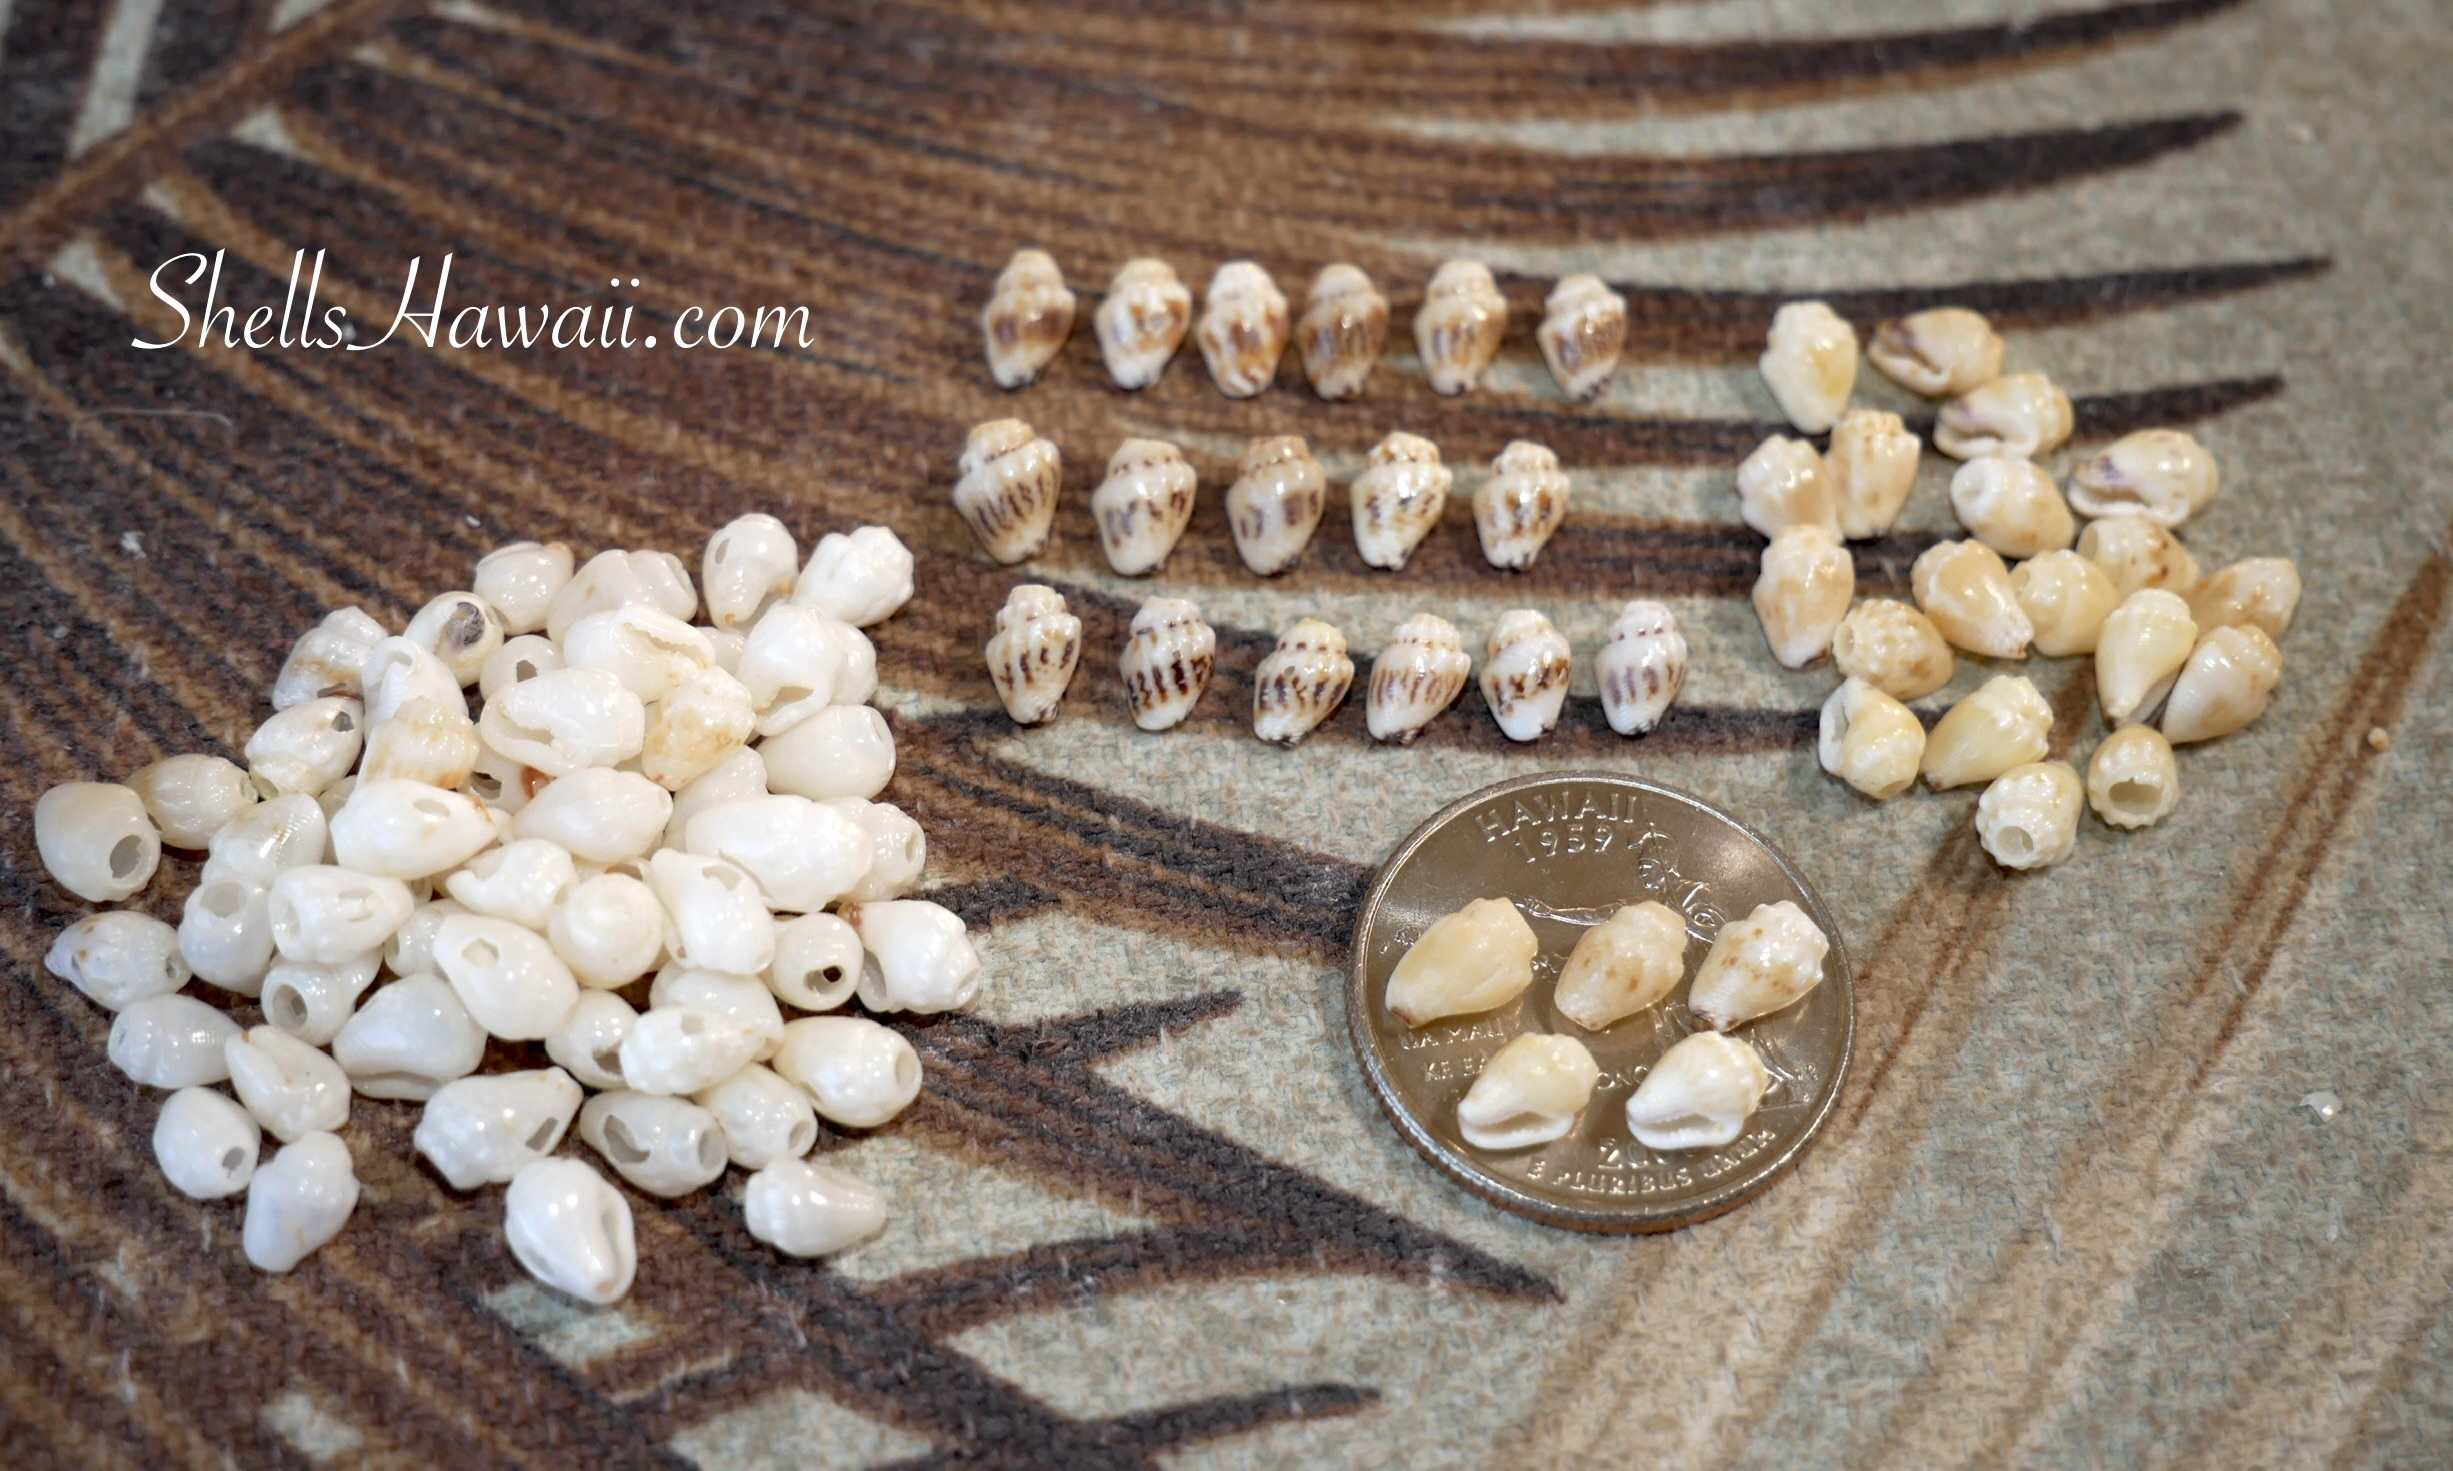
At first, everything feels simple. When you look at a pile of Momi shells, it’s natural to begin by separating what feels dark, what feels soft, and what looks similar in tone — that’s usually the first instinct.
But then something else starts to show up. The pattern begins to matter. When a pattern is lighter or darker, it quietly changes how the color feels, and once the shells sit together as a group, those pattern differences start to shift the overall look of the pile.

That was the moment that caught me. It wasn’t just about light or dark anymore — it was about how the patterns change the color when everything comes together. And that’s the part that really gets me. These shells may sit side by side, but each one carries its own pattern and character. You don’t notice it right away — and once you do, it completely changes how you see the pile.
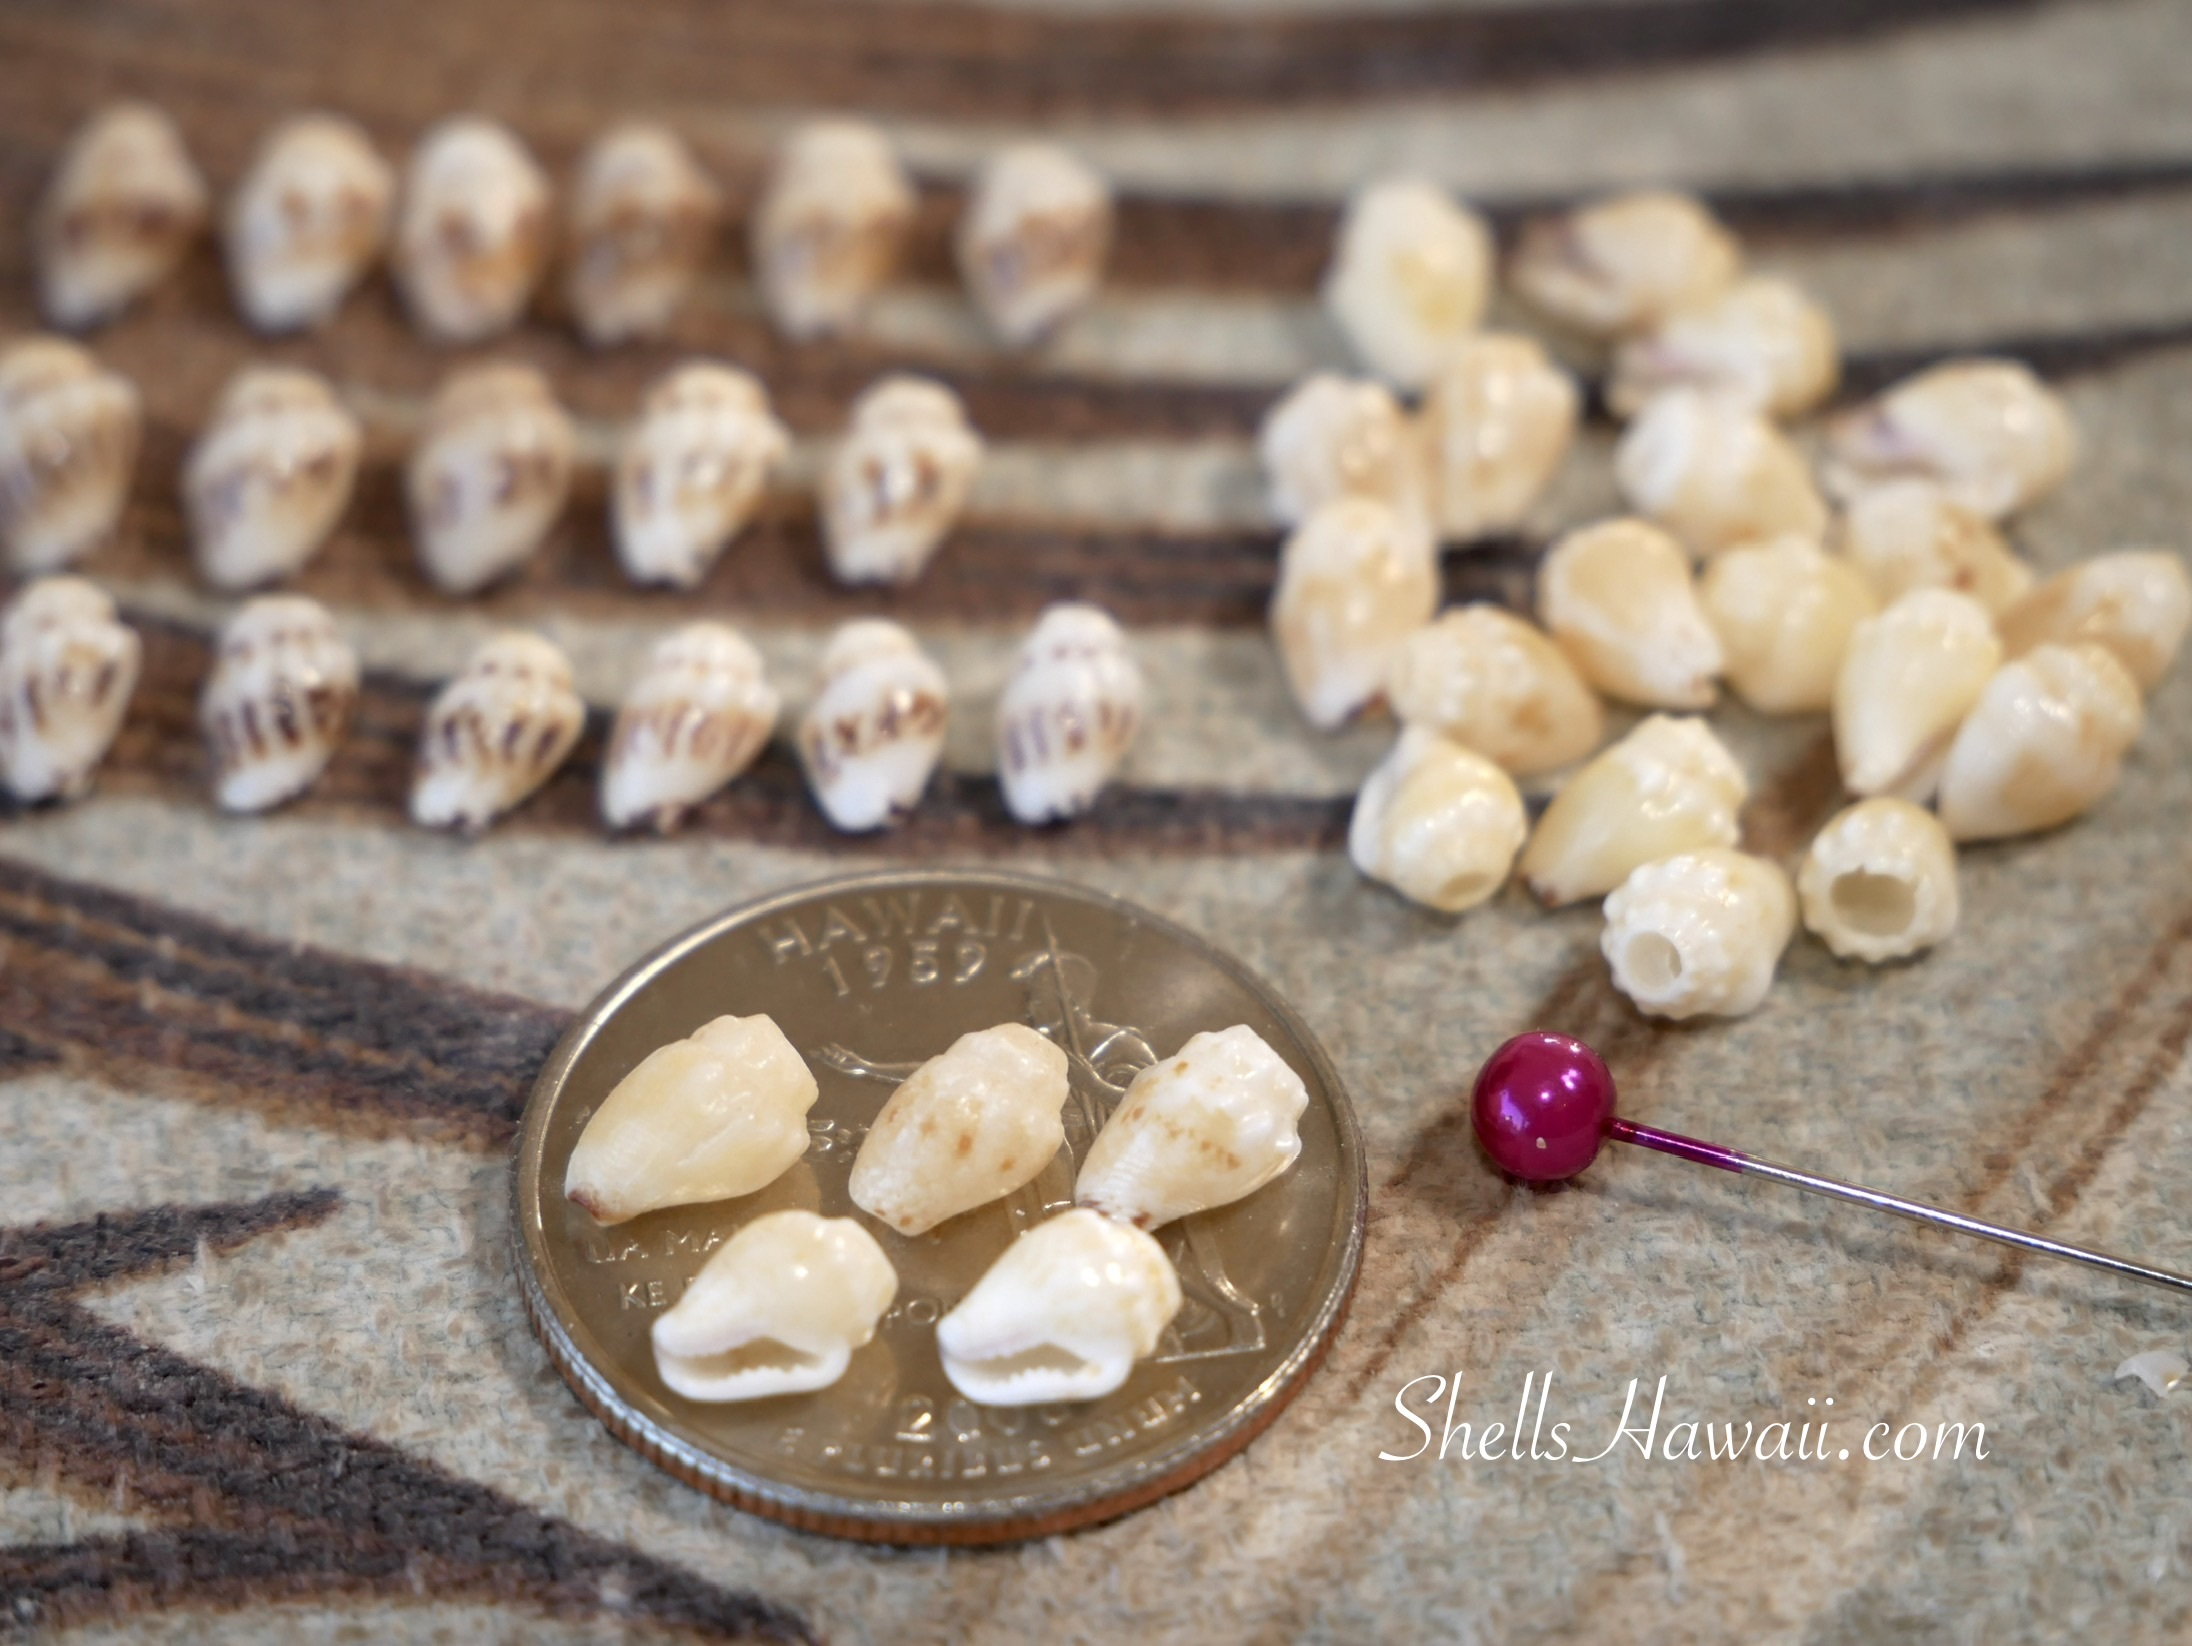
Finding the Soft Pale Yellow Momi Shells
And then… this is actually the color I was looking for. That soft, pale yellow — quiet, gentle, and easy on the eyes. It doesn’t ask for attention, but once you notice it, it naturally makes you pause.
What makes this color even more special — and a little more challenging — is the waha. Some of these pale yellow Momi shells have a black waha, and some don’t. That small detail matters more than most people realize. In certain designs, a bit of contrast helps the pattern stand out. In others, especially when I want everything to feel very soft and gentle, I have to keep looking for shells with no black in the waha at all.
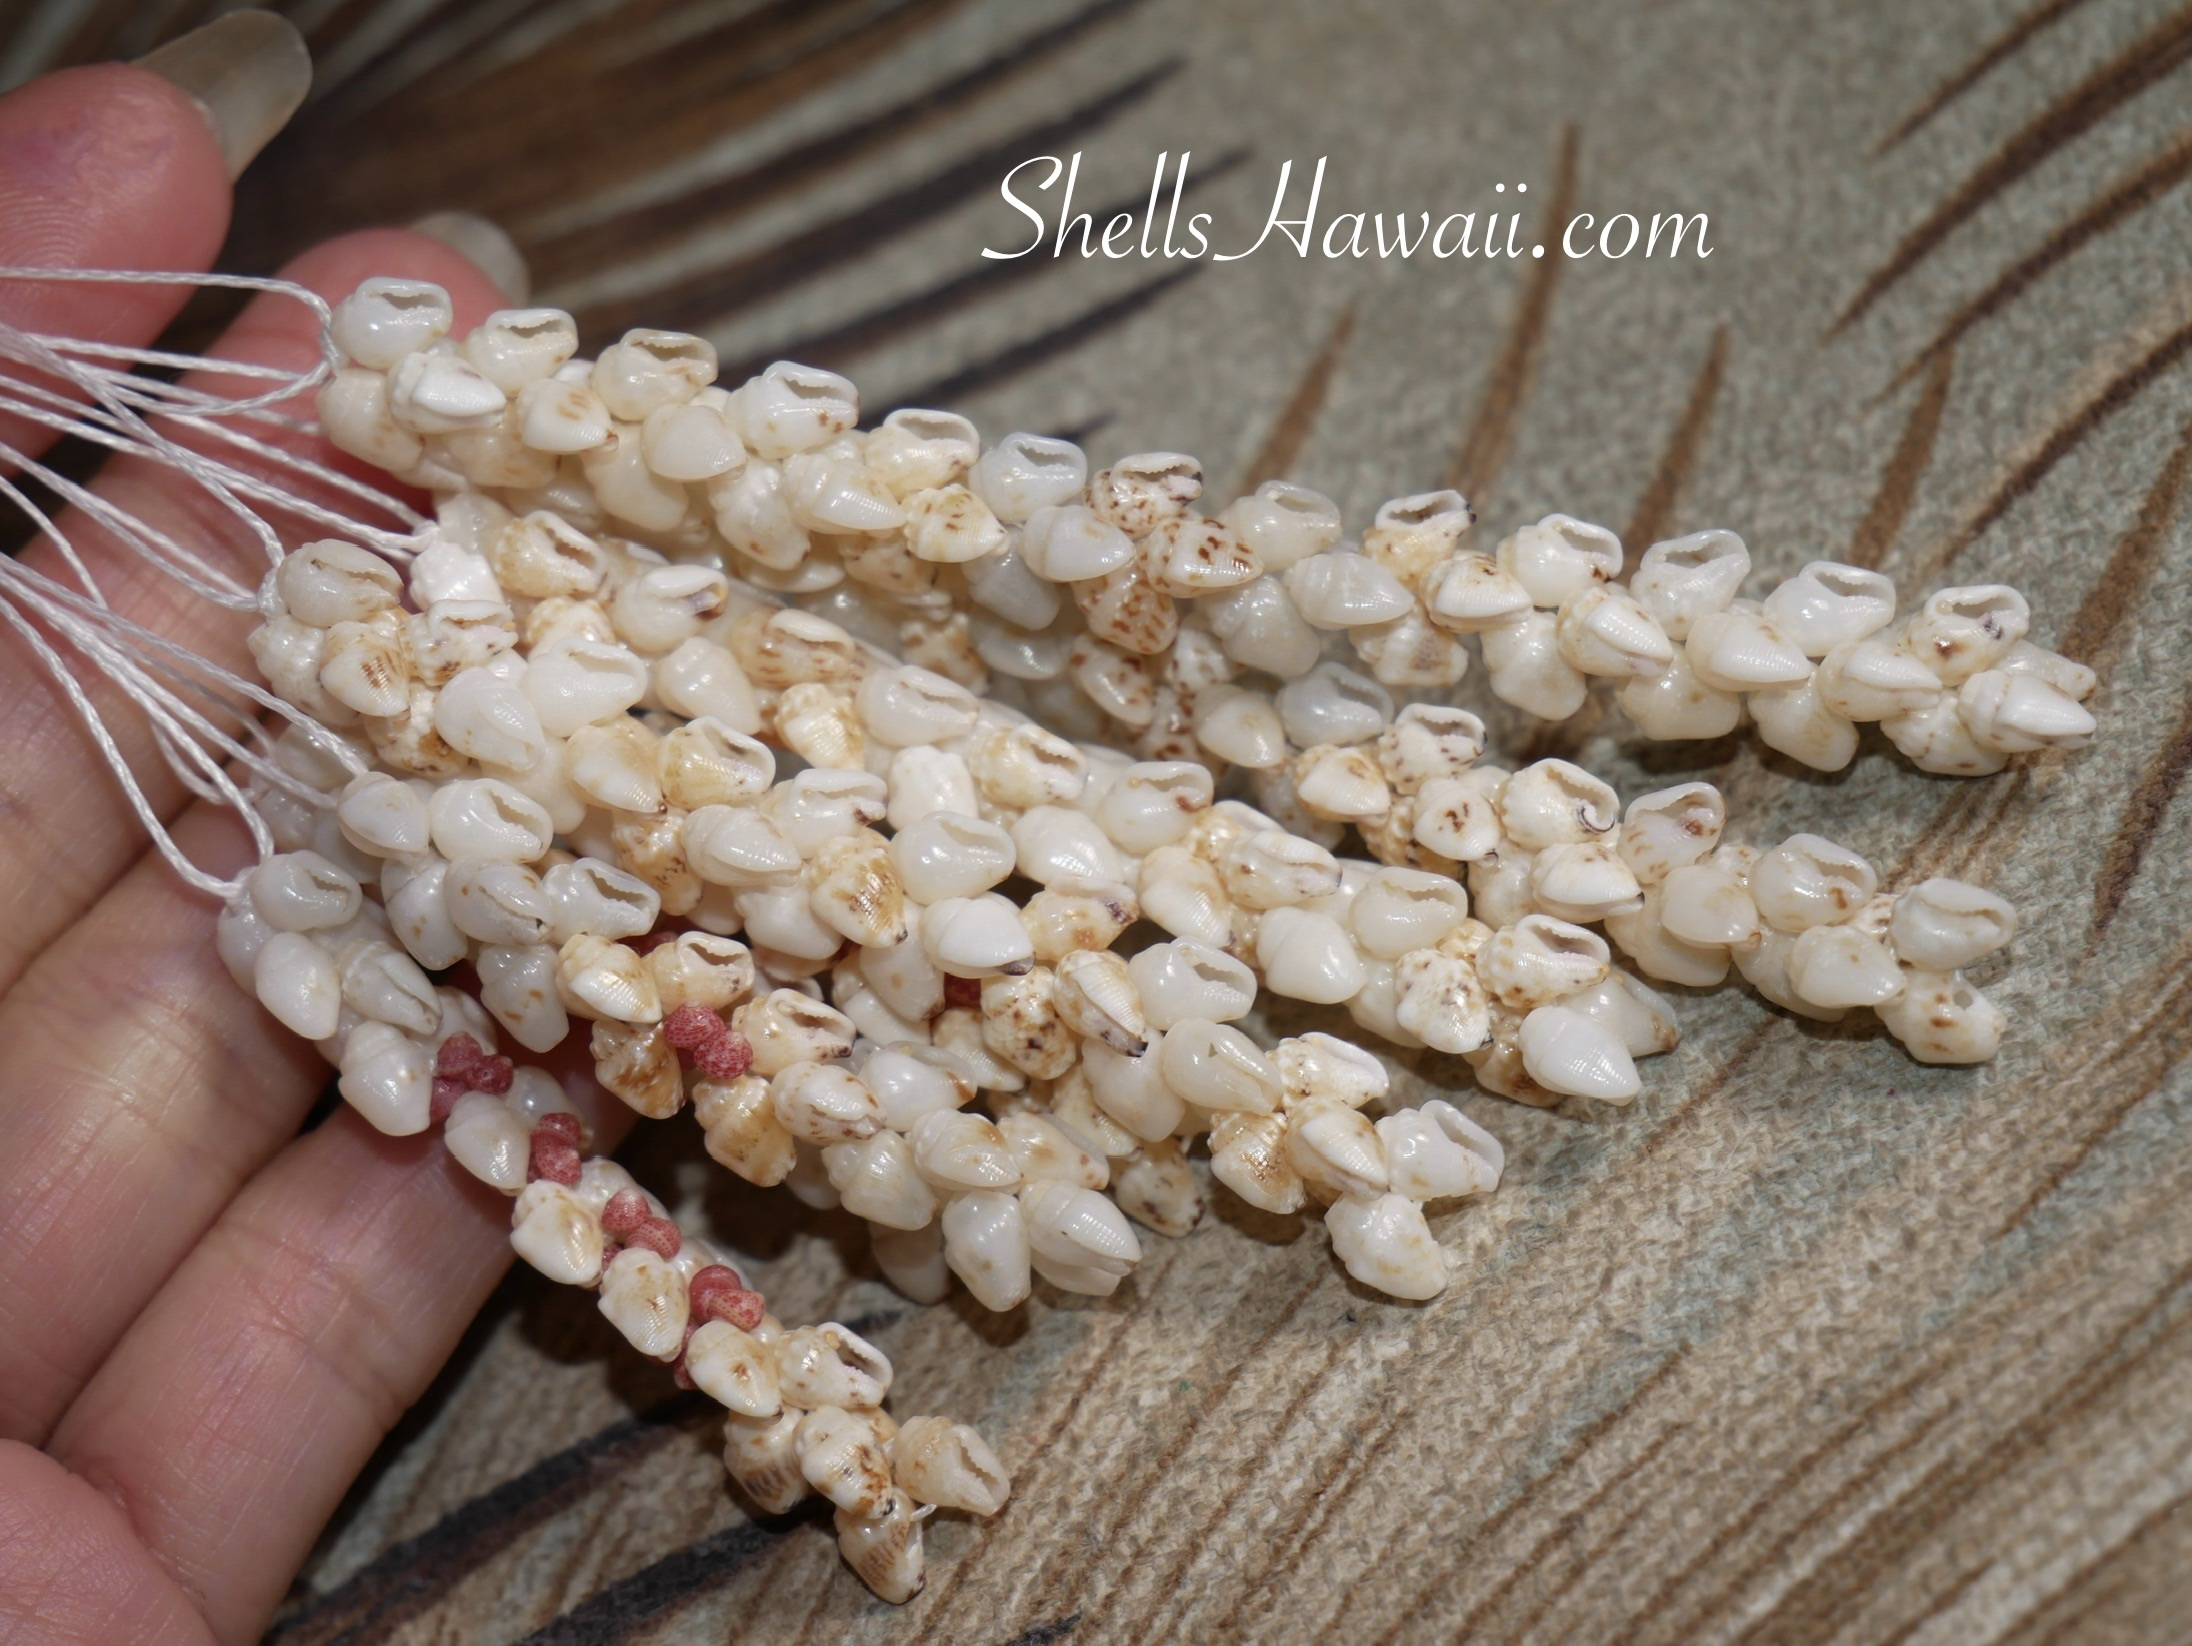
And honestly… that part isn’t easy. I have to pick up each shell one by one. First, I check the back to make sure there’s no pattern. Then I flip it over and look closely at the waha. If there’s any dark edge, it goes into a different pile. If it’s clean and soft all the way around, I set it aside.
There’s a lot of flipping, checking, and re-checking. But this is how I separate them and use them in different patterns as ideas start forming. These details may feel small, but they’re what help the final design feel balanced, intentional, and just right — especially for Pikake earrings, where softness really matters.
Small Details Behind a Finished Piece of Jewelry
This is just part of my everyday routine — working and creating Niʻihau shell jewelry. It’s one of the most enjoyable parts for me, before I move on to the next steps of poking and stringing.
There are so many small steps behind a finished piece of jewelry — far more than most people ever see — and every part of the process matters to me. It’s love, it’s joy, and it’s detailed work, one shell at a time. Each shell is unique in its own way, and bringing them together so they truly belong takes time. It can be challenging, but it’s also fun. And when a piece is finally finished — balanced, complete, and just right — seeing it find a new home where it will be loved and cherished really means a lot to me. In a way, it feels like it means something to the shells too.
Over the past few weeks, I’ve also been working on some new creations in Kipona and Pikake styles that you might enjoy seeing. I’ve been sharing a little behind the scenes of the Kipona process as well, along with sorting blue Momi shells for a new 3" Pikake style I’m slowly putting together.

Thank you for spending this time with me today, sorting shells together. I hope it felt slow, calming, and enjoyable. I’m hoping to have all the colors ready very soon — and next, we’ll begin creating the earrings with a clean, settled look. I can’t wait to share what comes next