 USD
USD

Aloha weekend, Everyone!
Today, I’m going through some of my Kauaʻi Kahelelani shells and came across a batch I bought from the south side beaches of the island. I thought this might be helpful for anyone who’s still new to Niʻihau shell jewelry and would love to eventually work with shells that come from Niʻihau.
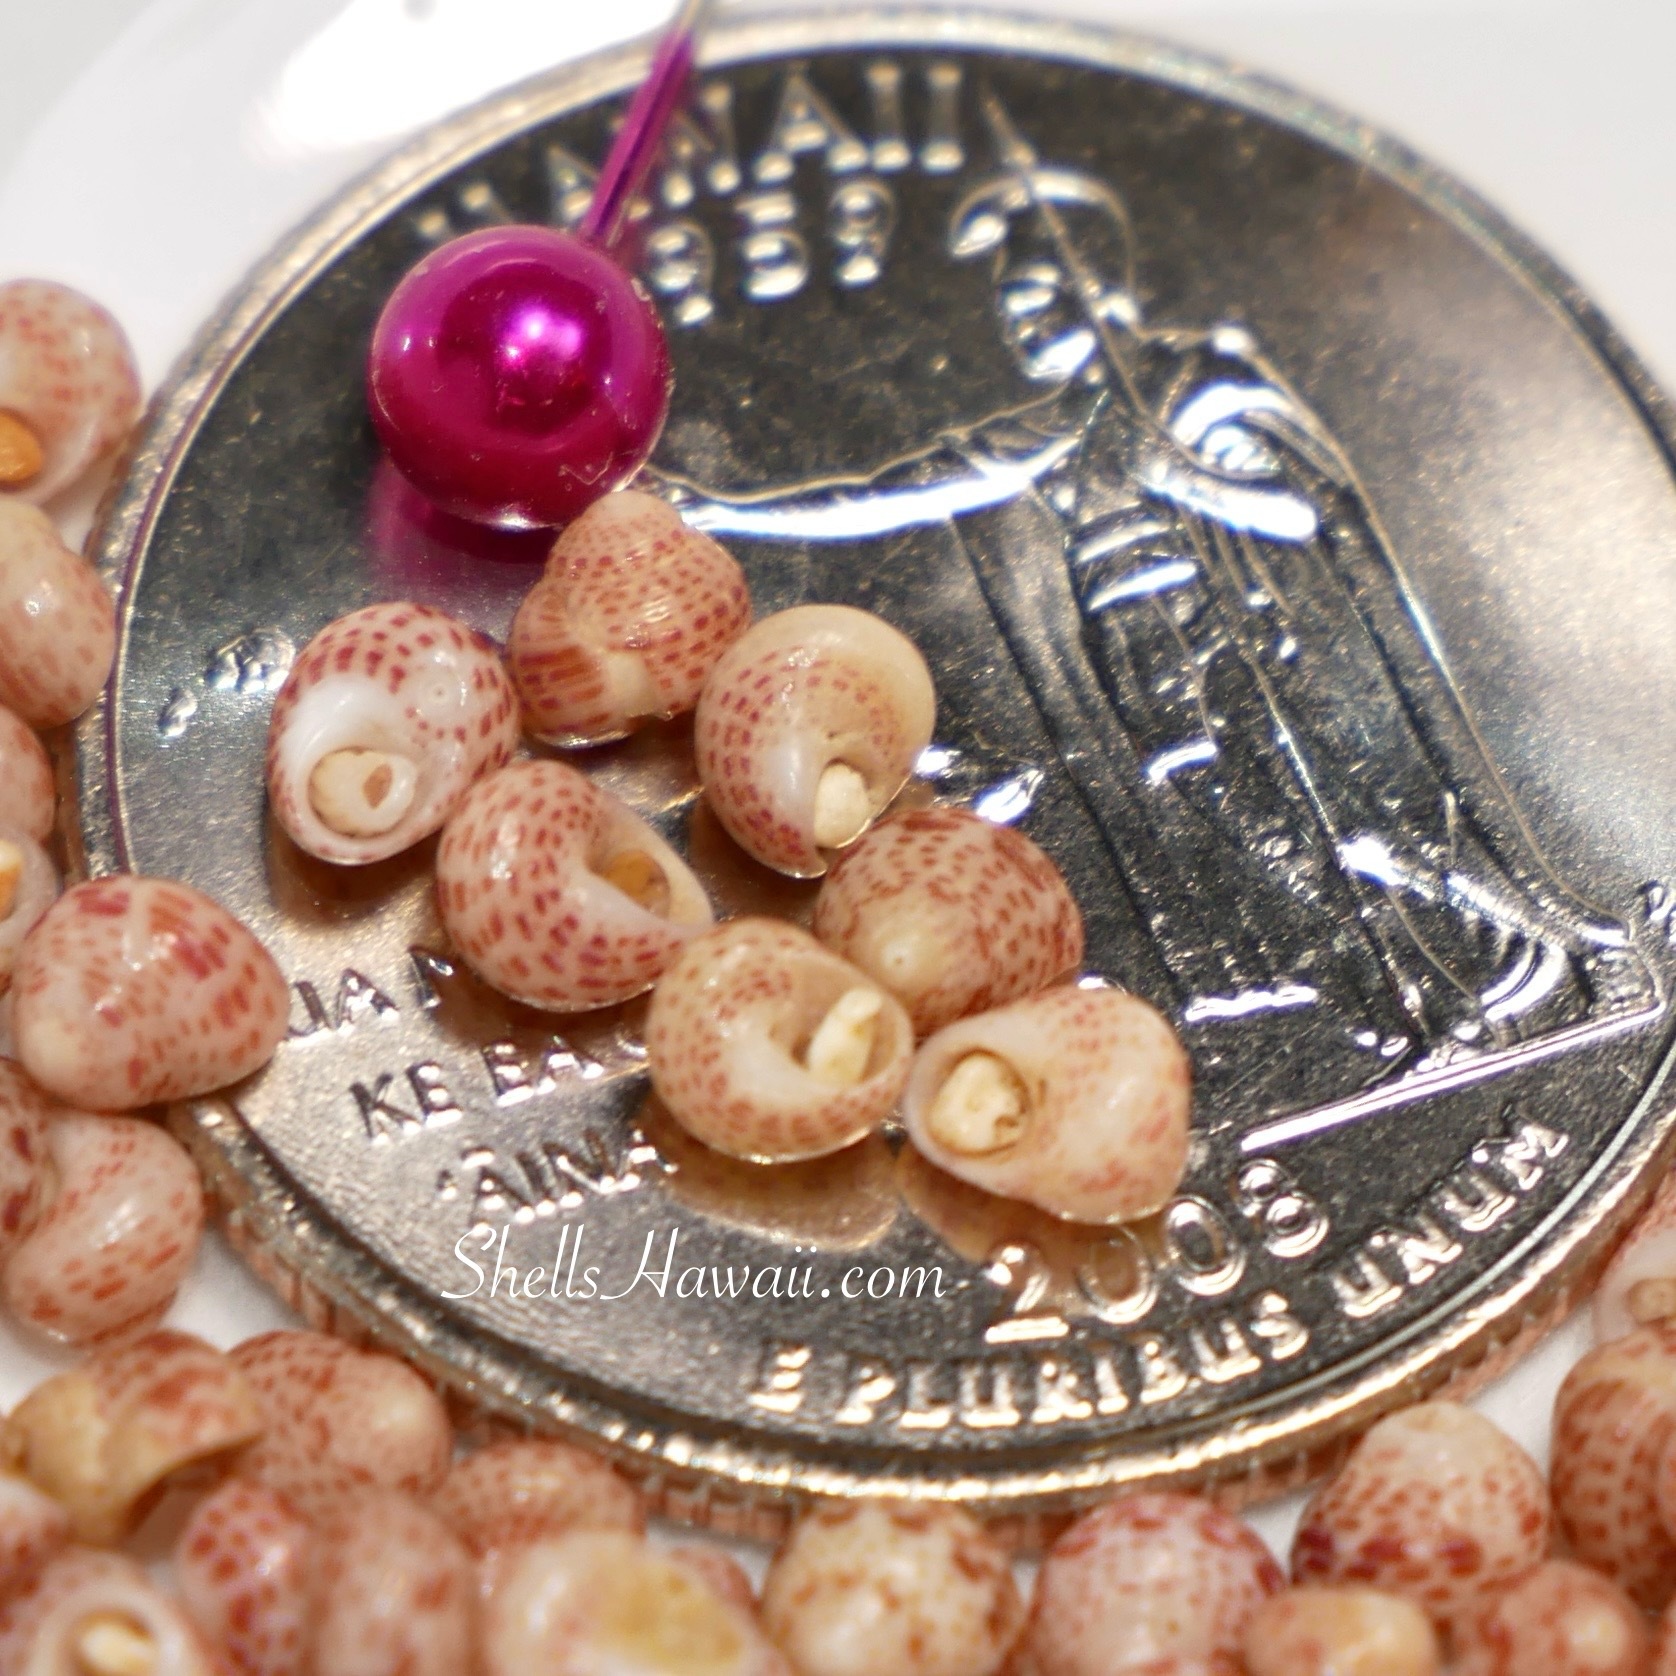
When you start collecting or buying Kahelelani shells, you’ll often notice a bit of fine sand stuck inside their waha (mouth). This is completely normal — especially for shells from Niʻihau. That fine sand helps protect the shell’s natural luster, preventing it from wearing down during years of tumbling in the ocean. So if you see sand still inside, don’t worry — it’s a natural part of what keeps their shine.
In this blog, I’ll share a few photos from my Kauaʻi shells and offer some beginner-friendly tips on identifying shell quality and understanding what size is best to start with.
Unsorted or Part-Sorted Kahelelani Shells — Can You Identify Them With Just Your Eyes?
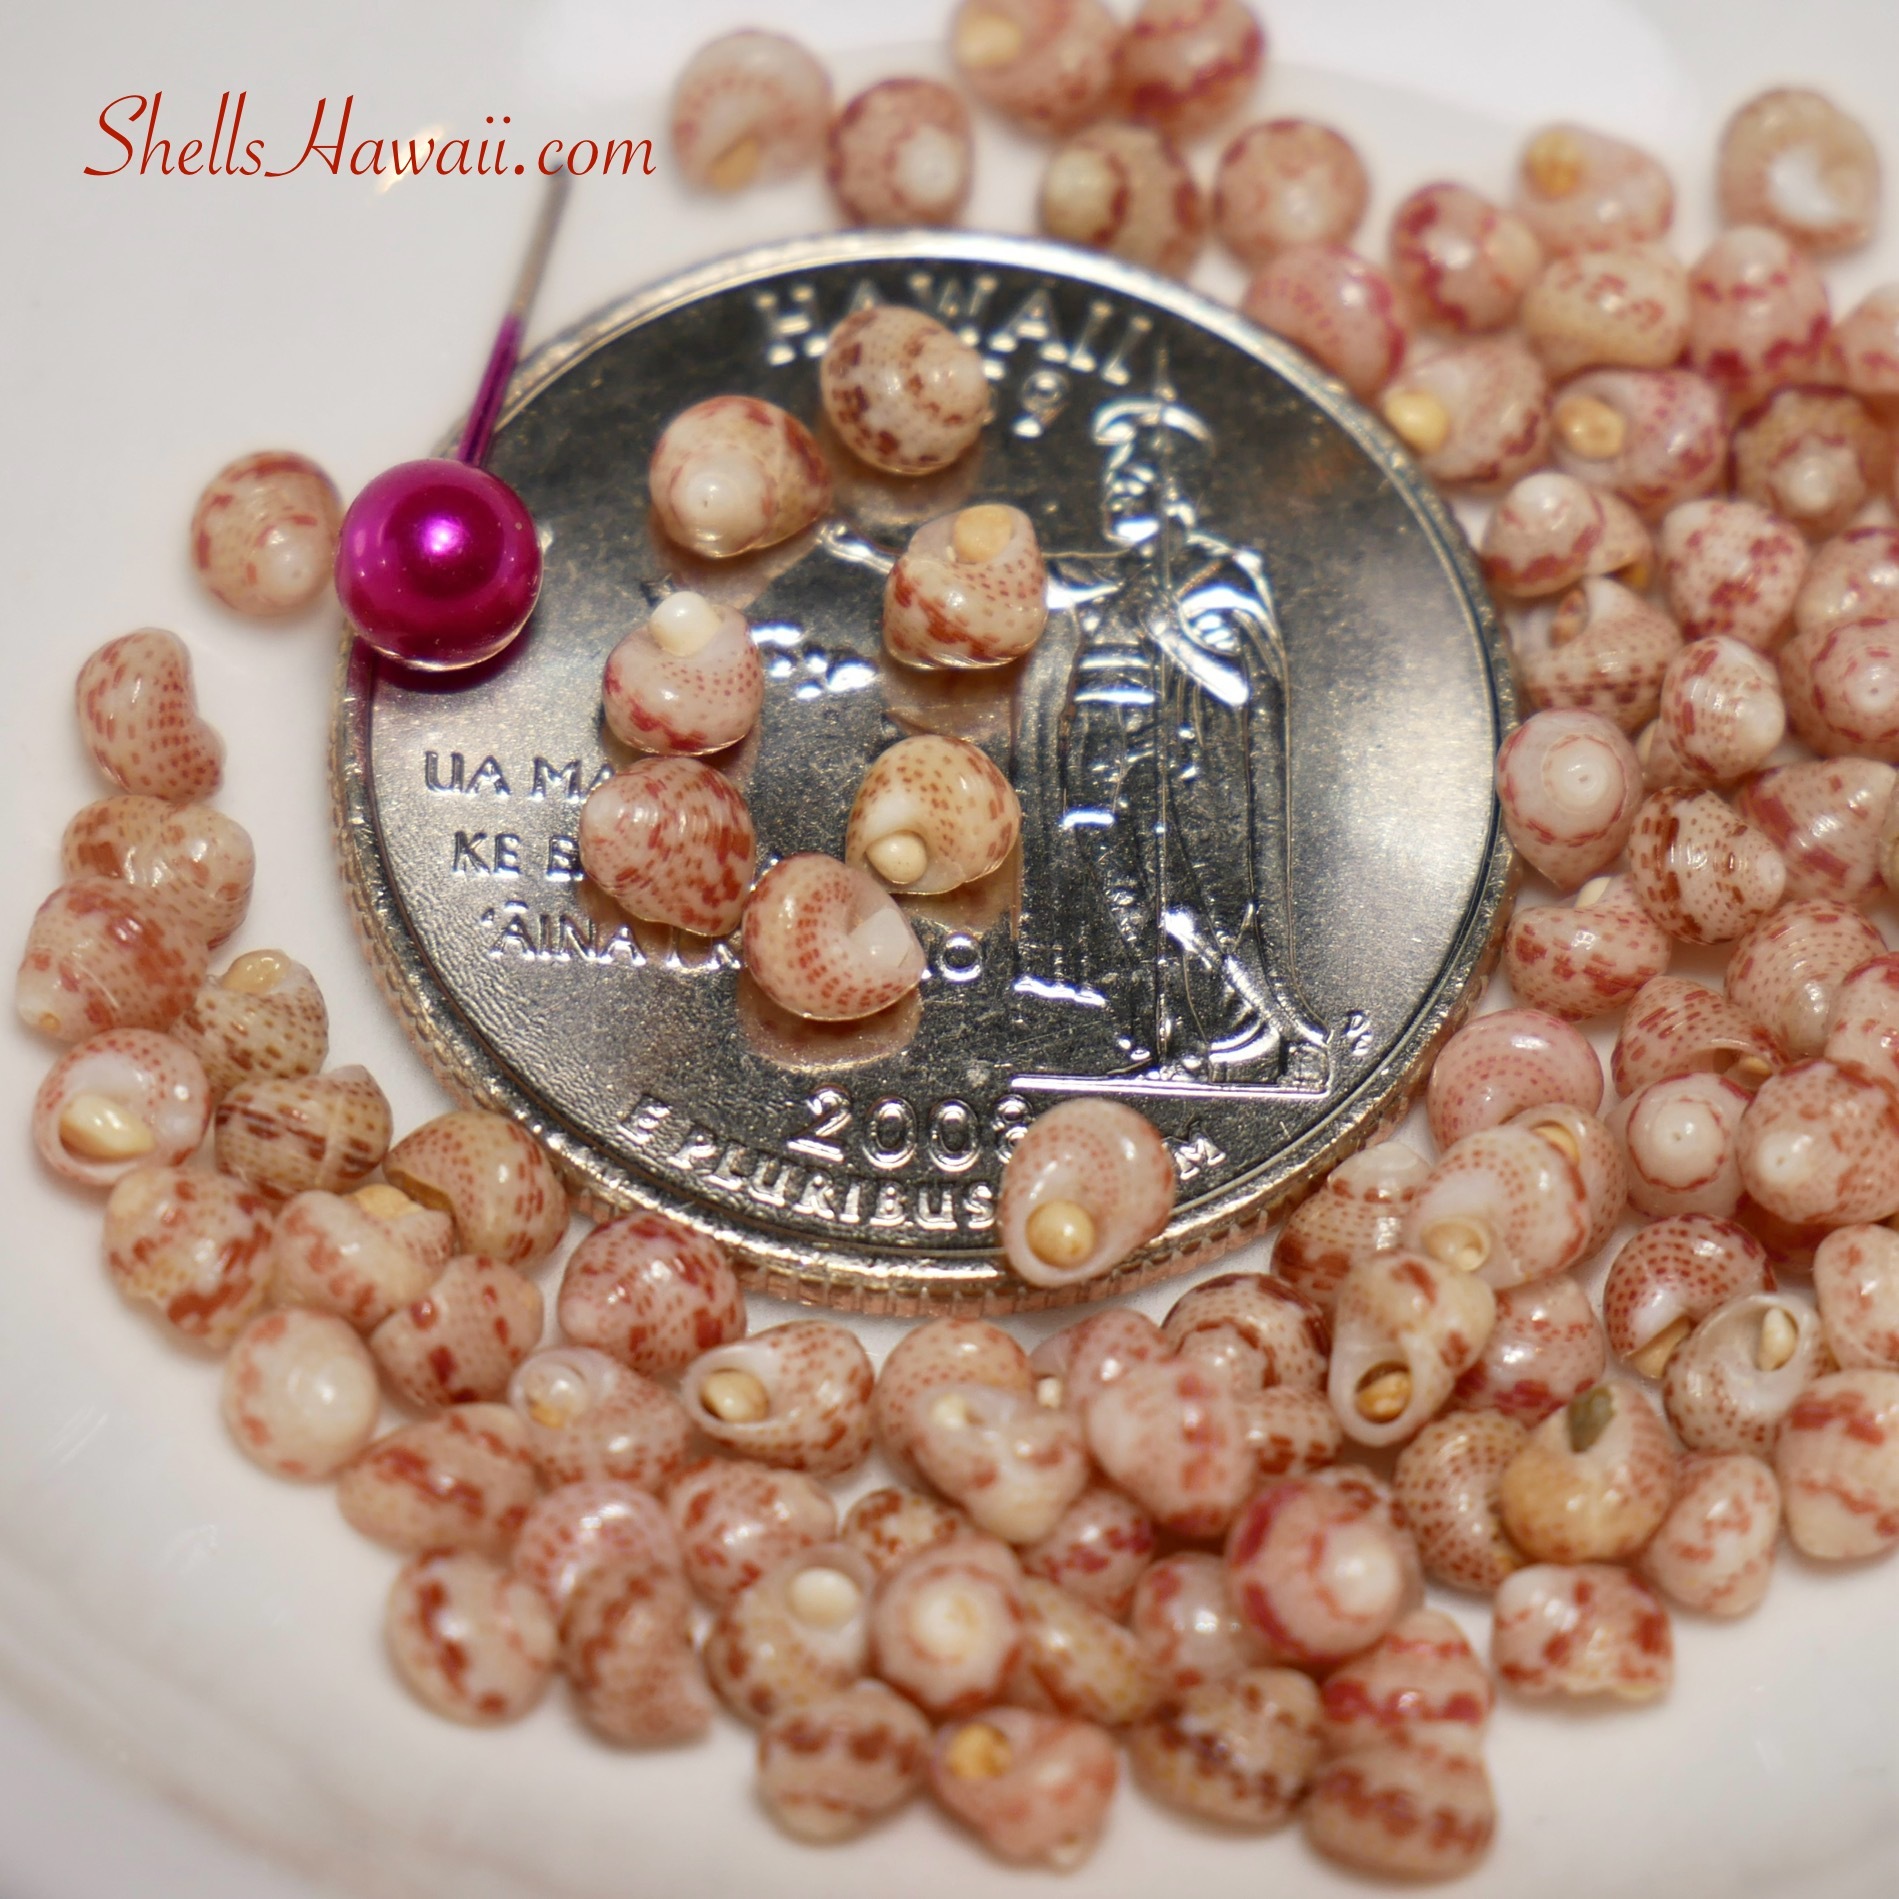
In these two photos below— you can see a batch of unsorted Kauaʻi & Niʻihau Kahelelani shells that look beautiful at first glance. But after sorting them one by one, I discovered a mix of B-grade, C-grade, and a lot of imperfect shells.
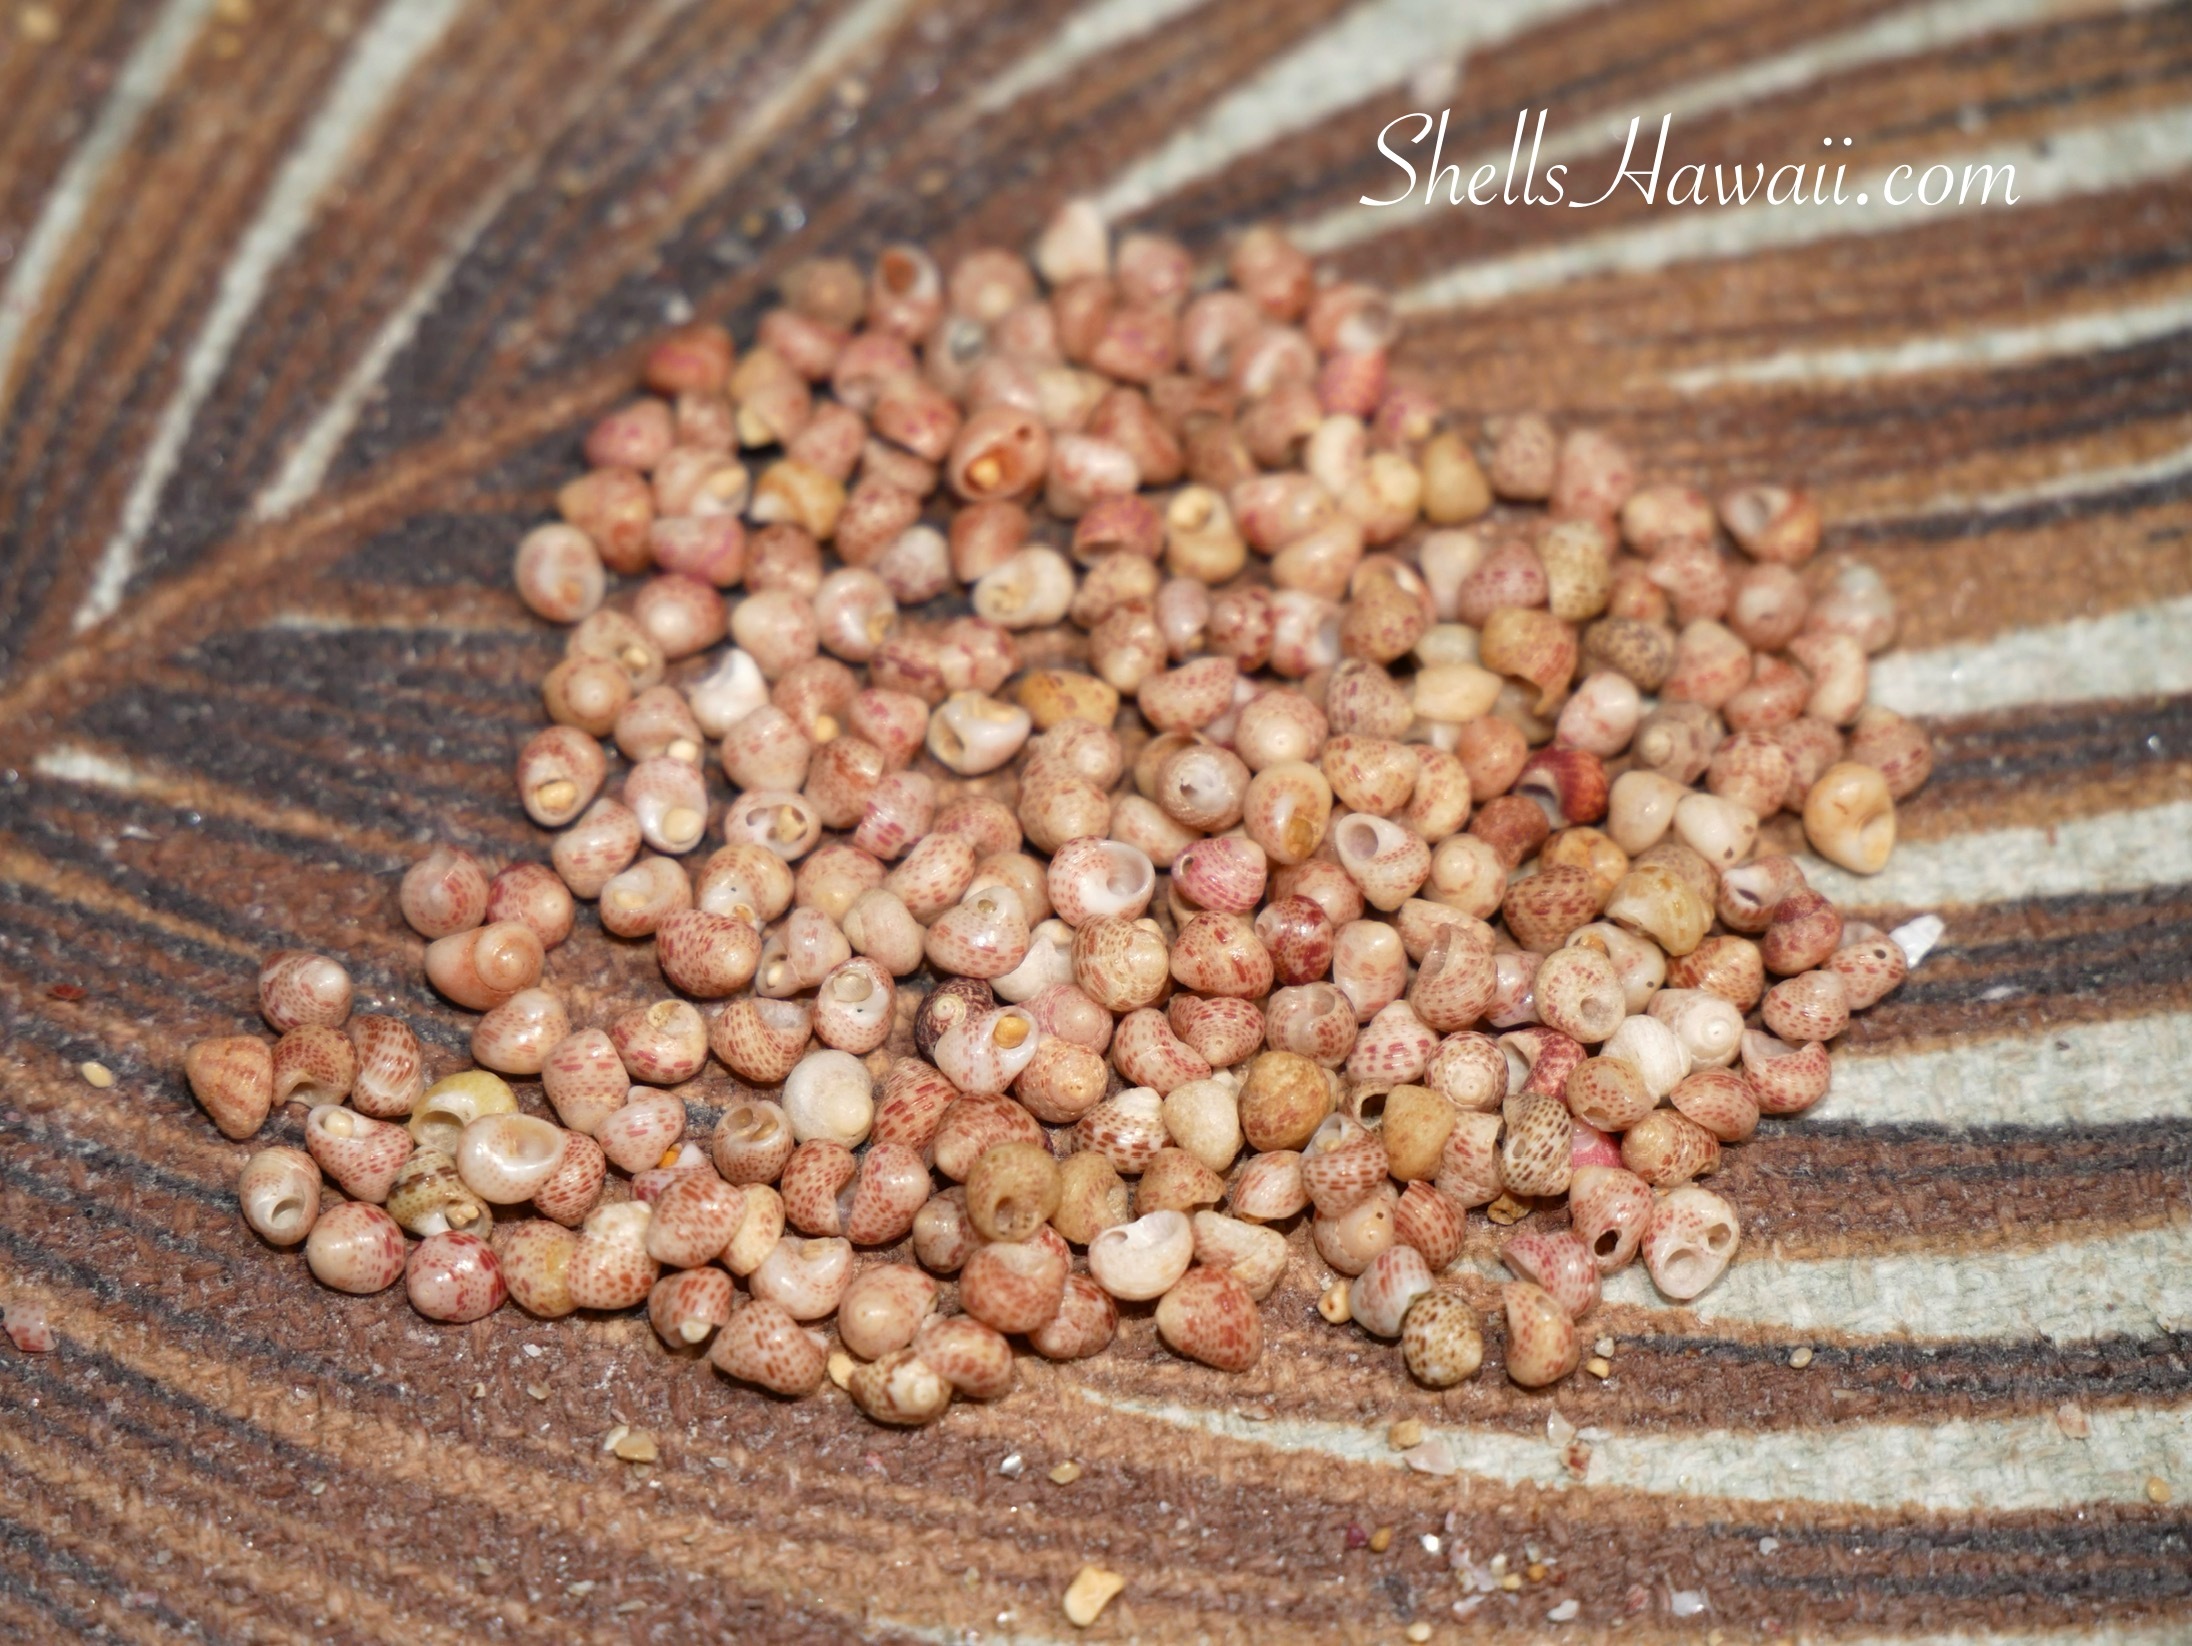
When you buy loose shells that are unsorted or partially sorted, it’s hard to tell how many imperfect ones are mixed in. Even after many years of experience, when I see a big batch of shells in one photo, I can only guess how many are truly A-grade. Photos can be deceiving until you sort and inspect each shell closely.
So, if you have the option, try to buy shells that have already been carefully sorted from imperfect ones. You may still find a few B- or C-grade shells mixed in, but trust me — you don’t want to find out the hard way after you’ve already begun your project. I been there lol
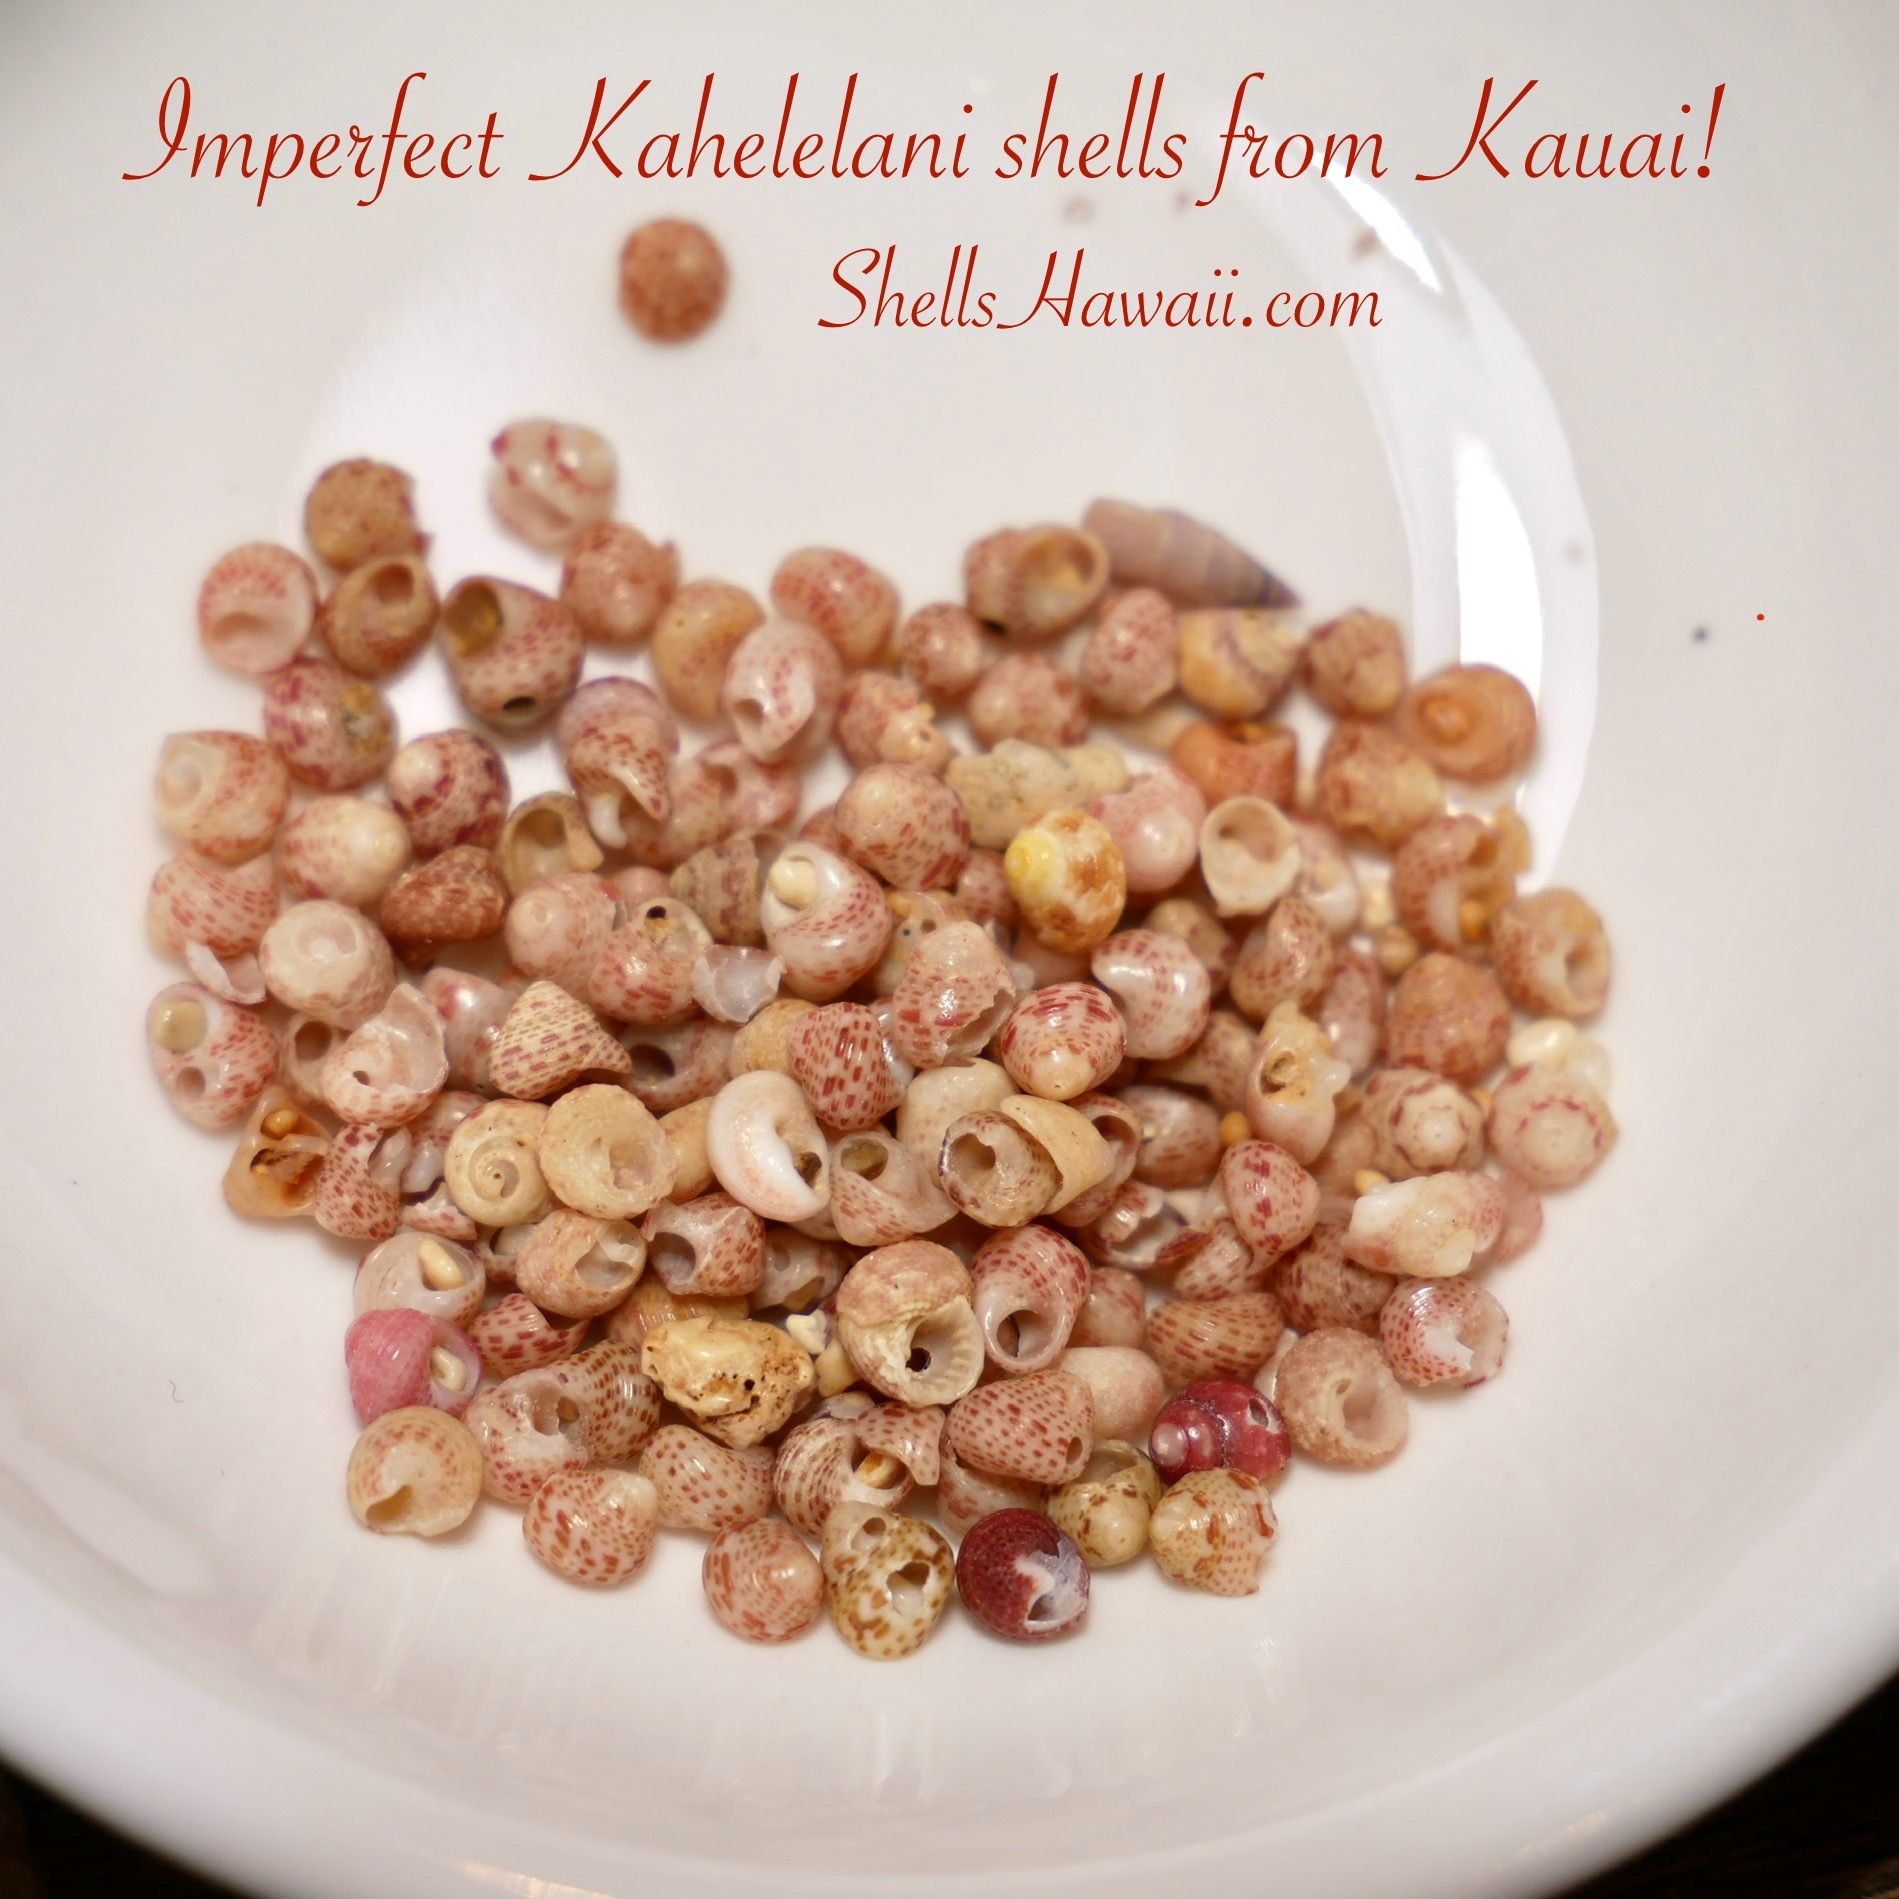
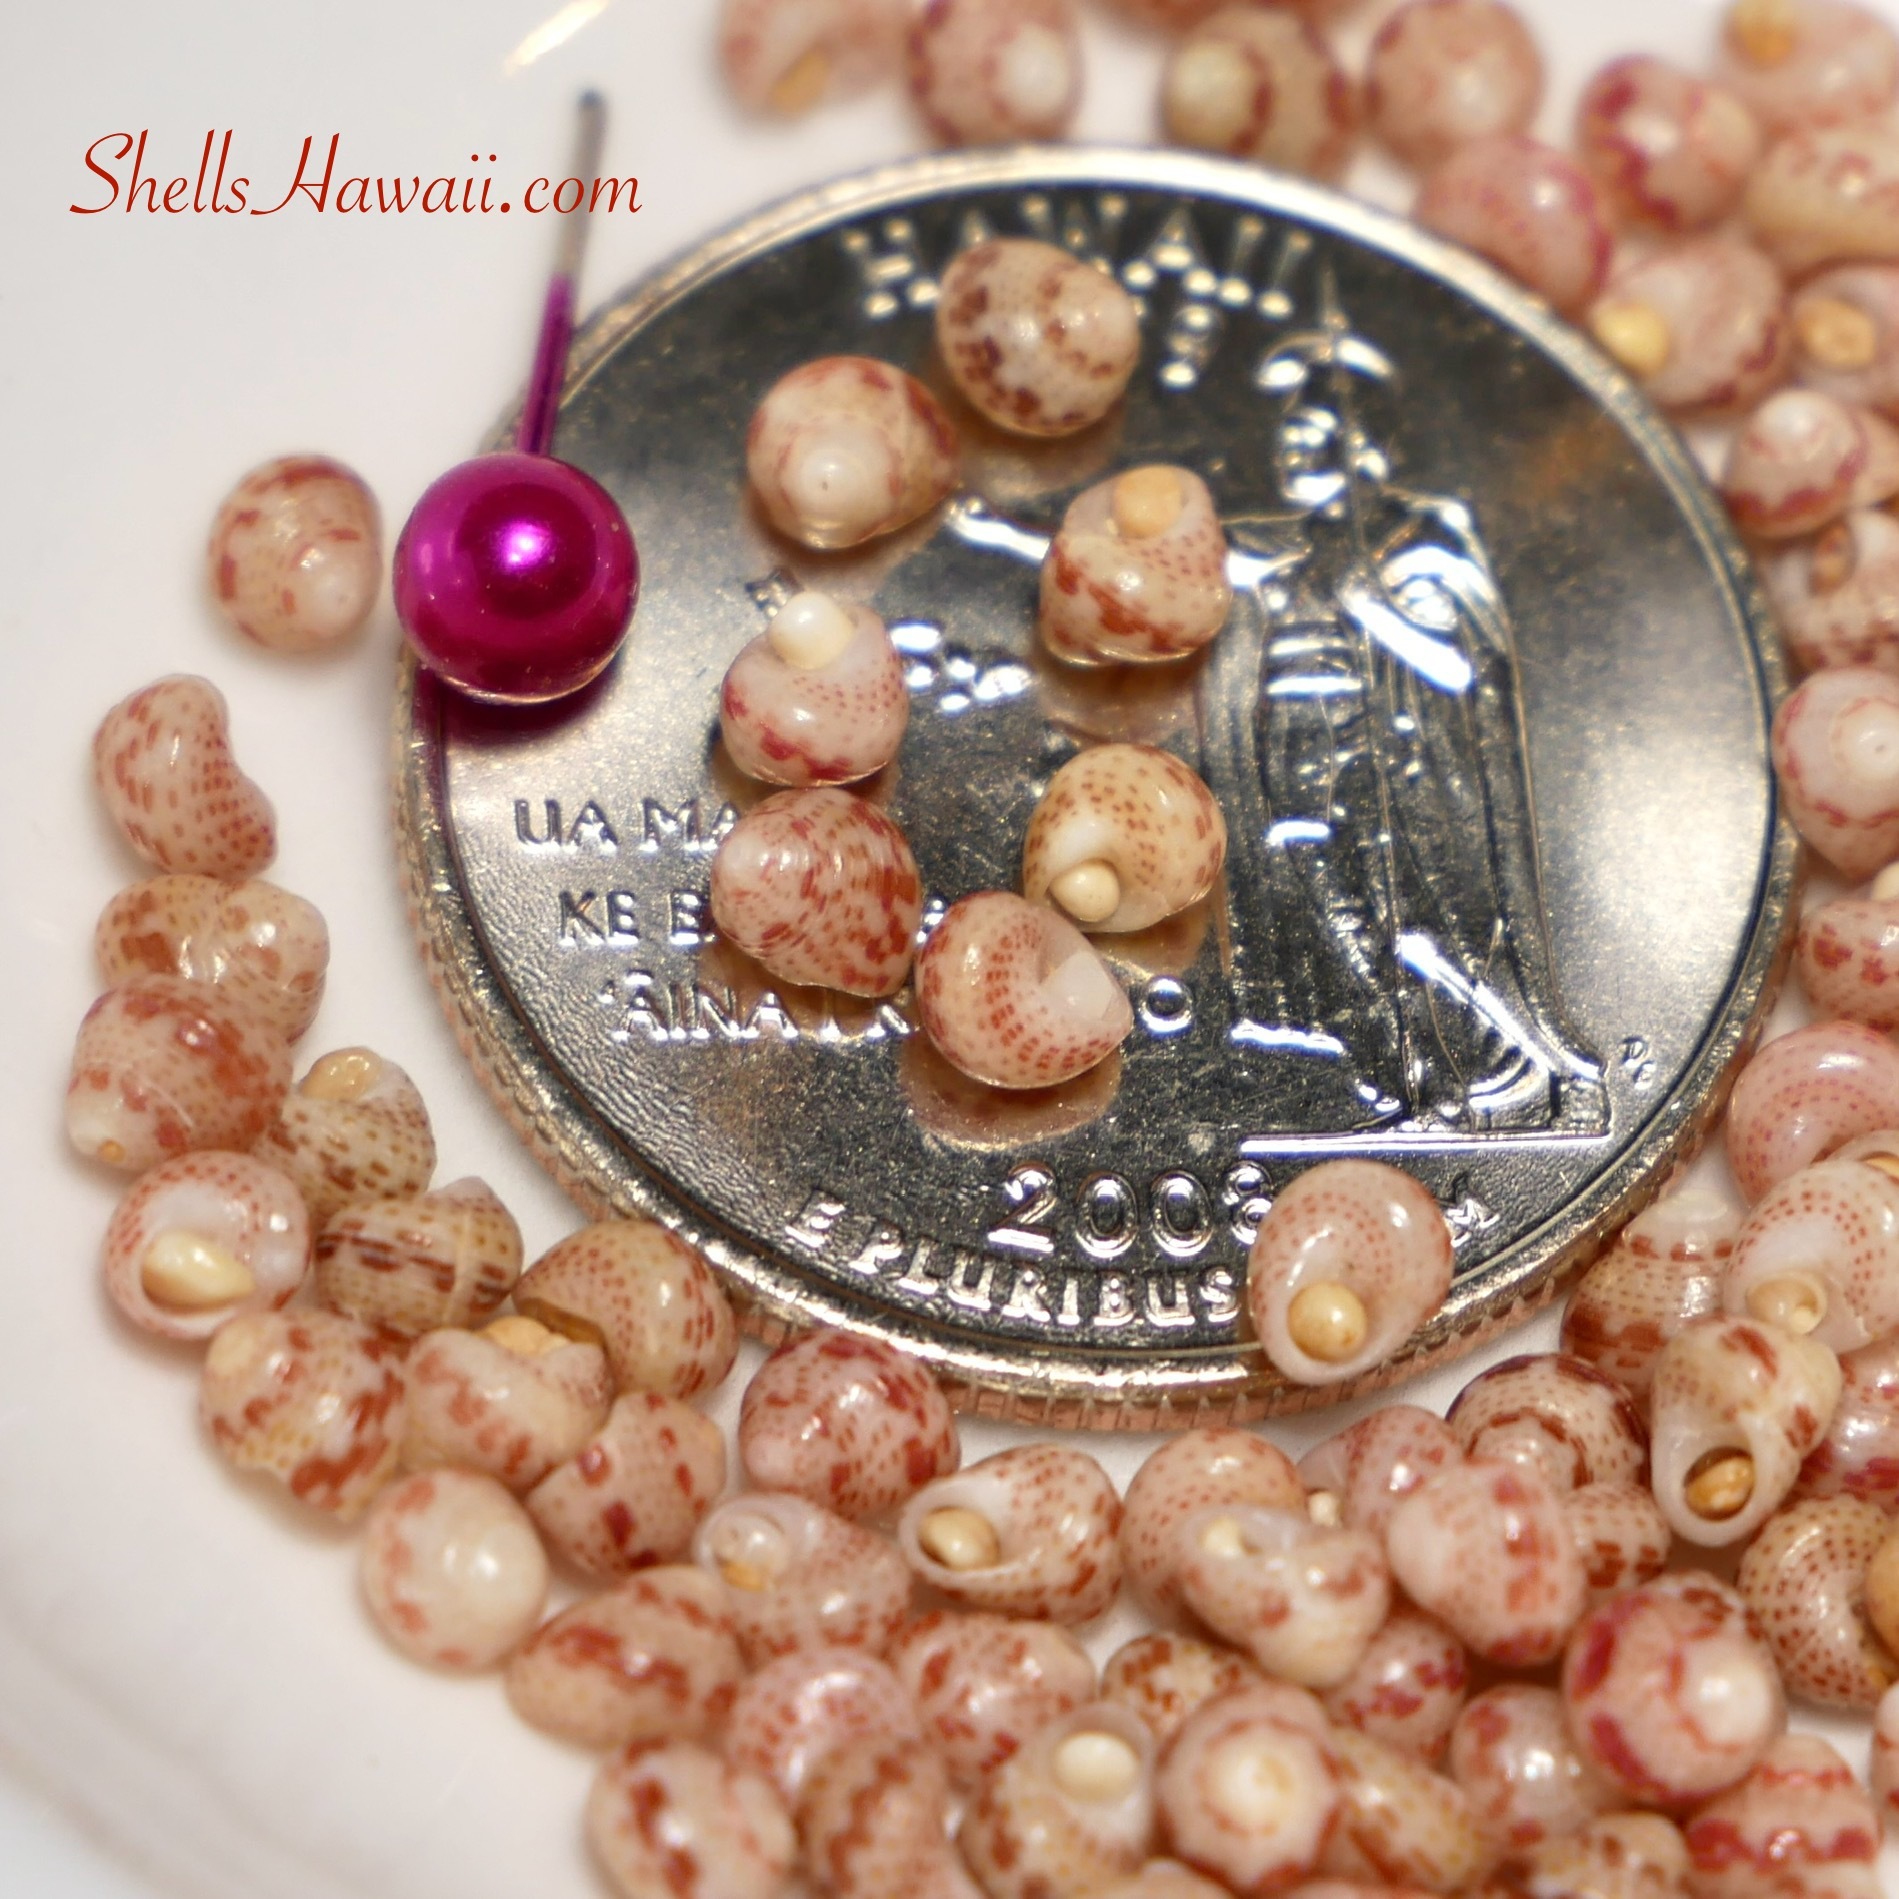
Here’s what the same batch looked like after sorting. The color and shine might still look nice, but if you look closely, you’ll see tiny cracks, uneven shapes, chipped lips, and duller luster on many of them.
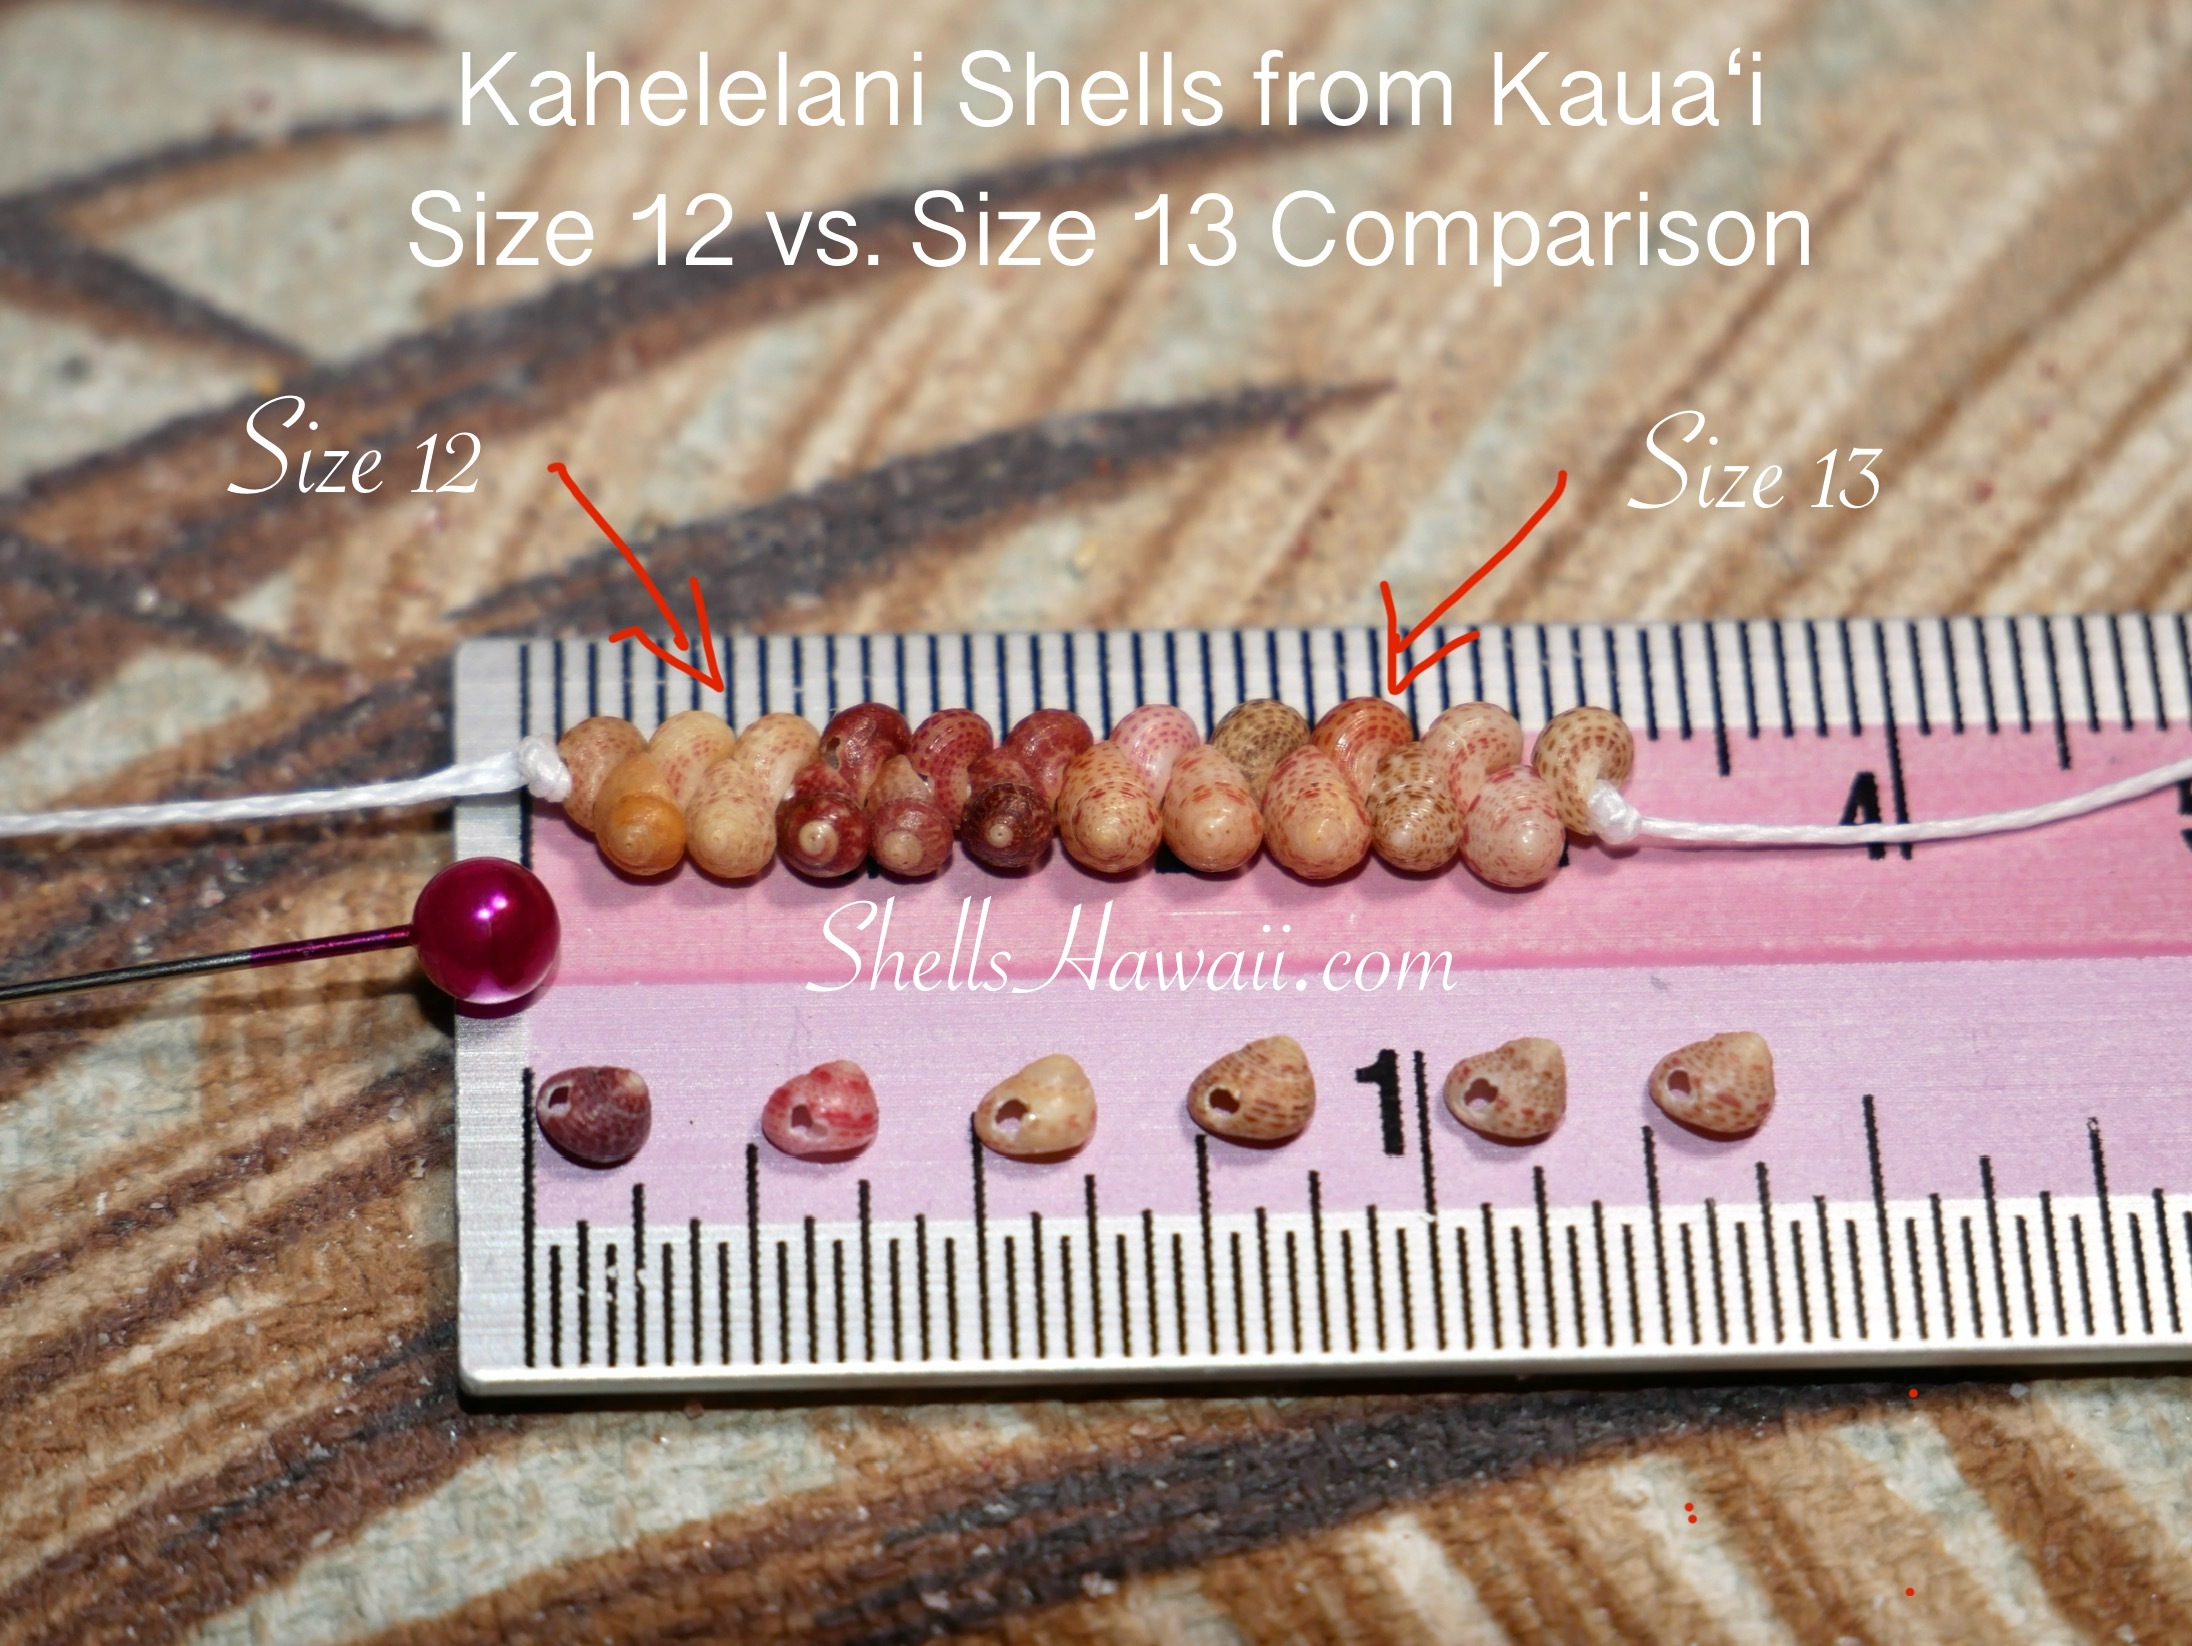
Why Size 13 Kahelelani Shells Are Ideal for Beginners
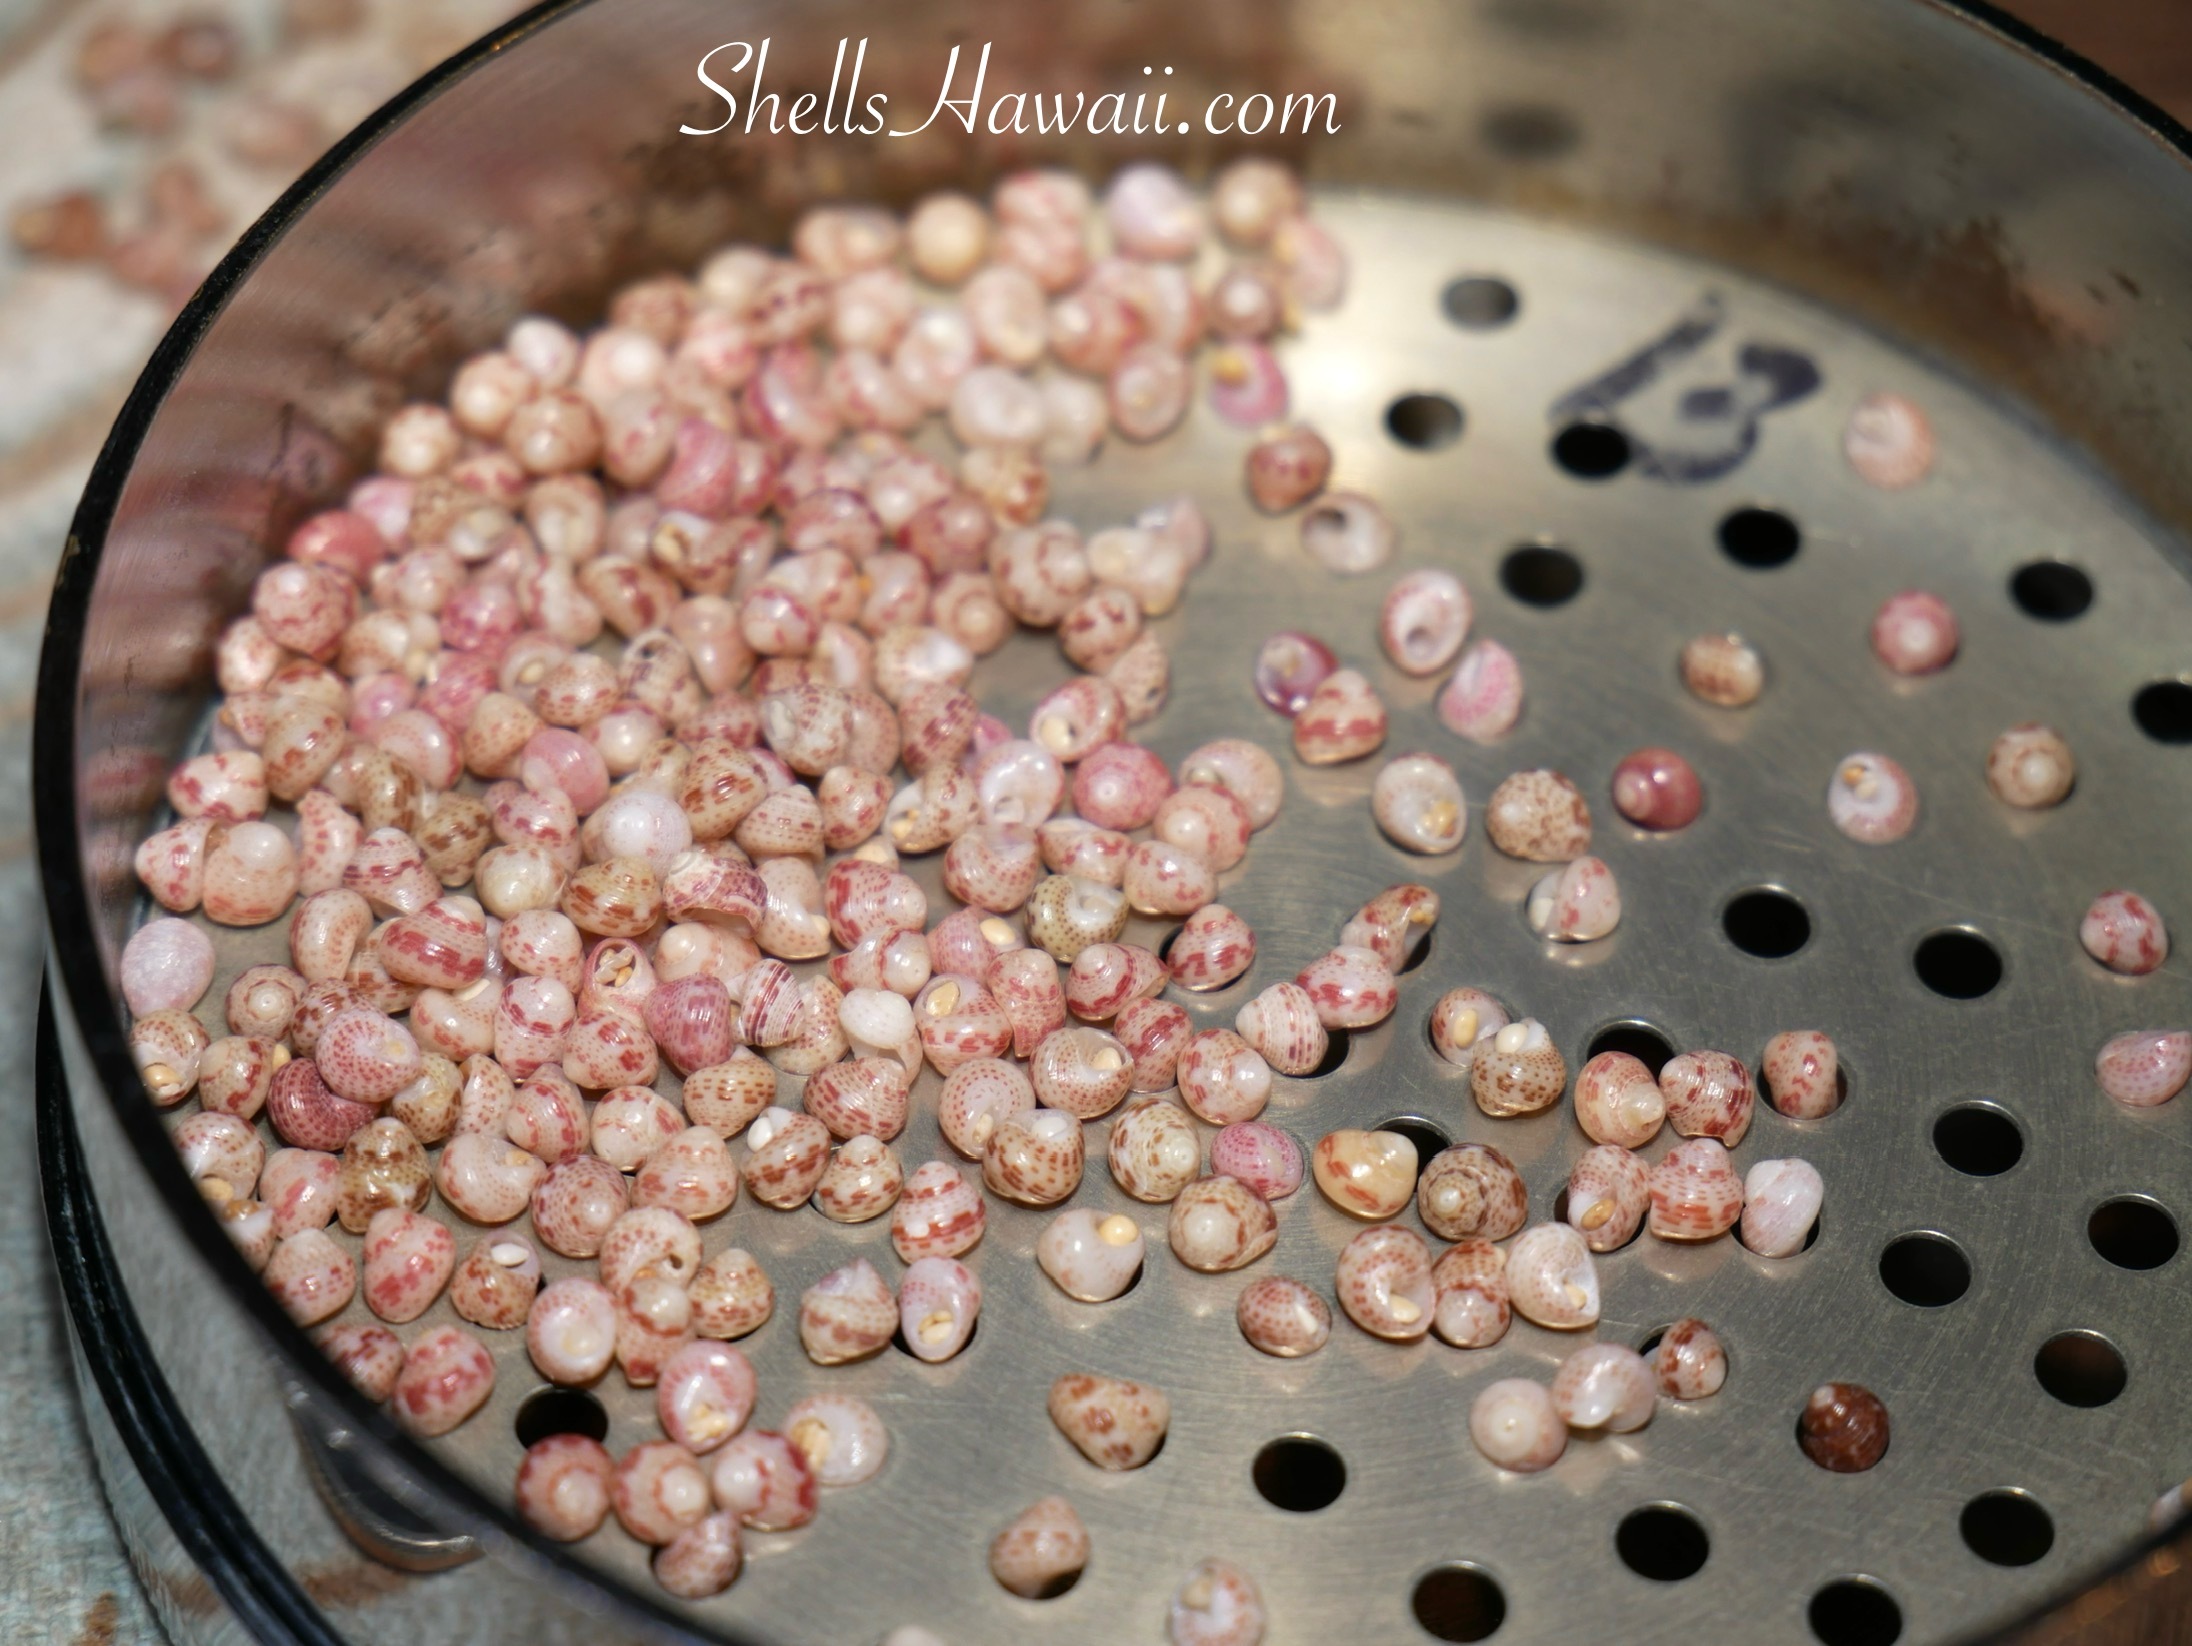
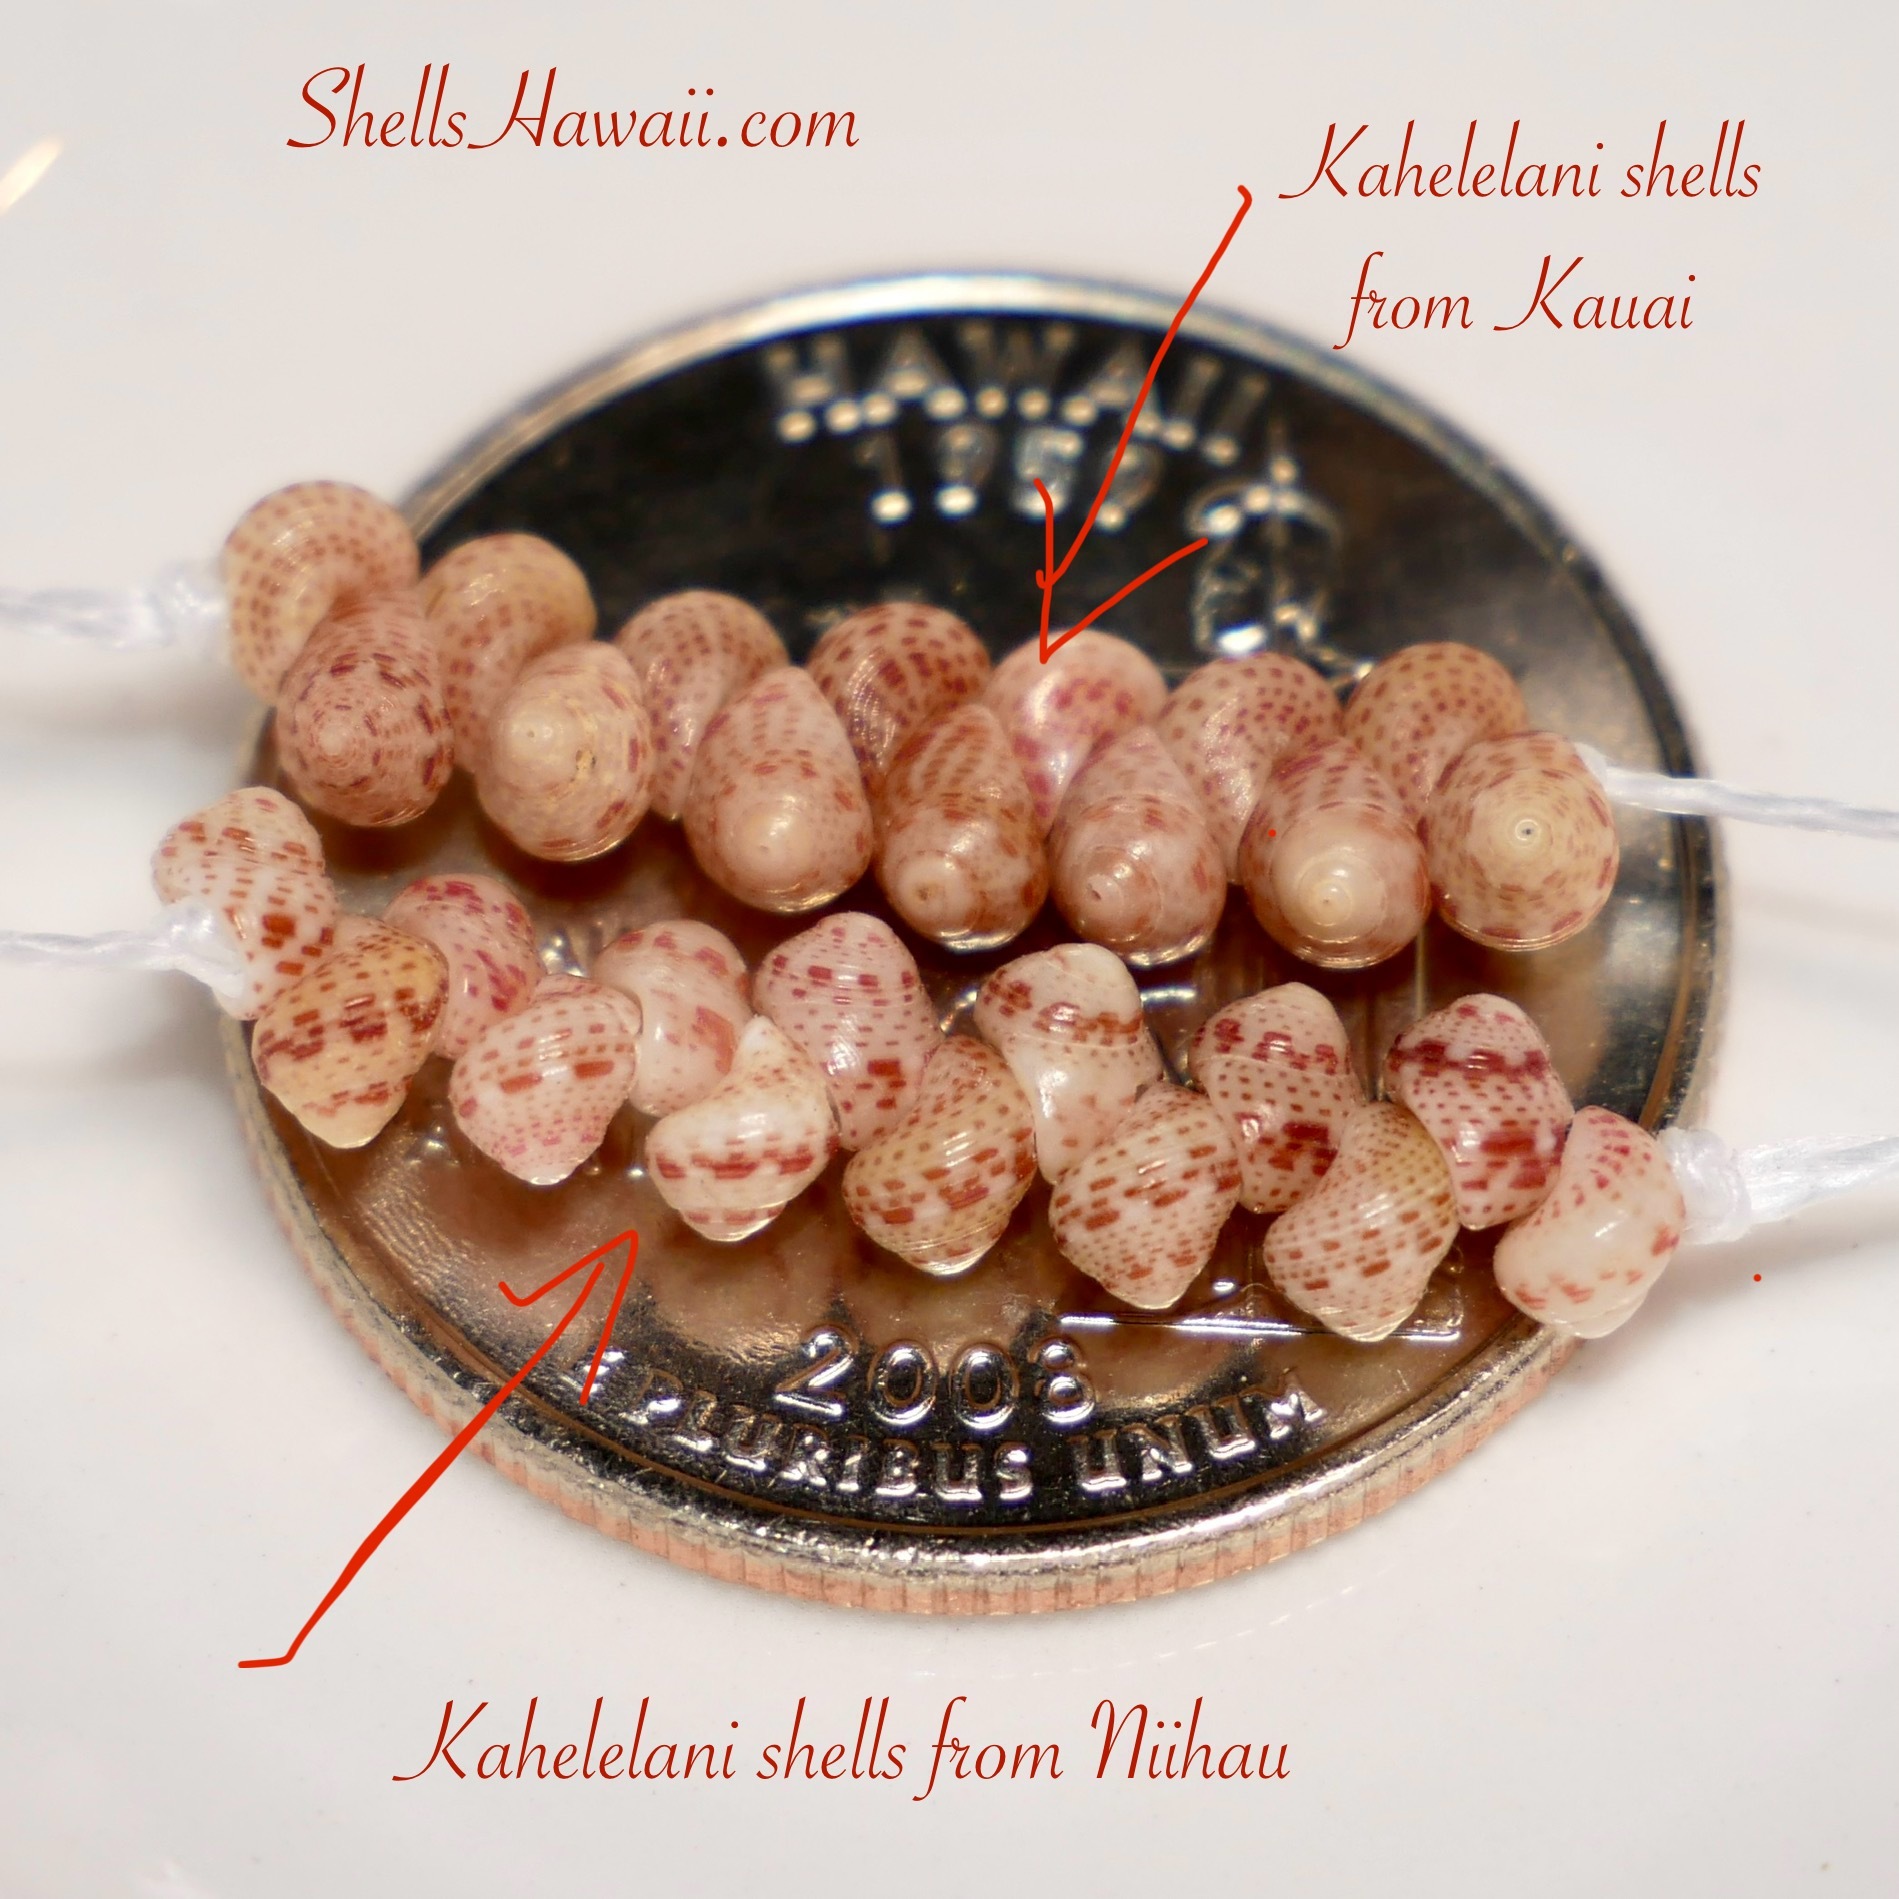
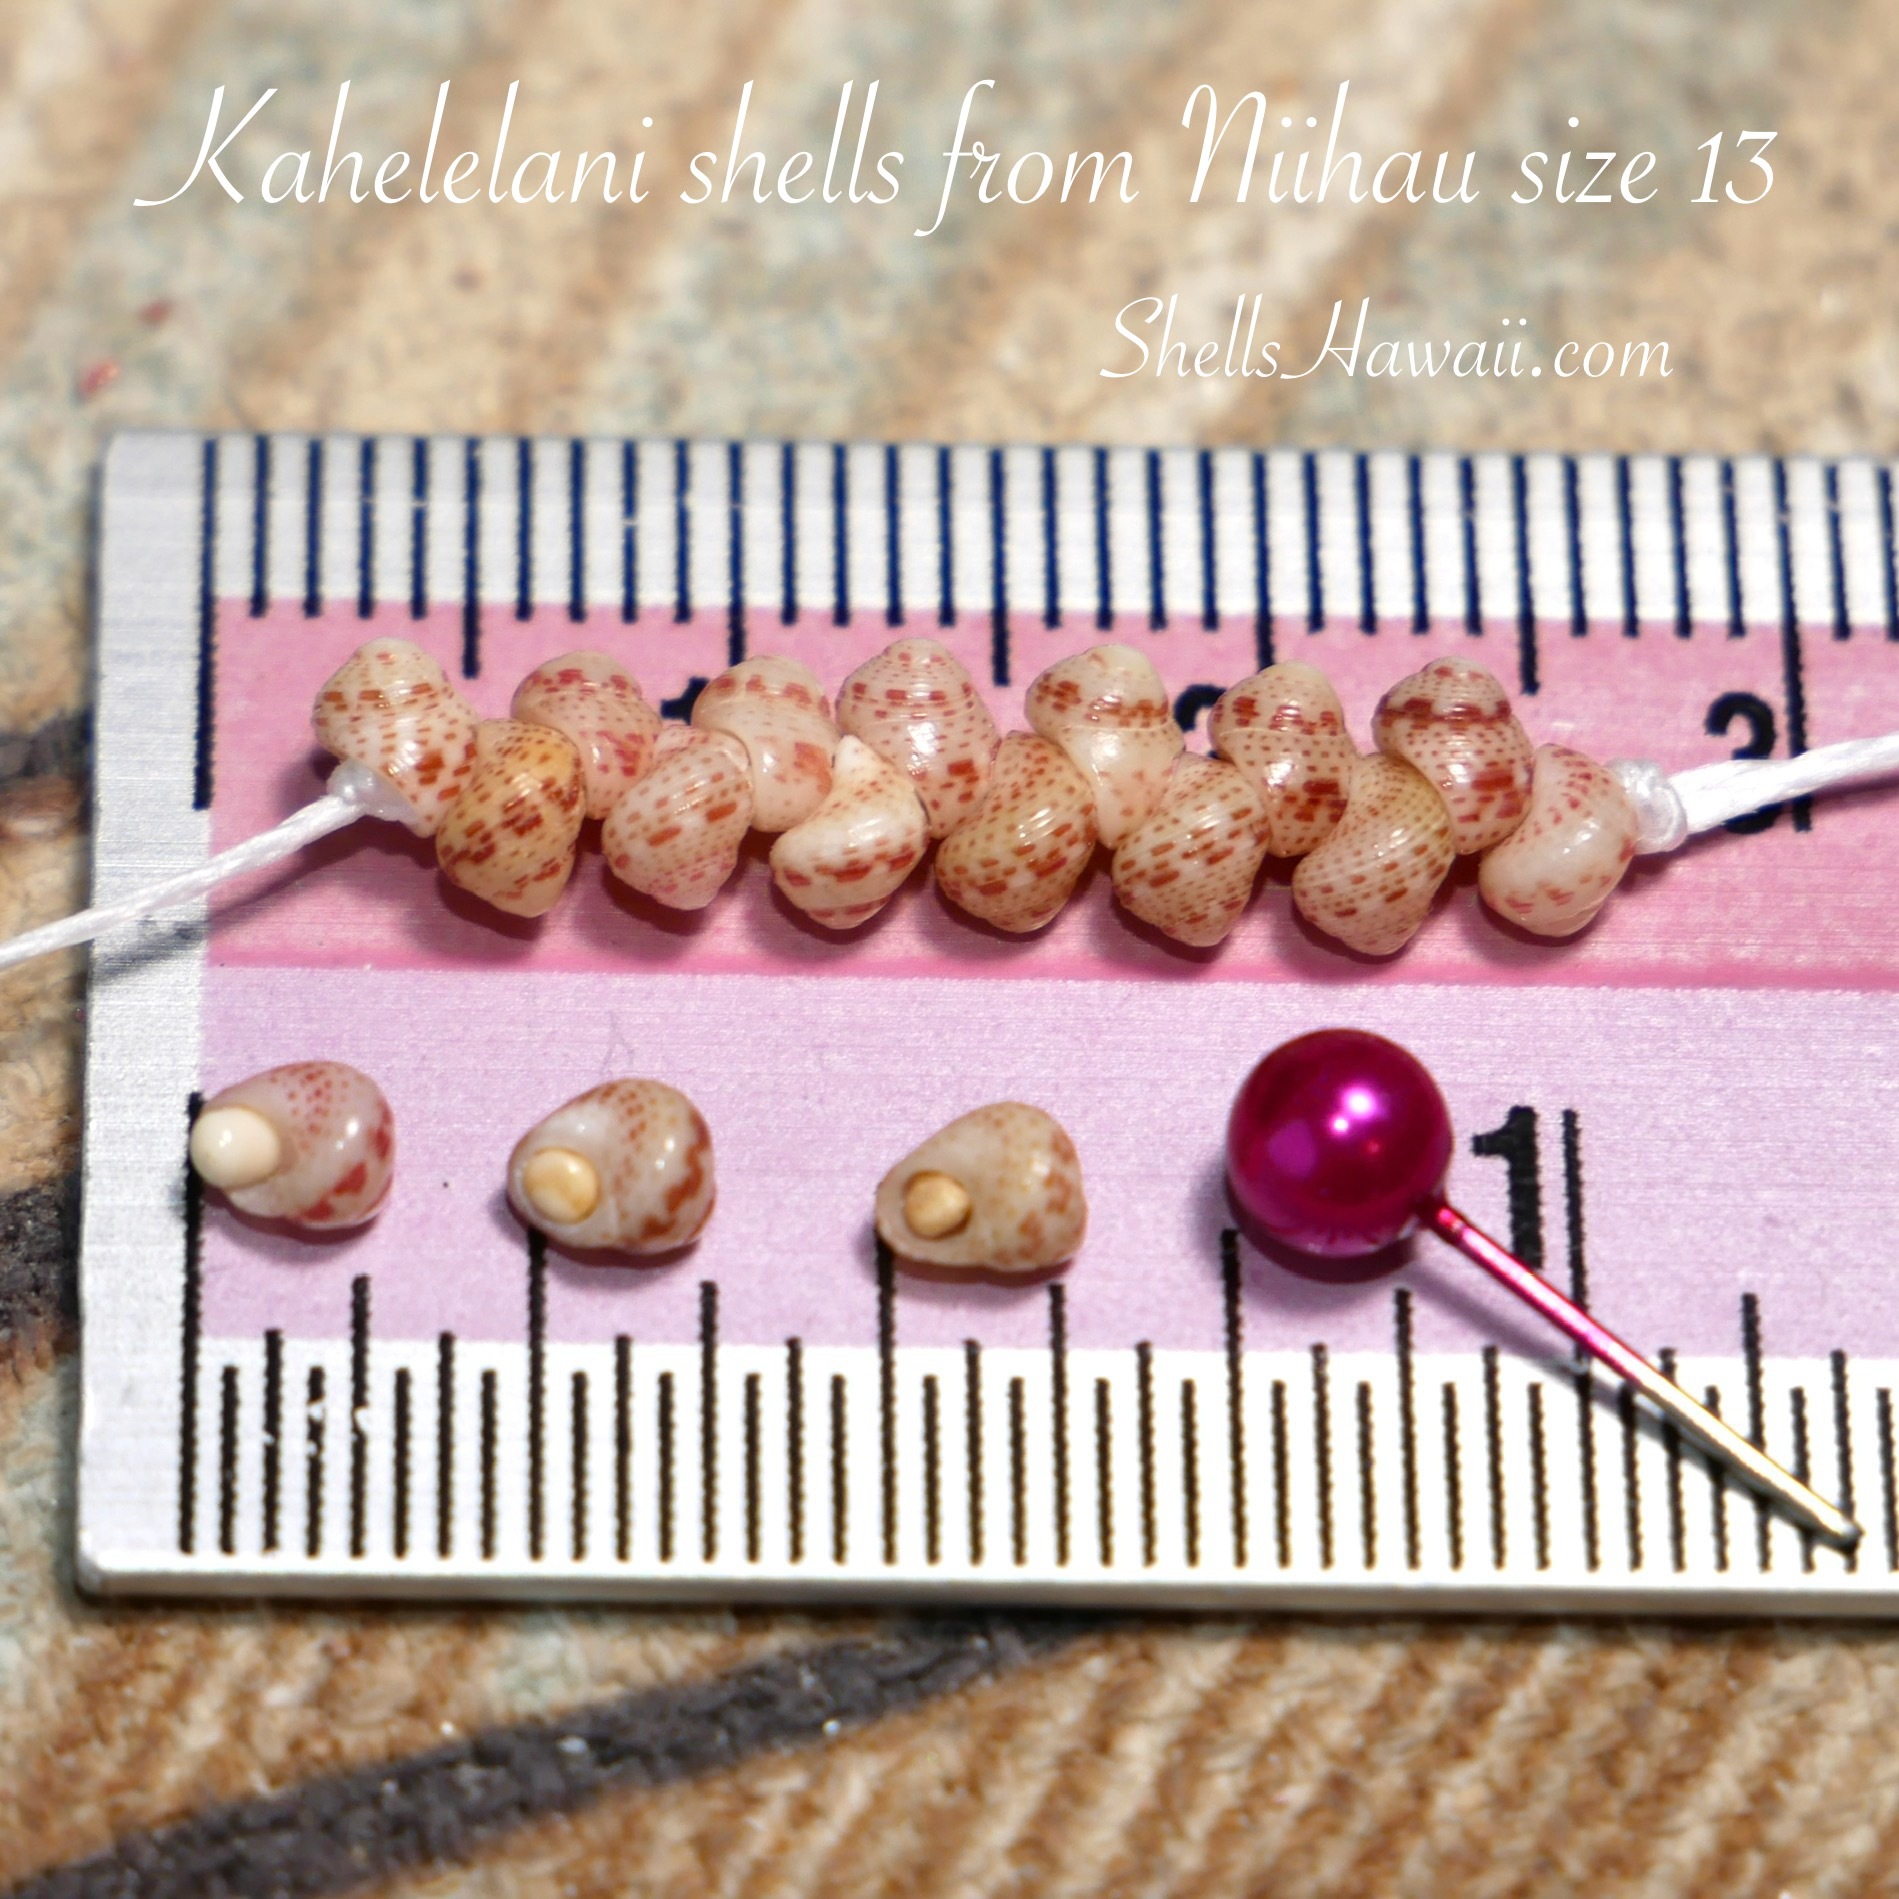
Today, I placed side by side two batches of Kahelelani shells both size 13 — one from Kauaʻi and one from Niʻihau. The reason for this comparison is to help you see and understand the sand that gets trapped inside their waha (mouth) and how it affects their luster.

In this photo — the Kauaʻi shells still have a nice shine because they were collected from a beach with very fine sand. That same fine sand, just like in Niʻihau shells, helps preserve their glossy surface and natural beauty.
If you plan to work with Kahelelani shells, I recommend starting with size 12 or 13, but size 13 is truly ideal. It’s easy to handle, has a balanced appearance, and still stays within a comfortable price range — perfect for beginners who want to learn how to make Hawaiian jewelry before moving on to more delicate shells from Niʻihau.
That’s why Kahelelani shells, size 13, from Kauaʻi or other islands that still have fine sand stuck in their waha (mouth) are a great way to practice and learn. They let you see whether you can handle and work with the shells comfortably before investing in the more expensive ones from Niʻihau.
This kind of practice set is the perfect opportunity to build confidence and technique — before buying larger batches of Niʻihau shells and discovering how different they can feel to work with if you haven’t yet mastered how to poke the holes properly.
If you’d like to try working with Kahelelani shells yourself, here are a few sets available on my website:
- 100 pcs Genuine Kahelelani Shells from Niʻihau – Size 13 #3128
- 100 pcs Genuine Kahelelani Shells from Kauaʻi – Size 13 #3127
Both are great examples of authentic shells collected and prepared with aloha — perfect for learning, practicing, or beginning your first Niʻihau shell jewelry project.
For Beginners Who Want to Learn More
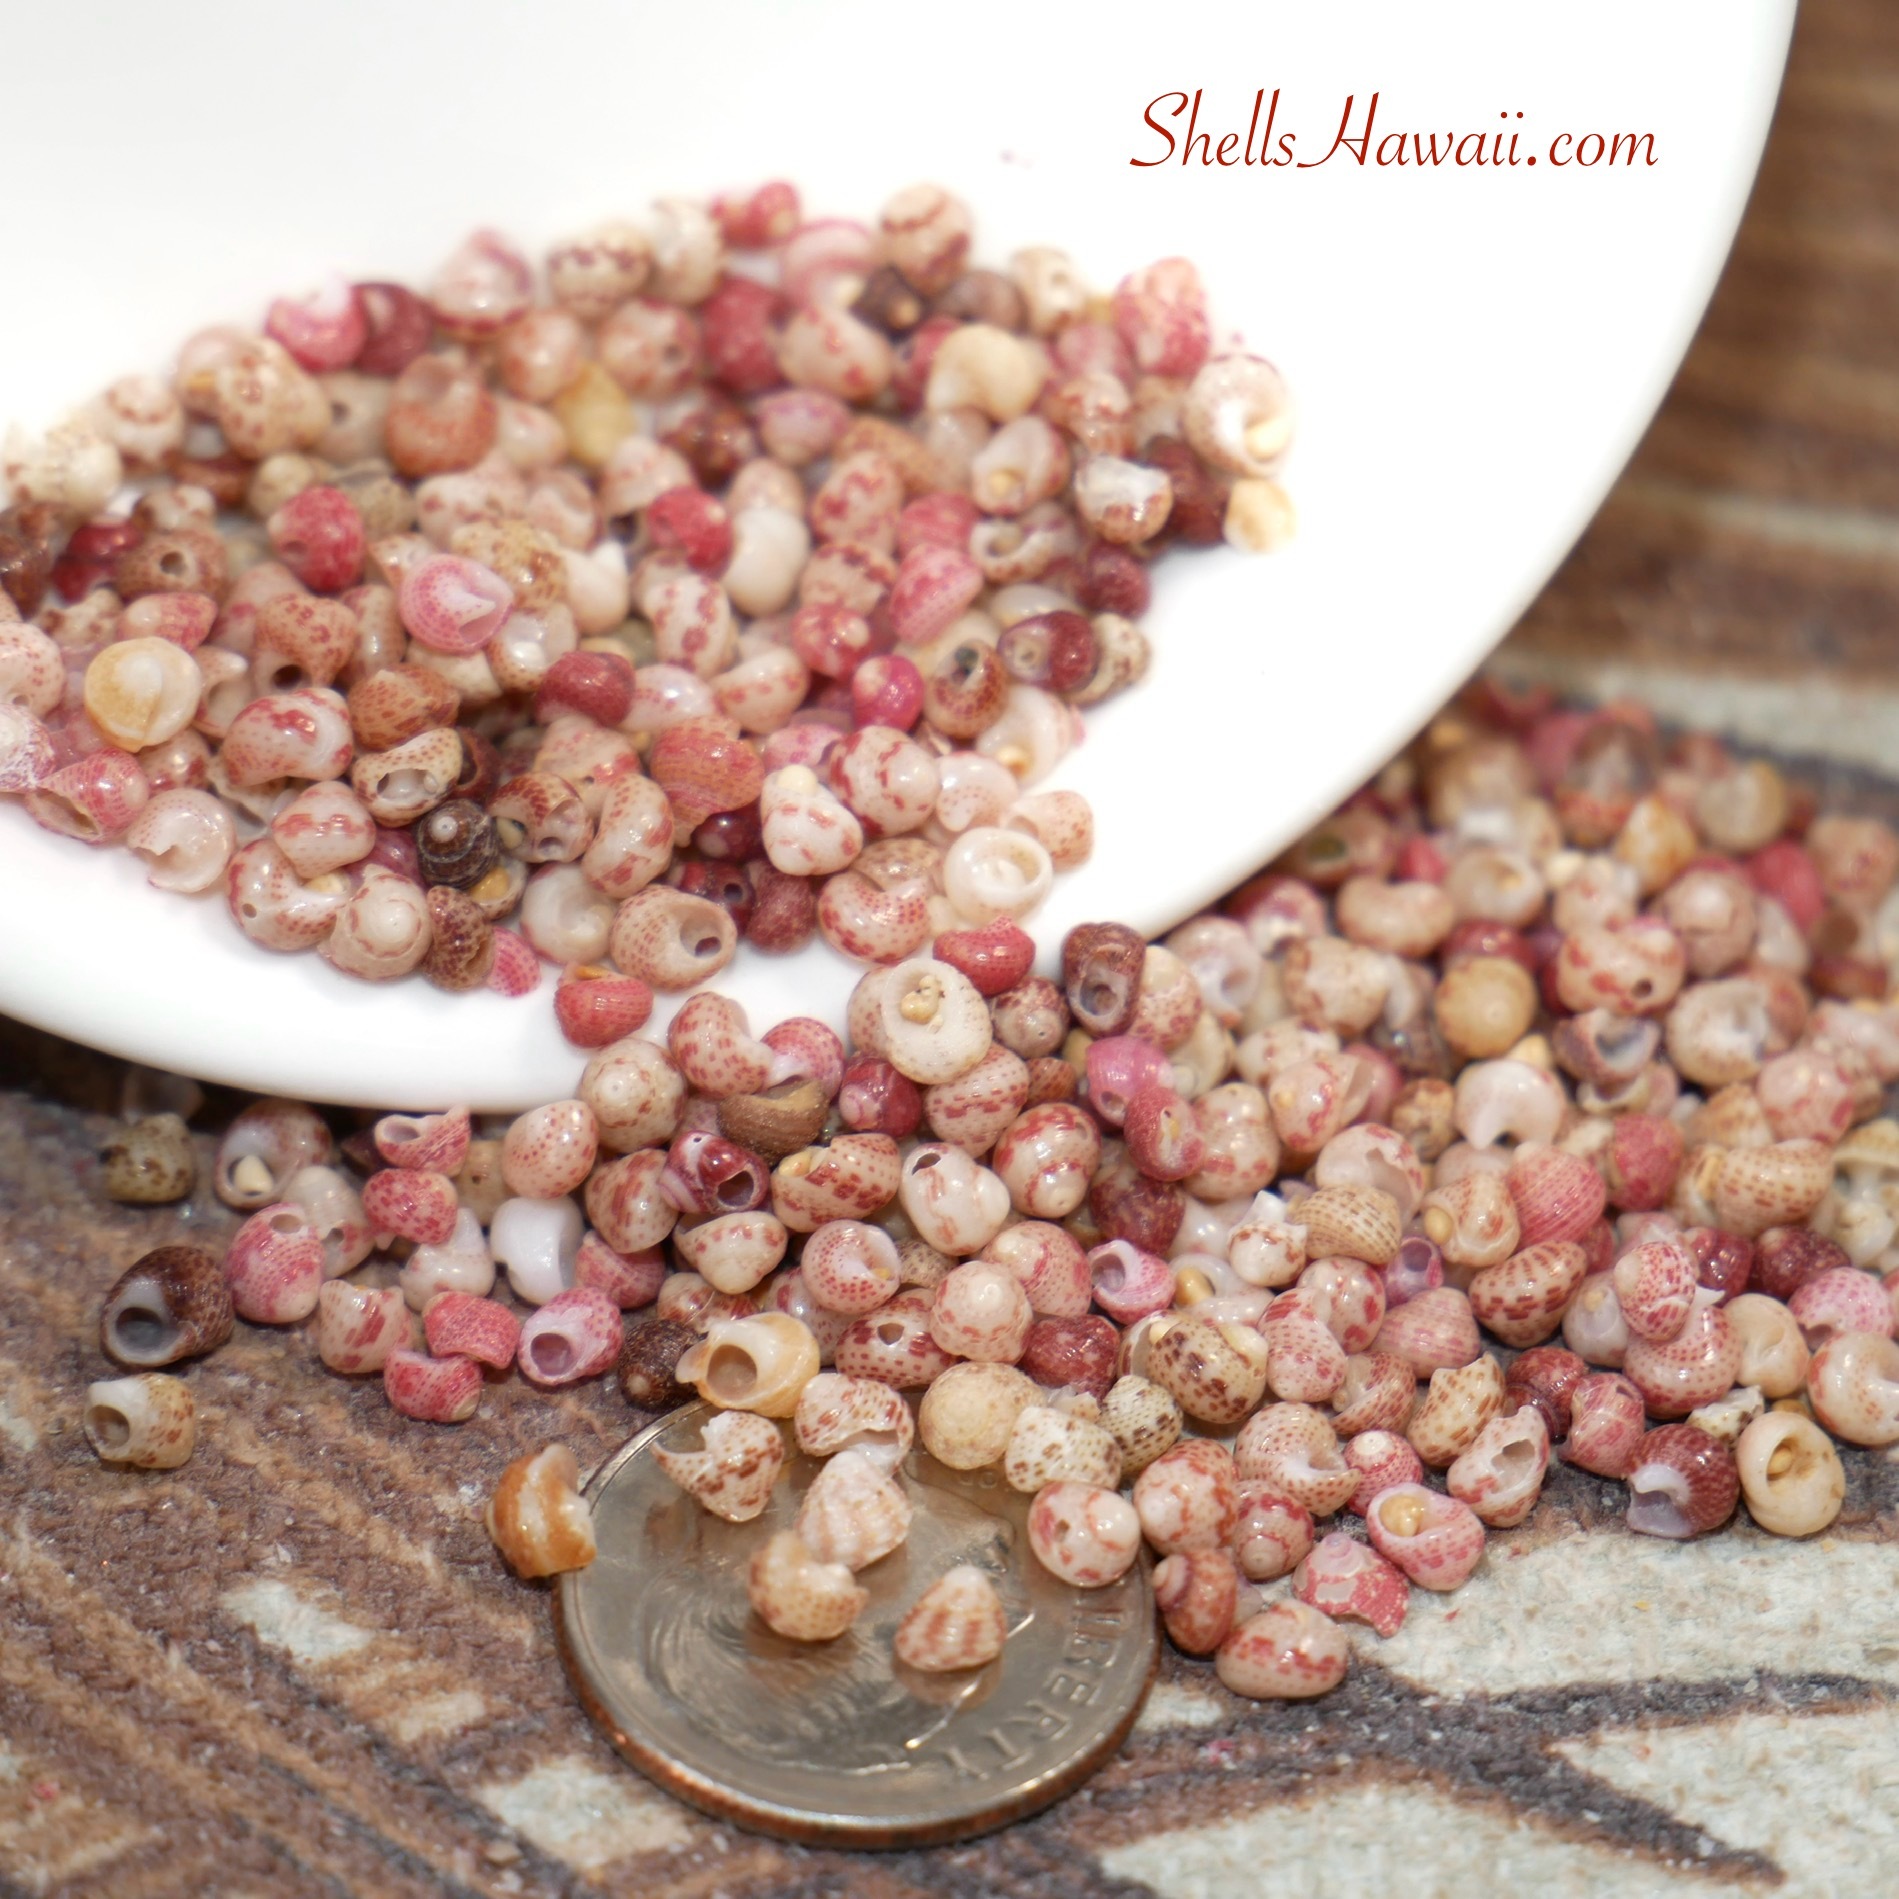
If you’re a beginner with very little experience, it’s important to understand how tiny Kahelelani shells really are before you rush to buy them. Many people are surprised the first time they see just how small these treasures are!
And if you’ve already started working with these shells but still find certain parts a bit challenging — especially when it comes to cleaning out the sand — you’re not alone. That stage takes a little time and familiarity with how each shell is built. One helpful thing to keep in mind is that it’s less about force and more about understanding the shell’s structure and balance.
With practice, you begin to recognize where and how the opening should be made so the shell sits nicely when strung — particularly for Mauna Loa style pieces. It’s a gentle, learn-by-feel process. At first it can seem tricky, but once your hands get used to the shells, it starts to feel much more natural.

Whether you’re working with Momi , Kahelelani, or Laiki shells, all of them will have fine sand inside. Sooner or later, you’ll need to learn how to poke your own shells instead of relying on pre-poked ones. Pre-poked shells are becoming harder to find, and once you master this skill, you’ll feel much more confident and independent as an artist.
If you’re new and would like to learn more about Kahelelani shells, you can start with these beginner blogs:
- Blog 11 Part 1 – Beginner’s Guide: Should I Try to Make Niʻihau Shell Jewelry?
- Blog 3 – What Are Kahelelani Shells?
- Blog 9 – How Tiny and Precious Kahelelani Shells Really Are
Each one will give you a deeper understanding of the shells, their beauty, and how to start your own journey in Niʻihau shell jewelry making — with patience, aloha, and respect for every tiny treasure from the sea.
I hope this blog helps you better understand which Kahelelani size to start with and gives you the confidence to begin your own creative journey. If you have any questions or need advice before you buy or begin, please feel free to contact me anytime — I’m always happy to help.