 USD
USD

Aloha and welcome to ShellsHawaii blog everyone,
Today we will talk a little bit about some of the tools you may need when creating Niʻihau shell jewelry. When I first started learning, I honestly did not know much about jewelry tools at all. I had to slowly learn the names of different pliers, what each one was used for, and which tools I actually needed. At first, everything felt a little confusing, especially when you’re completely new to jewelry making.
So in this blog, I wanted to share some of the very basic tools that helped me along the way and may also help you with your own creations. And honestly, other than pliers, one of the most important tools you will probably need is a good poking tool.
“One of the questions I get asked most often is, ‘How do you poke such tiny shells, and what do you use so the shells don’t break?’ Many people think the answer must involve expensive or complicated tools, but honestly, most of the tools I use are very simple. Nothing fancy at all — just small tools that feel comfortable to work with and help make the process easier over time.
So today, let me share a few of the tools I keep close by at my work table while creating with Kahelelani, Momi, and Laiki shells, starting with one of the most important tools of all — the Niʻihau shell poking tool for Kahelelani and Momi shells.”
1. What Tool Do I Use to Poke Kahelelani, Momi or Laiki Shells?
When I first started creating with Niʻihau shells, I honestly did not have the right tool at all. I thought a regular sewing needle would work fine for poking Kahelelani shells, and technically it did… but very slowly. Sometimes I had to poke the same shell many times just to make the hole large enough for the thread. Then one day I tried using that same needle on a Momi shell, and the needle snapped almost immediately. That was definitely one of my first big learning moments.
After that, I started experimenting with different tools, including bead reamers and small jewelry tools, but nothing felt quite right for these tiny shells. Later, I began noticing photos of other artists using Niʻihau shell poking tools, but nobody really explained where to find them. So eventually, I made my own using a strong smooth needle tip with wooden handles made from teak and makore wood.
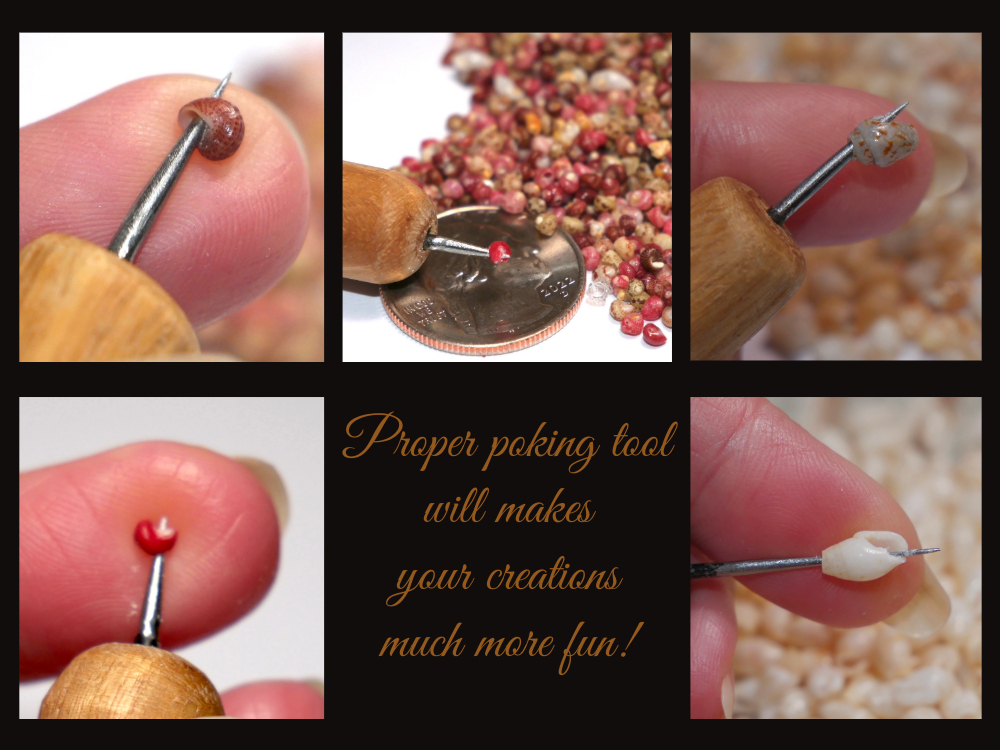
Once I started using it, everything became much easier and more comfortable. Over time, I also learned that different shell types and styles work better with different needle lengths.
Here’s what I recommend:
• For Kahelelani shells, short or medium-length needles both work very well because the shells are so tiny. If you only want to invest in one tool, I would recommend the medium size because it works nicely for both Kahelelani and Momi shells.
• For Momi shells, a medium-length needle has the perfect reach and strength.
• With Laiki shells, sometimes you may need a longer and smaller needle to carefully poke through the Laiki waha. This style of poking works especially well for Manuʻaloa single-strand designs. Because the shell is very delicate near the opening, the poking must be done very carefully so the end of the shell does not crack and the hole does not become too large. If the hole becomes too large, the shells may overlap each other unnaturally once they are strung together.
• Because Laiki shells have a very thick layer on the cheek side of the shell, this type of poking tool may sometimes have difficulty pushing completely through. In those cases, you may need to drill the shell instead.
• If you’d like to see the exact one I use, you can find it here: Niʻihau Shell Poking Tool.
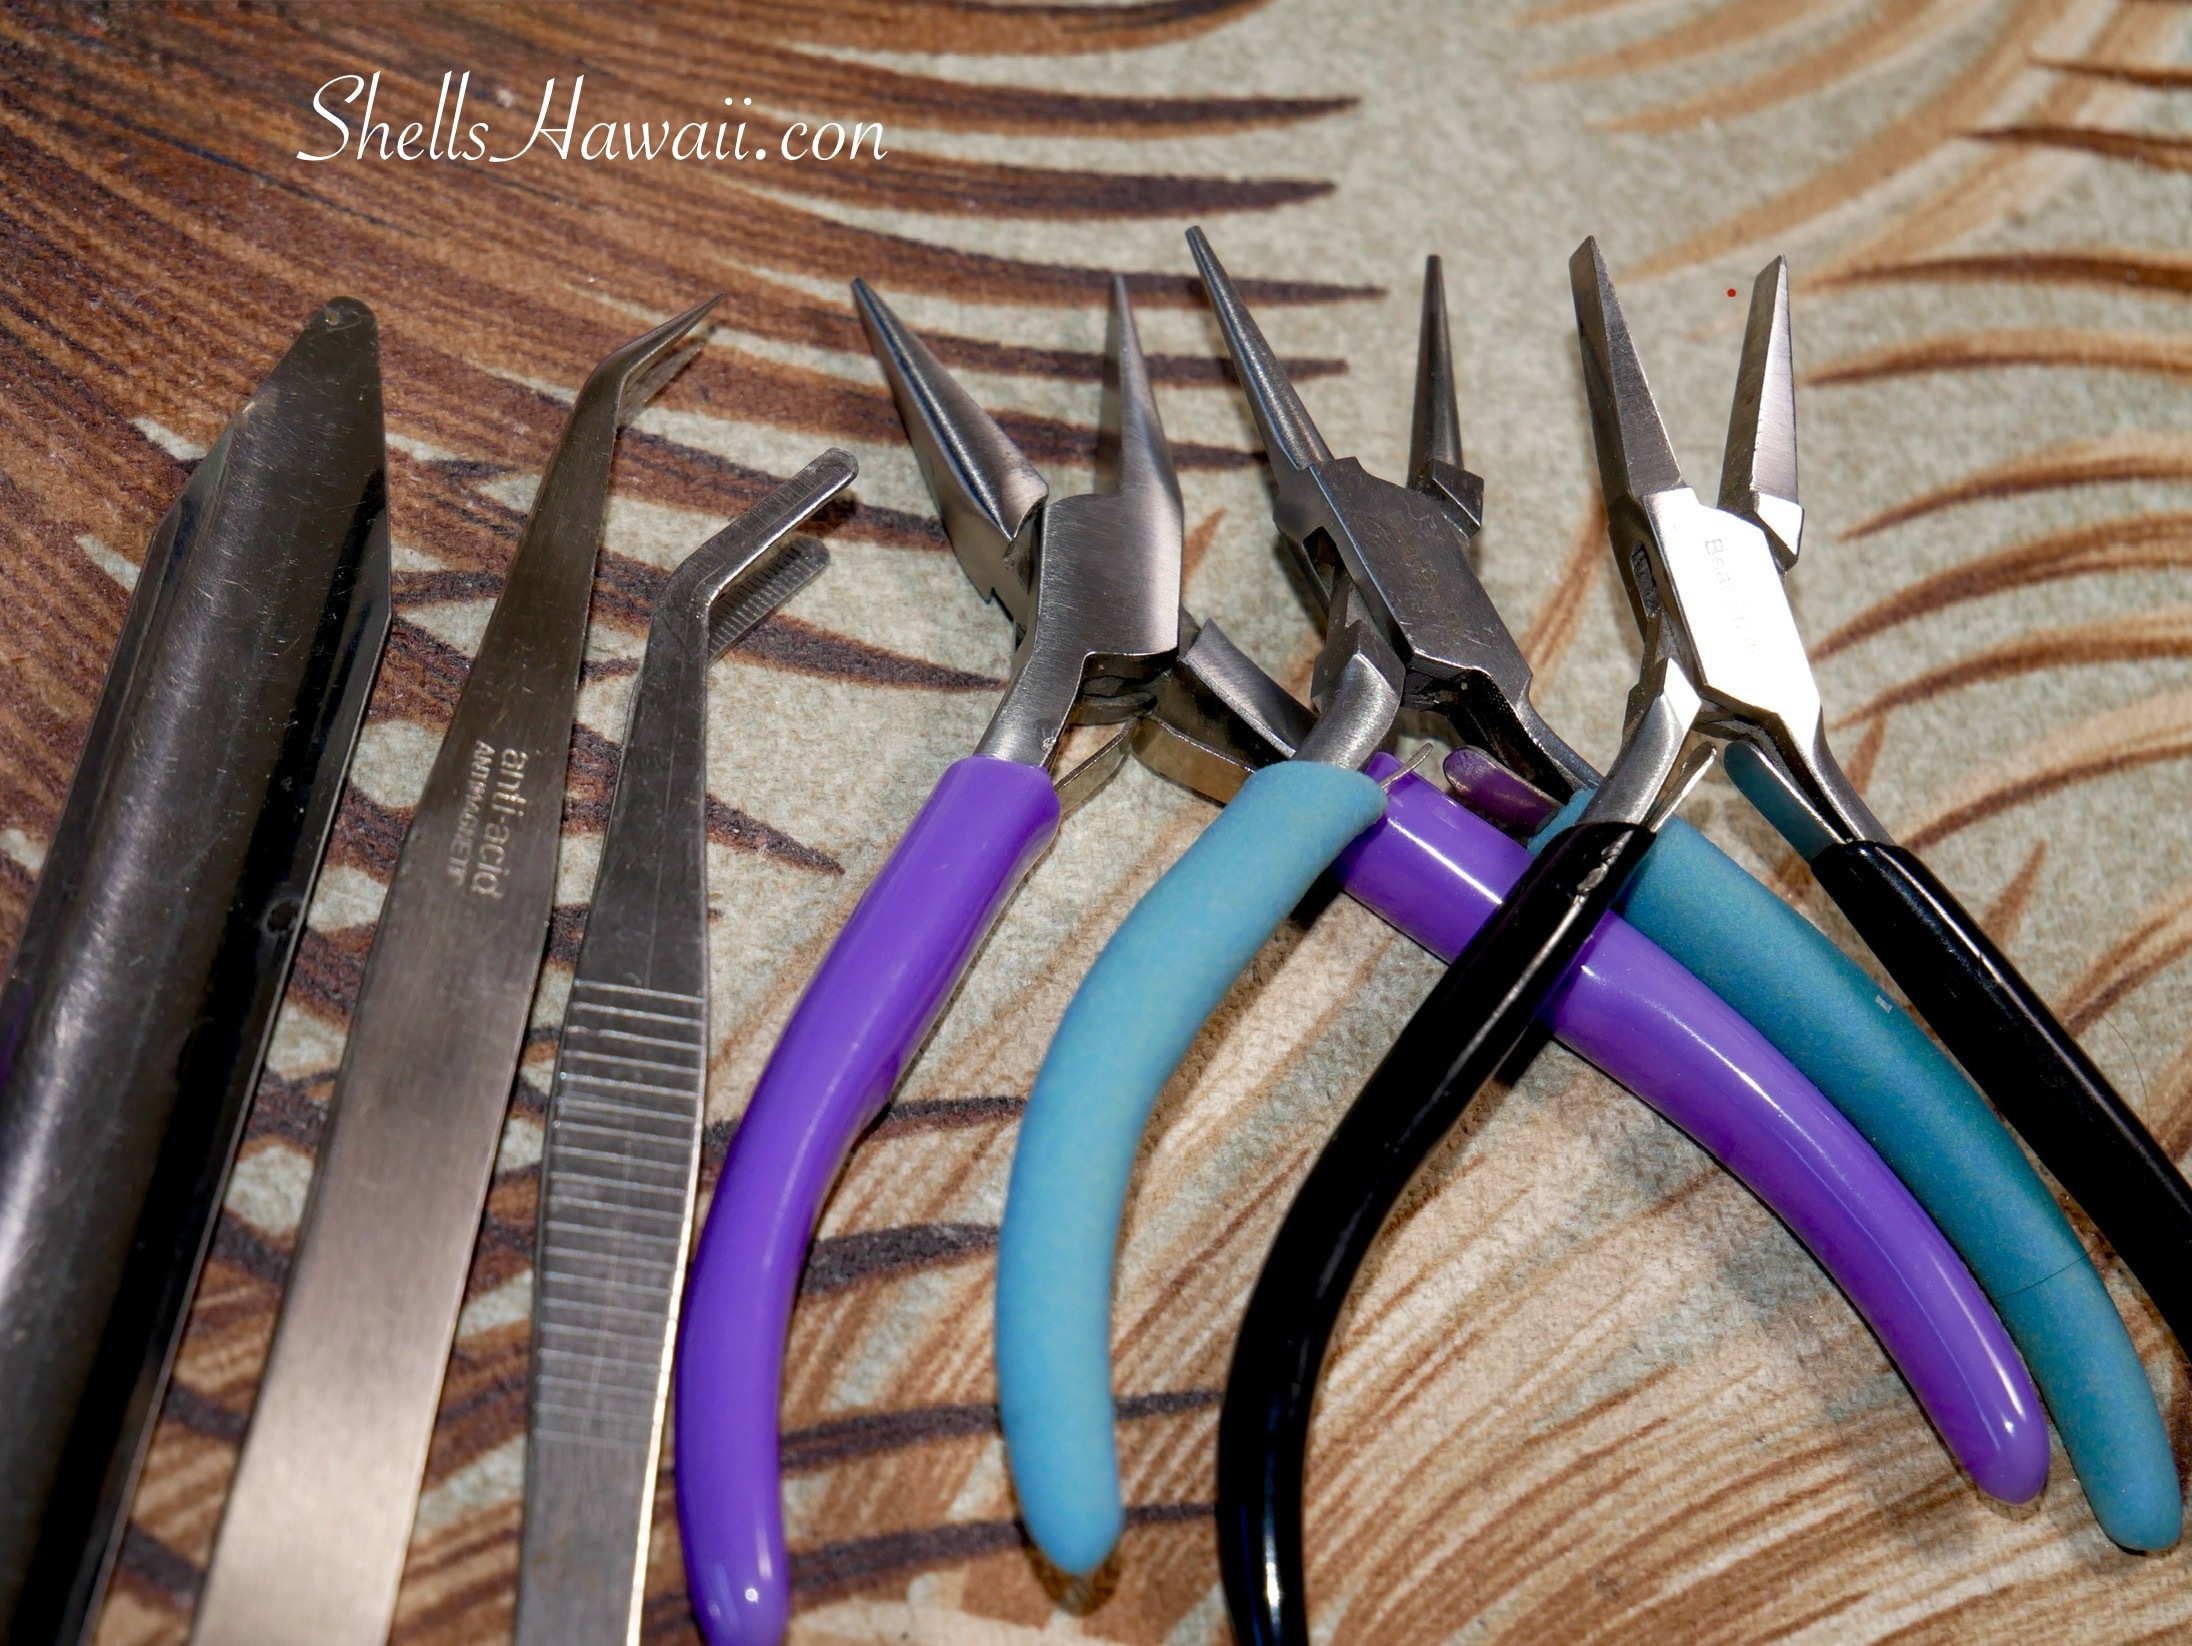
2. Tweezers and Basic Jewelry Pliers
Tiny shells definitely need tiny helpers. I always keep a few pairs of fine-tip tweezers close by because they’re very helpful for picking up, sorting, and turning tiny shells when your fingers just can’t quite manage comfortably. And somehow, tweezers always seem to disappear right when you need them most, so keeping an extra pair nearby is never a bad idea.
For jewelry pliers, you really do not need anything fancy. A simple set with flat-nose and round-nose pliers is more than enough for most beginners. They work nicely for attaching clasps, jump rings, and earring hooks, and after a while they slowly start feeling natural in your hands while you work.
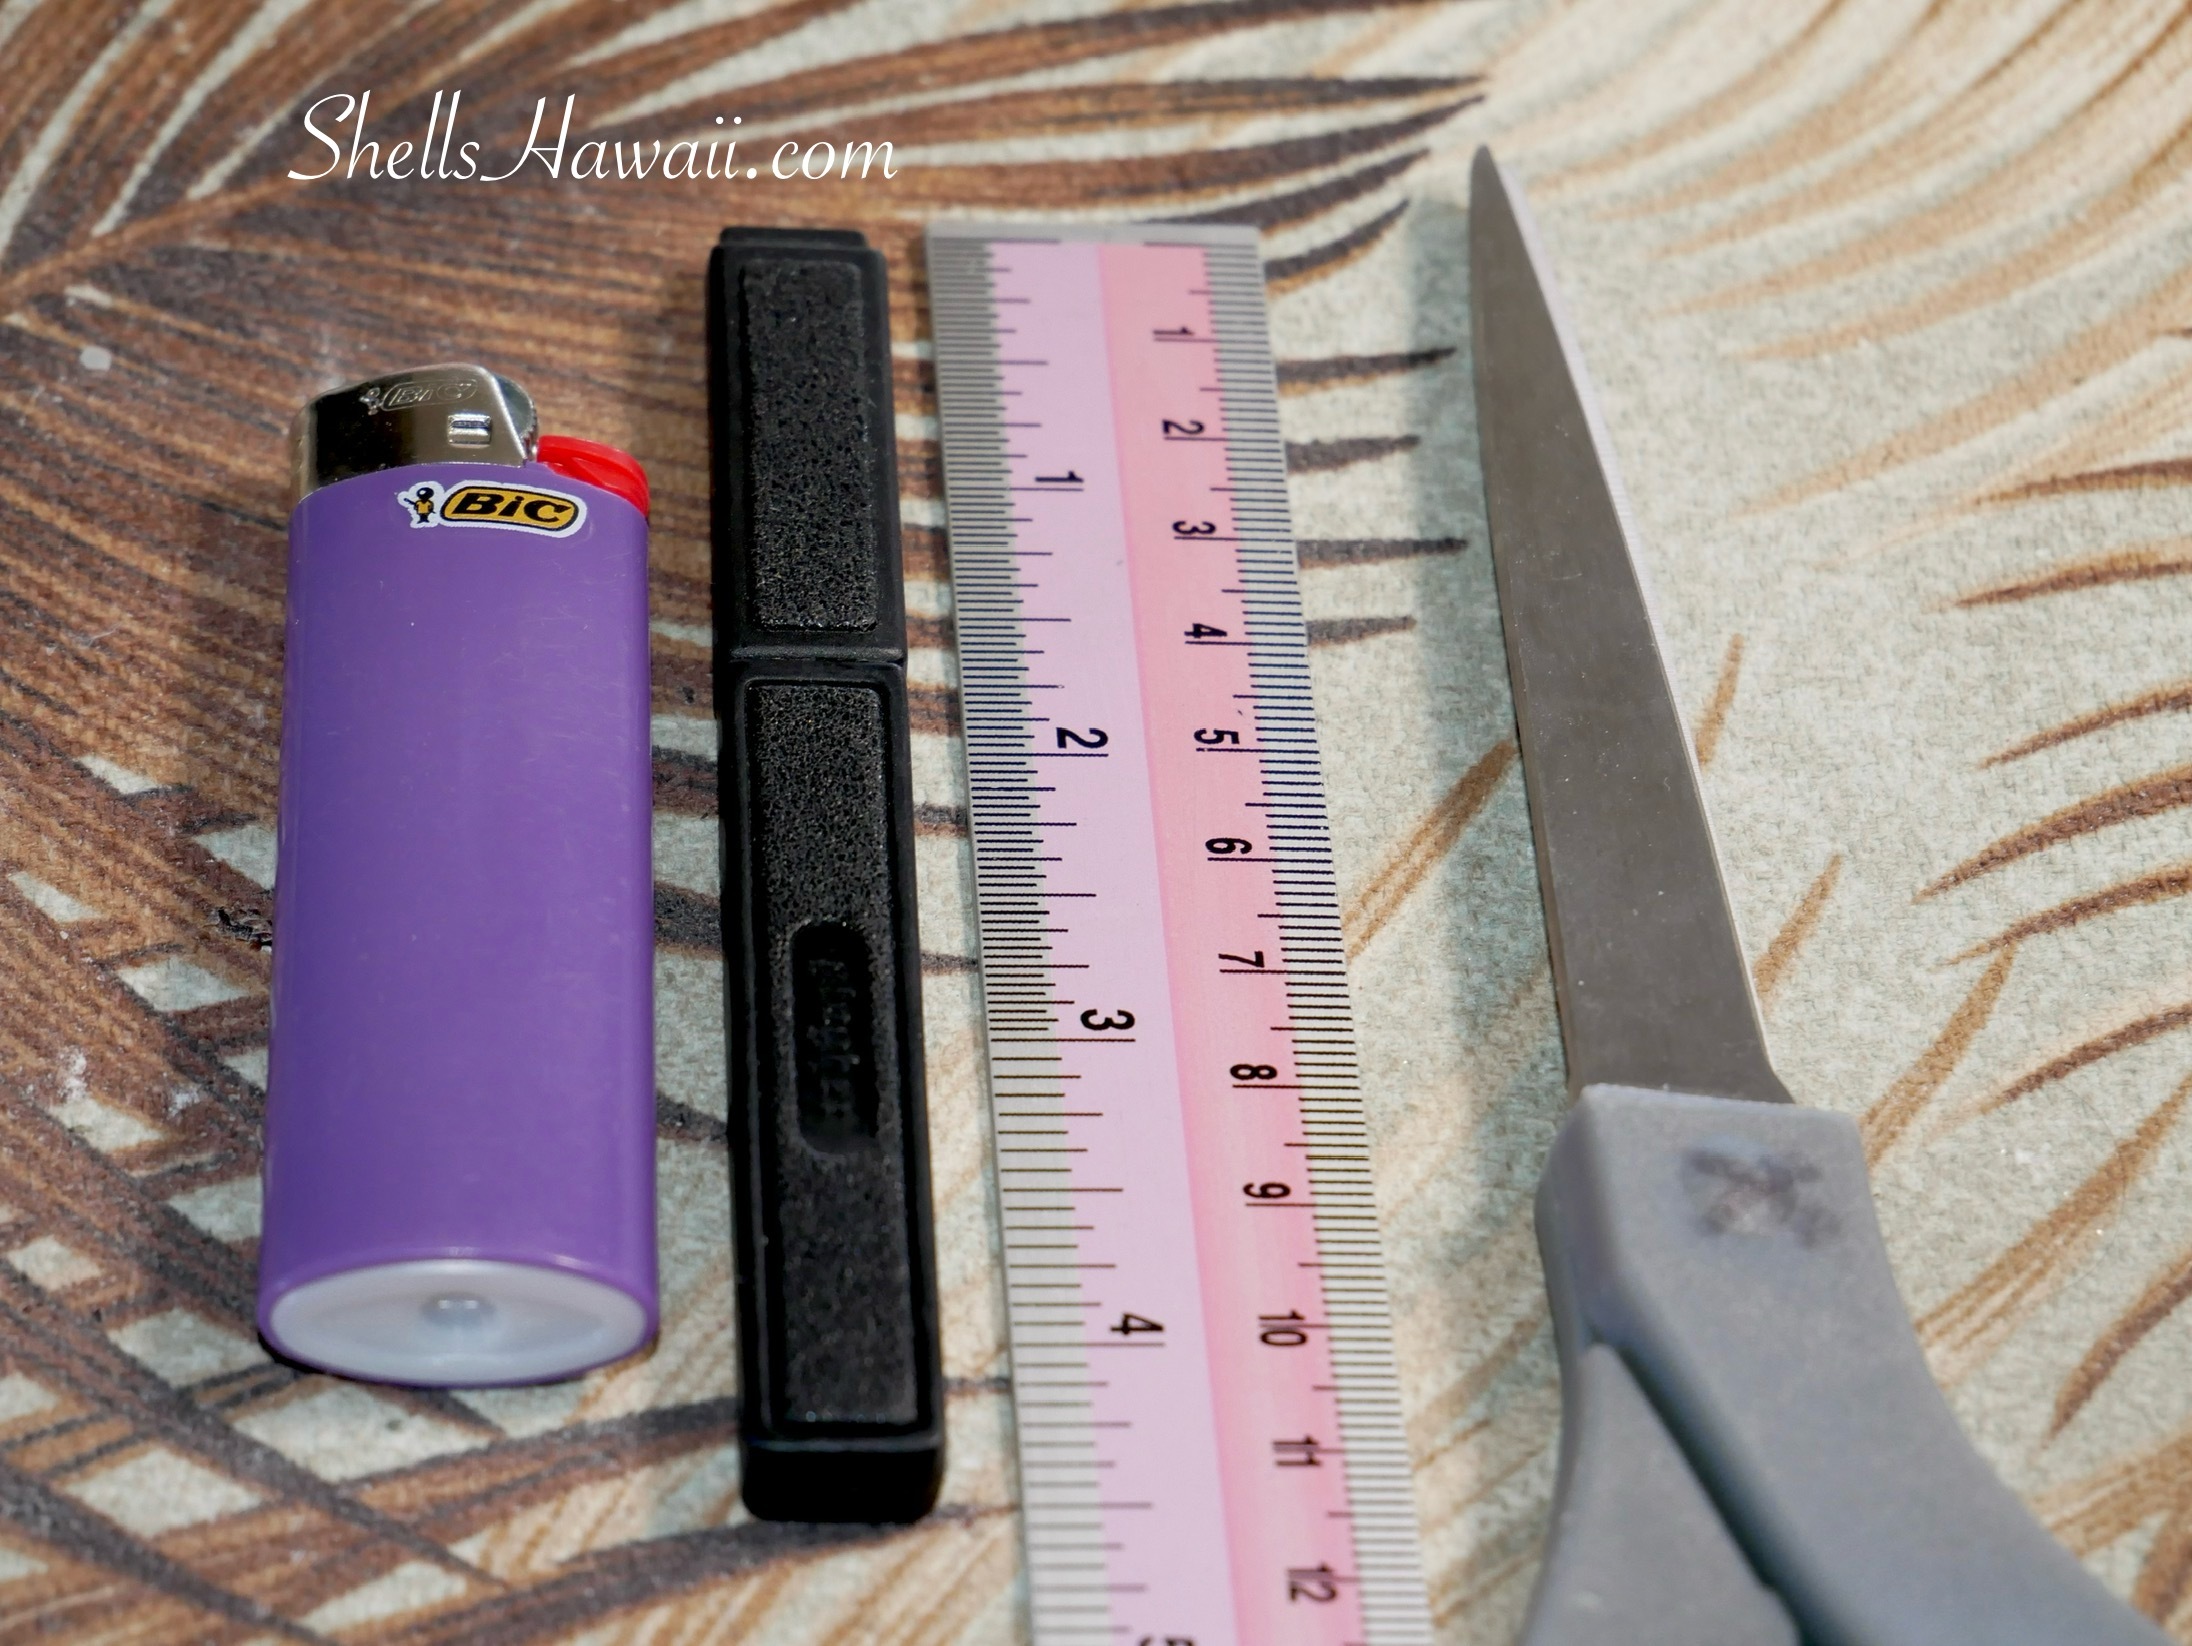
3. Scissors and a Lighter
Simple tools, but very important ones. A good sharp pair of scissors helps make trimming your thread clean and easy while working with shell jewelry. The lighter is used for just a quick touch — enough to lightly seal the ends of the thread so nothing unravels without damaging the material itself.
A good ruler and tape measure also come in very handy, especially when measuring bracelet, necklace, or lei lengths before finishing your creations. Small details like this may seem simple at first, but they really help keep the finished jewelry cleaner, more balanced, and easier to work with over time.
4. Good Lighting
This may honestly be one of the most underrated tools of all. I keep a bright desk lamp with a flexible arm and a daylight LED bulb right at my work table because good lighting helps me see the true shell colors, natural luster, and tiny cracks or flaws before I even begin stringing. Sometimes a shell may look perfectly fine at first glance, but once the lighting changes, you suddenly notice a weak edge or tiny crack.
And honestly, no magnifier here — just my own eyes, steady lighting, patience, and sometimes a short coffee break when my eyes get tired.
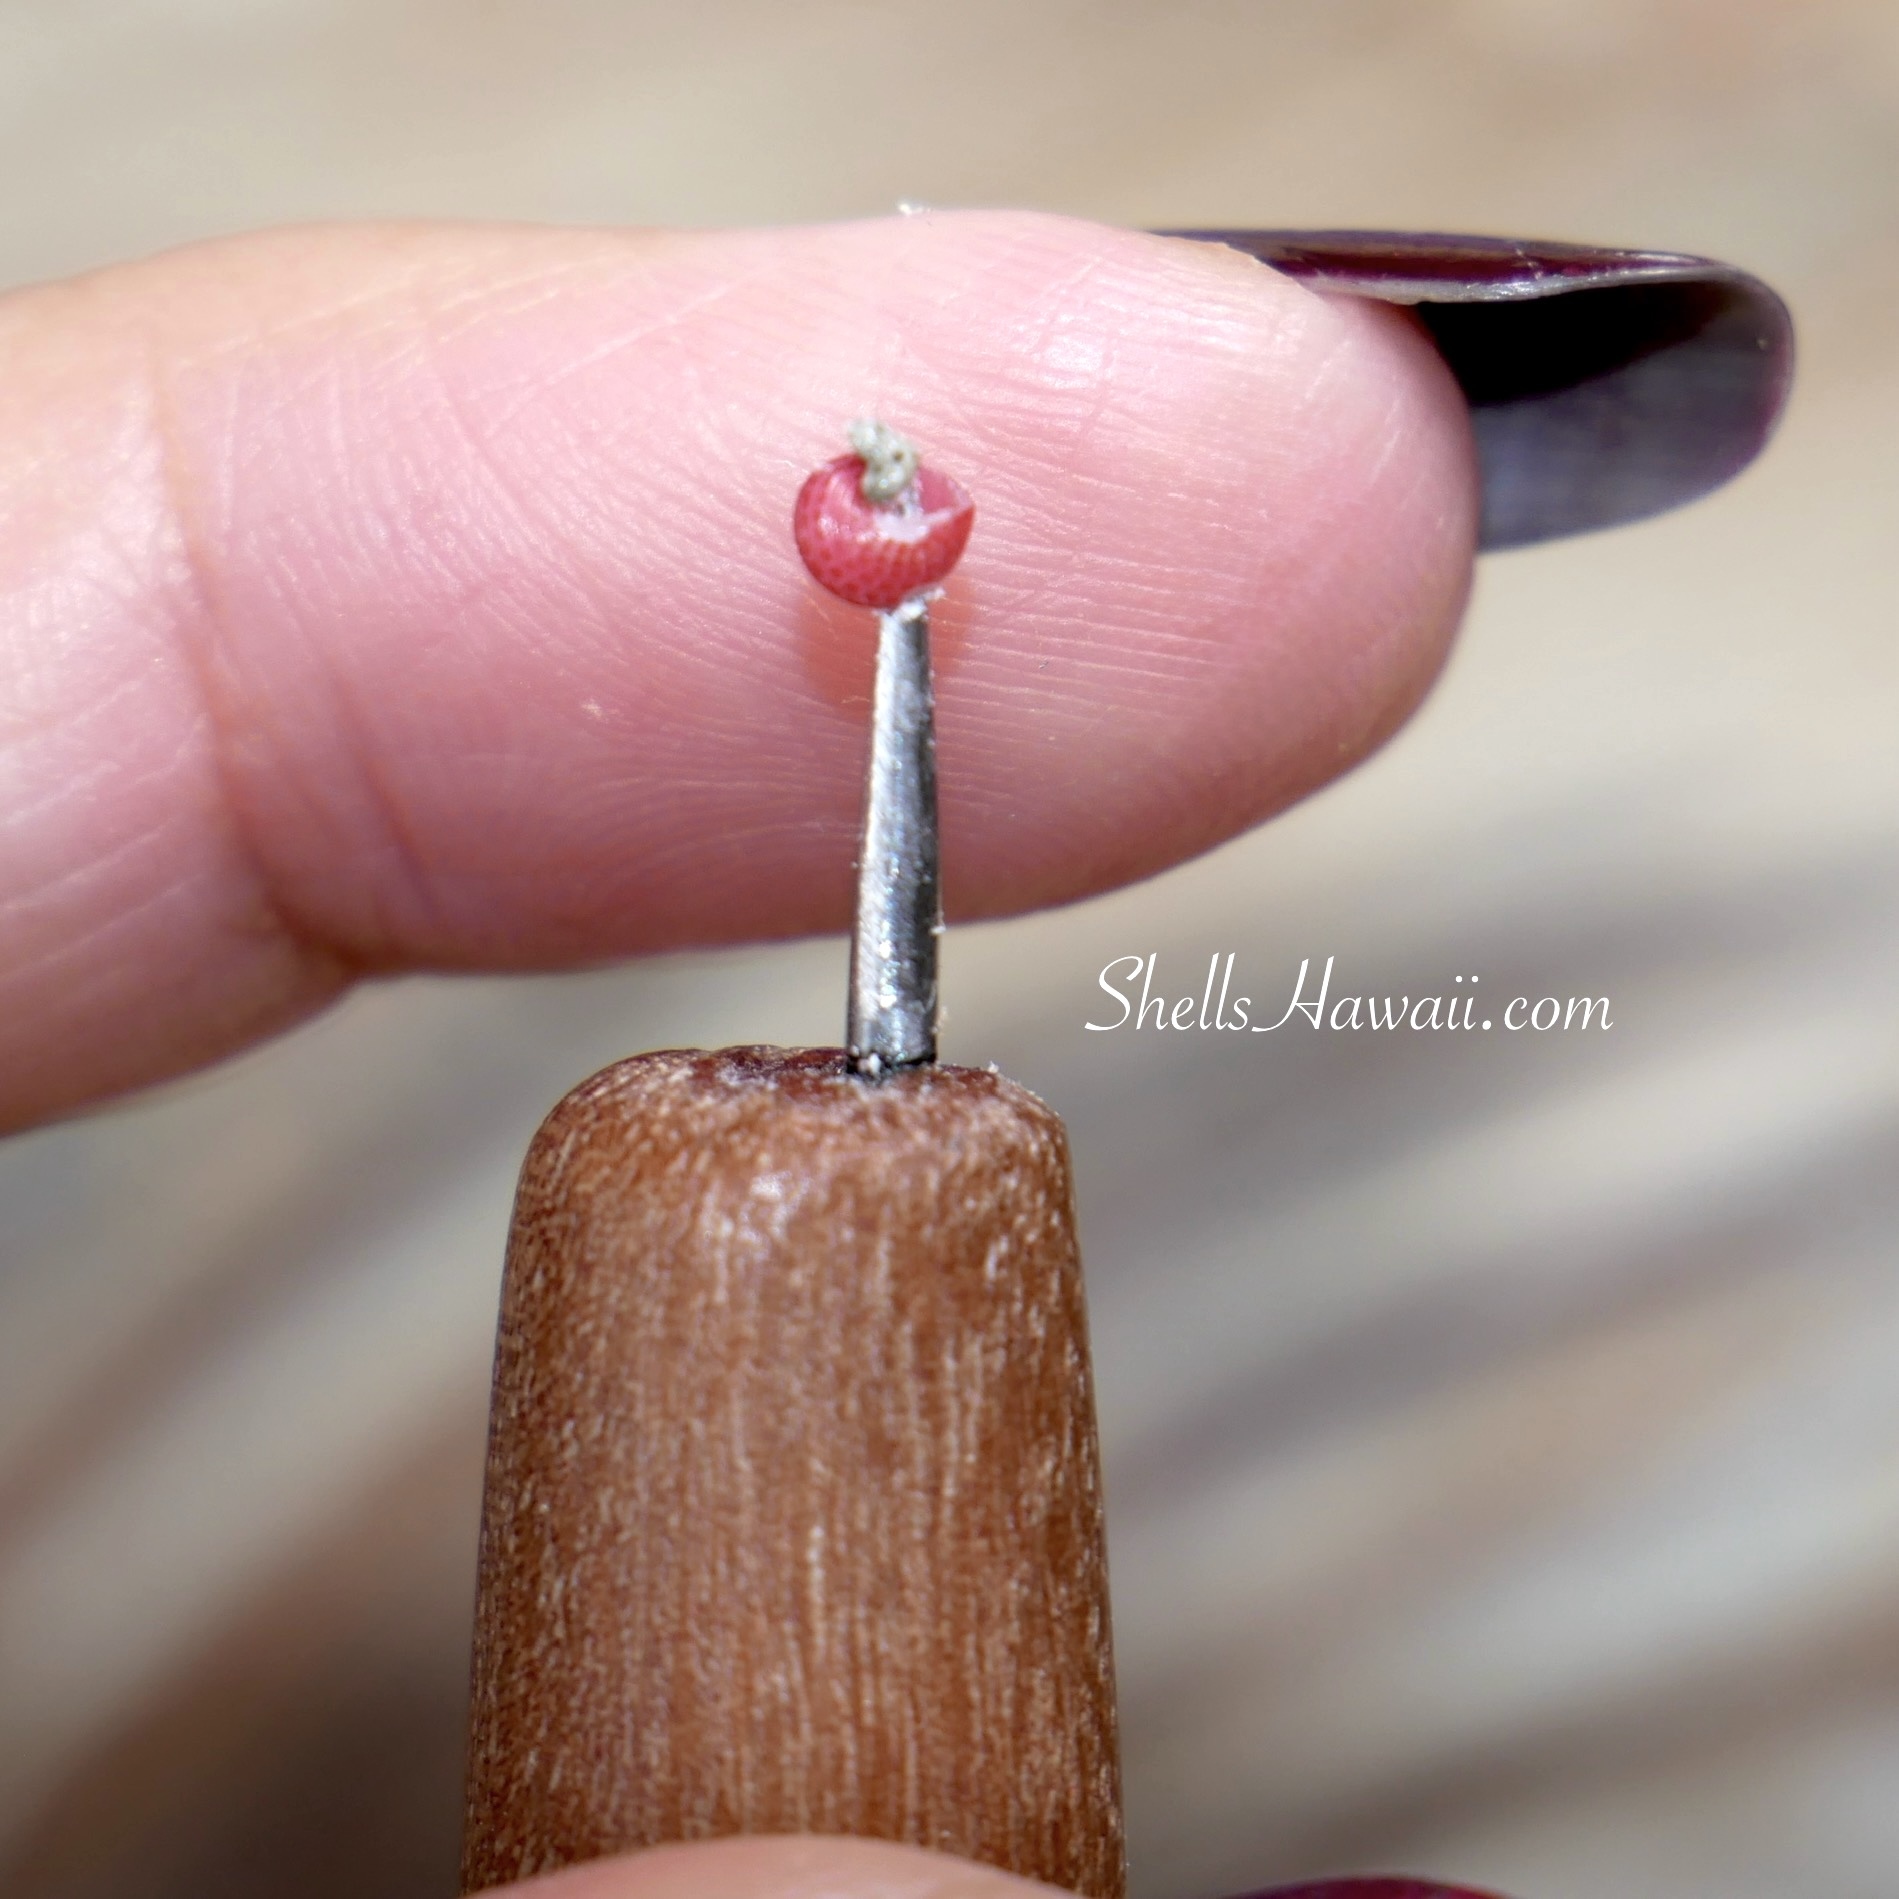
5. Your Fingers
In the end, one of the most important tools is still your own two hands.
Your fingers do all the feeling, flipping, sorting, and stringing. Over time, they slowly learn the shape and curves of each shell. They guide the patterns, balance the colors, and somehow begin knowing when something looks right — and when it needs to be taken apart and tried again.
And since I always get asked about this — yes, you’ll often see me in photos or videos with long fingernails. But honestly, they’re not for beauty at all. They’ve actually become one of my most helpful tools. My nails help me scoop up tiny shells, pick them from the table, and balance them on my fingertip to get them ready for poking. That little extra length honestly makes my work smoother and faster.
Some people prefer short nails, and that works perfectly for them. But for me, fingernails have become part of my everyday shell tools. So whenever someone says, “Wouldn’t long nails slow you down?” I always laugh a little because for me it’s actually the opposite.
And honestly, no machine or gadget can ever fully replace the care, patience, and aloha that flows through your fingertips while creating.
A Few Final Thoughts
And that’s about it — those are some of the simple tools I keep close by while creating. Over time, you’ll slowly discover your own favorites too and find what feels most comfortable in your hands.
And honestly, other than the tools themselves, one of the most important things when beginning is having good shell quality to work with. Good shells and trustworthy suppliers truly make a huge difference in your journey and can help prevent a lot of disappointment before you even begin your creations.
If you would like to learn more about shell quality, shell sizes, grading, and beginner tips, you’re always welcome to visit my beginner’s blogs where I share more of the things I’ve personally learned over the years.
I truly hope this blog helps you with your beginning journey. And if you would like to see what kinds of shell supplies I have to offer, please feel free to visit my loose shell supplies section, explore some of my finished jewelry, or read through some of my behind-the-scenes blogs that may also help you along your journey.
Much aloha,
Janjira