 USD
USD

Aloha and welcome to the ShellsHawaii Blog everyone. Today we’ll be talking more about what you need to know before you begin your journey into creating Niʻihau shell jewelry.
The Beginning of the Journey
When the idea of making Niʻihau shell jewelry first comes to mind, I’m sure many people grab their phone and run straight to Mr. Google! Haha — I don’t blame you. These days, there’s so much information online compared to when I first started 15–16 years ago. Maybe you find YouTube videos, tutorials on Instagram, Facebook, TikTok, or even shells and starter kits on Etsy. After a while, curiosity starts turning into action. You don’t just want to watch anymore — you want to try.
One of the friendliest ways to begin is through a Niʻihau shell class. Most beginners first learn the classic Pikake style using Momi shells. Usually the shells are already pre-poked, the thread is prepared, and everything is ready for you. By the end of class, everyone walks away with their very first piece of Niʻihau shell jewelry.
But honestly, learning from a prepared class kit is very different from starting completely from scratch. Stringing a beginner kit is much easier compared to sorting shells, matching sizes, and especially poking the shells yourself. That part is a whole different story — and definitely not as easy as it looks.

First Rule: Understand the Size (Very Important for Beginners)
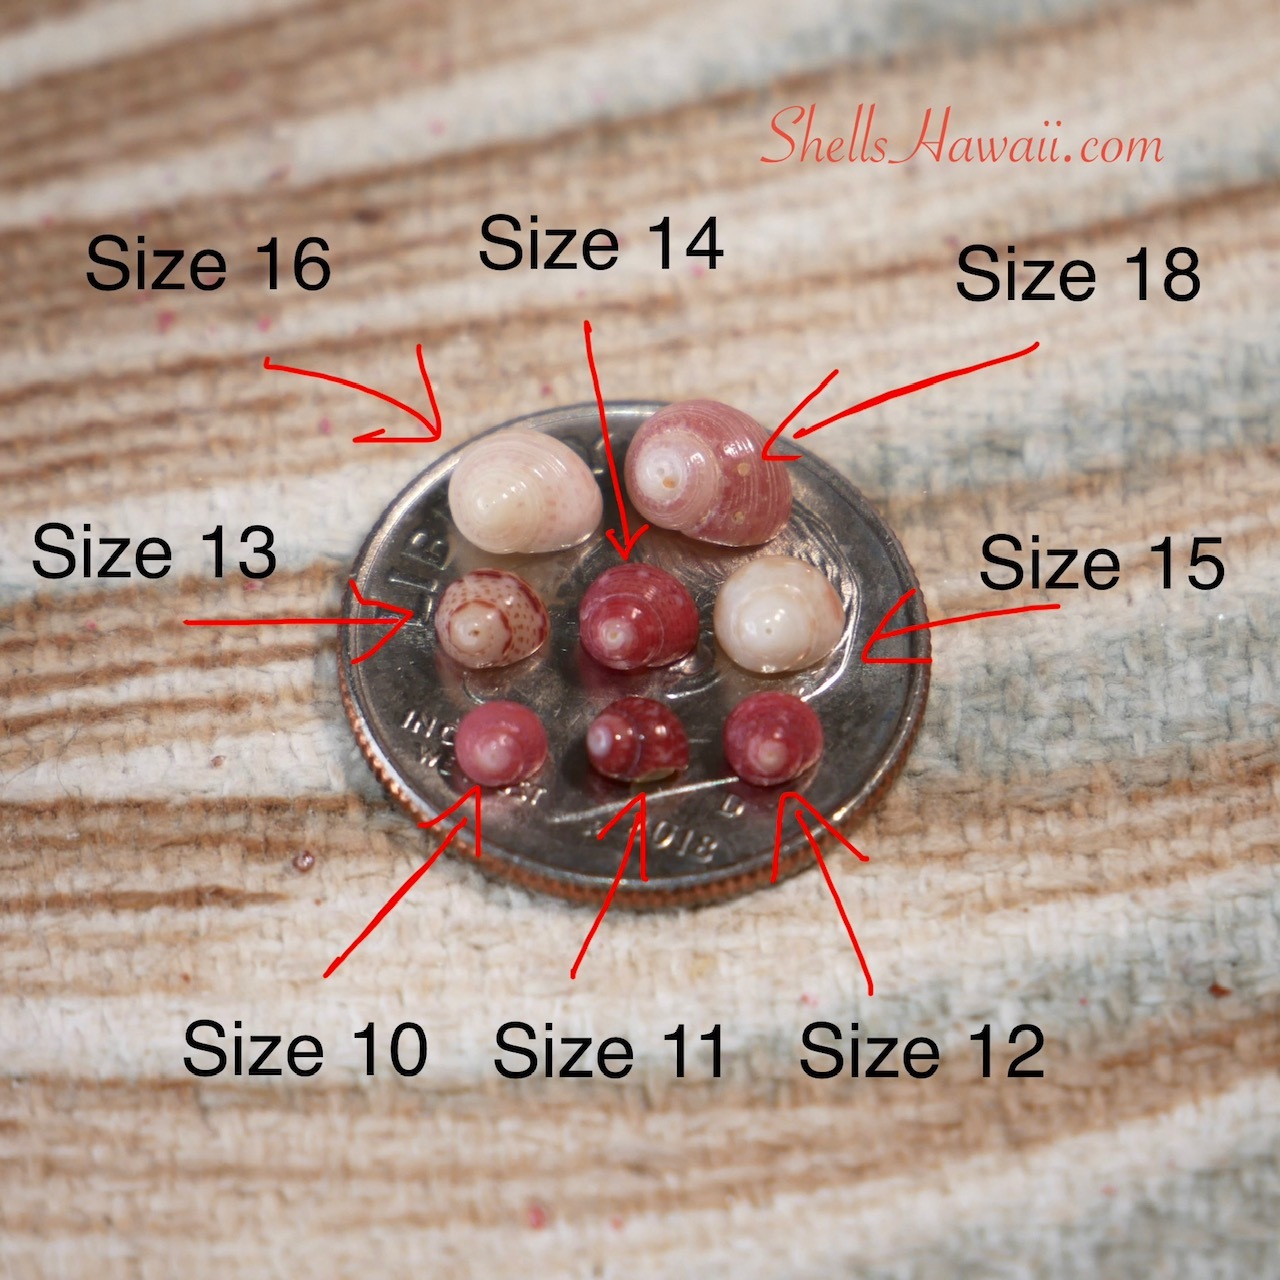
Before you begin, it’s extremely important to understand just how tiny these shells really are.
Kahelelani shells especially can surprise people. Even when beginners purchase the largest sizes available, many still react with:
“Wow… they’re still so small!”
And honestly, starting with the tiniest shells right away can quickly become frustrating. That’s why I often recommend beginning with slightly larger shells or even Momi shells first. It allows you to enjoy the process, build confidence, and slowly develop your skills before moving into more delicate shell work.
The Struggles Beginners Often Face
Many people purchase loose shells without fully realizing how difficult the process can be at first. Later, they reach out feeling frustrated because they don’t know which tools to use, what thread works best, or how to poke the shells properly.
Without the right tools, thread, and technique, stringing shells can become very difficult very quickly. Poking shells is not simply making a hole and pushing thread through — there’s real skill and patience involved.
I know because I struggled through all of it myself. When I first started, there were no videos, classes, or tutorials available to guide me. Everything felt secretive, and I had to learn through years of experimenting and making mistakes on my own.
That’s why I often suggest beginners start with Momi shells first. They’re larger, easier to handle, and a wonderful way to practice before moving into smaller Kahelelani shells.
Next Blog — What You Need to Know Before You Buy the Shells
In the next part of this beginner series, we’ll talk more about how to choose the right shells, what to look for, and some common mistakes beginners should avoid before purchasing shells for their projects.
A little knowledge in the beginning can save you from a lot of frustration later and make your shell jewelry journey much smoother.
With aloha,
Janjira