 USD
USD

Aloha and welcome to my ShellsHawaii blog, everyone
Double Pīkake…
Umm… what is that?
I have to be honest — the first time I heard this style, my head was spinning. I tried to understand it from a book, read the instructions over and over, and somehow it still didn’t match what I already knew from actually working with shells. The drawings didn’t look like what we make in real life, and the explanation felt much more complicated than the style itself. I even started thinking, wait… am I doing this wrong?
Before We Begin: Do You Know the Single Pīkake Style?
If you’re not yet familiar with the Single Pīkake style, I really recommend starting there first. Understanding that foundation makes the double version feel much less confusing. You may also enjoy learning more about Momi shells — their colors, natural variations, and why they’re considered so special — and if you’ve ever been curious about where my Niʻihau shells come from, I share more about that journey and process as well.
When Instructions Make Your Brain Twist
Sometimes, when you’re trying to learn something new — especially something you’ve never done before — it doesn’t always click right away, and that’s pretty normal. Learning Niʻihau shell techniques can feel the same way. Reading instructions and actually working with your hands are very different experiences, so it’s common to look at the page and then look at your work and think, “Hmm… why does this feel a little different in real life?” That little moment of doubt happens to all of us, and it’s just part of learning.
I remember going through the exact same thing. It took real time, real patience, and plenty of second-guessing before it finally clicked. I kept trying, kept adjusting, and kept questioning myself. Then one day, something just popped into my head. I said it out loud, walked back to my work table, tried it again — and suddenly, it made sense. Just to be sure, I checked with my respected supplier, who is also a lei master, and she confirmed that yes — this is exactly how Double Pīkake is done. After all that confusion, it turned out my instincts were right the whole time.
So if you’re still feeling a little confused at this point, please don’t worry — I truly get it. Sometimes we think too much, and that can make simple things feel harder than they really are. With Pīkake styles, your hands often understand before your brain does. Sometimes you just have to try, trust your common sense, and see what happens. That’s exactly how I learned Niʻihau shell jewelry myself. Being self-taught is a beautiful journey — it just takes a little more time and patience along the way.
So… What Is Double Pīkake?
Let’s keep this simple.
Double Pīkake is a fuller, more dimensional version of the Pīkake style. Visually, it looks richer and more layered, with the shells sitting closer together and forming a thicker, more rounded pattern. Compared to Single Pīkake, the design feels bolder in presence while still keeping the soft, flowing rhythm that makes Pīkake so recognizable.
At a glance, you’ll notice the clusters look more compact and full, giving the piece a stronger texture and a slightly heavier visual weight — but without losing that gentle, floral movement.
That fuller look is what sets Double Pīkake apart. It carries the same familiar Pīkake feeling, just with more depth and presence.
Single Pīkake — A Visual Look
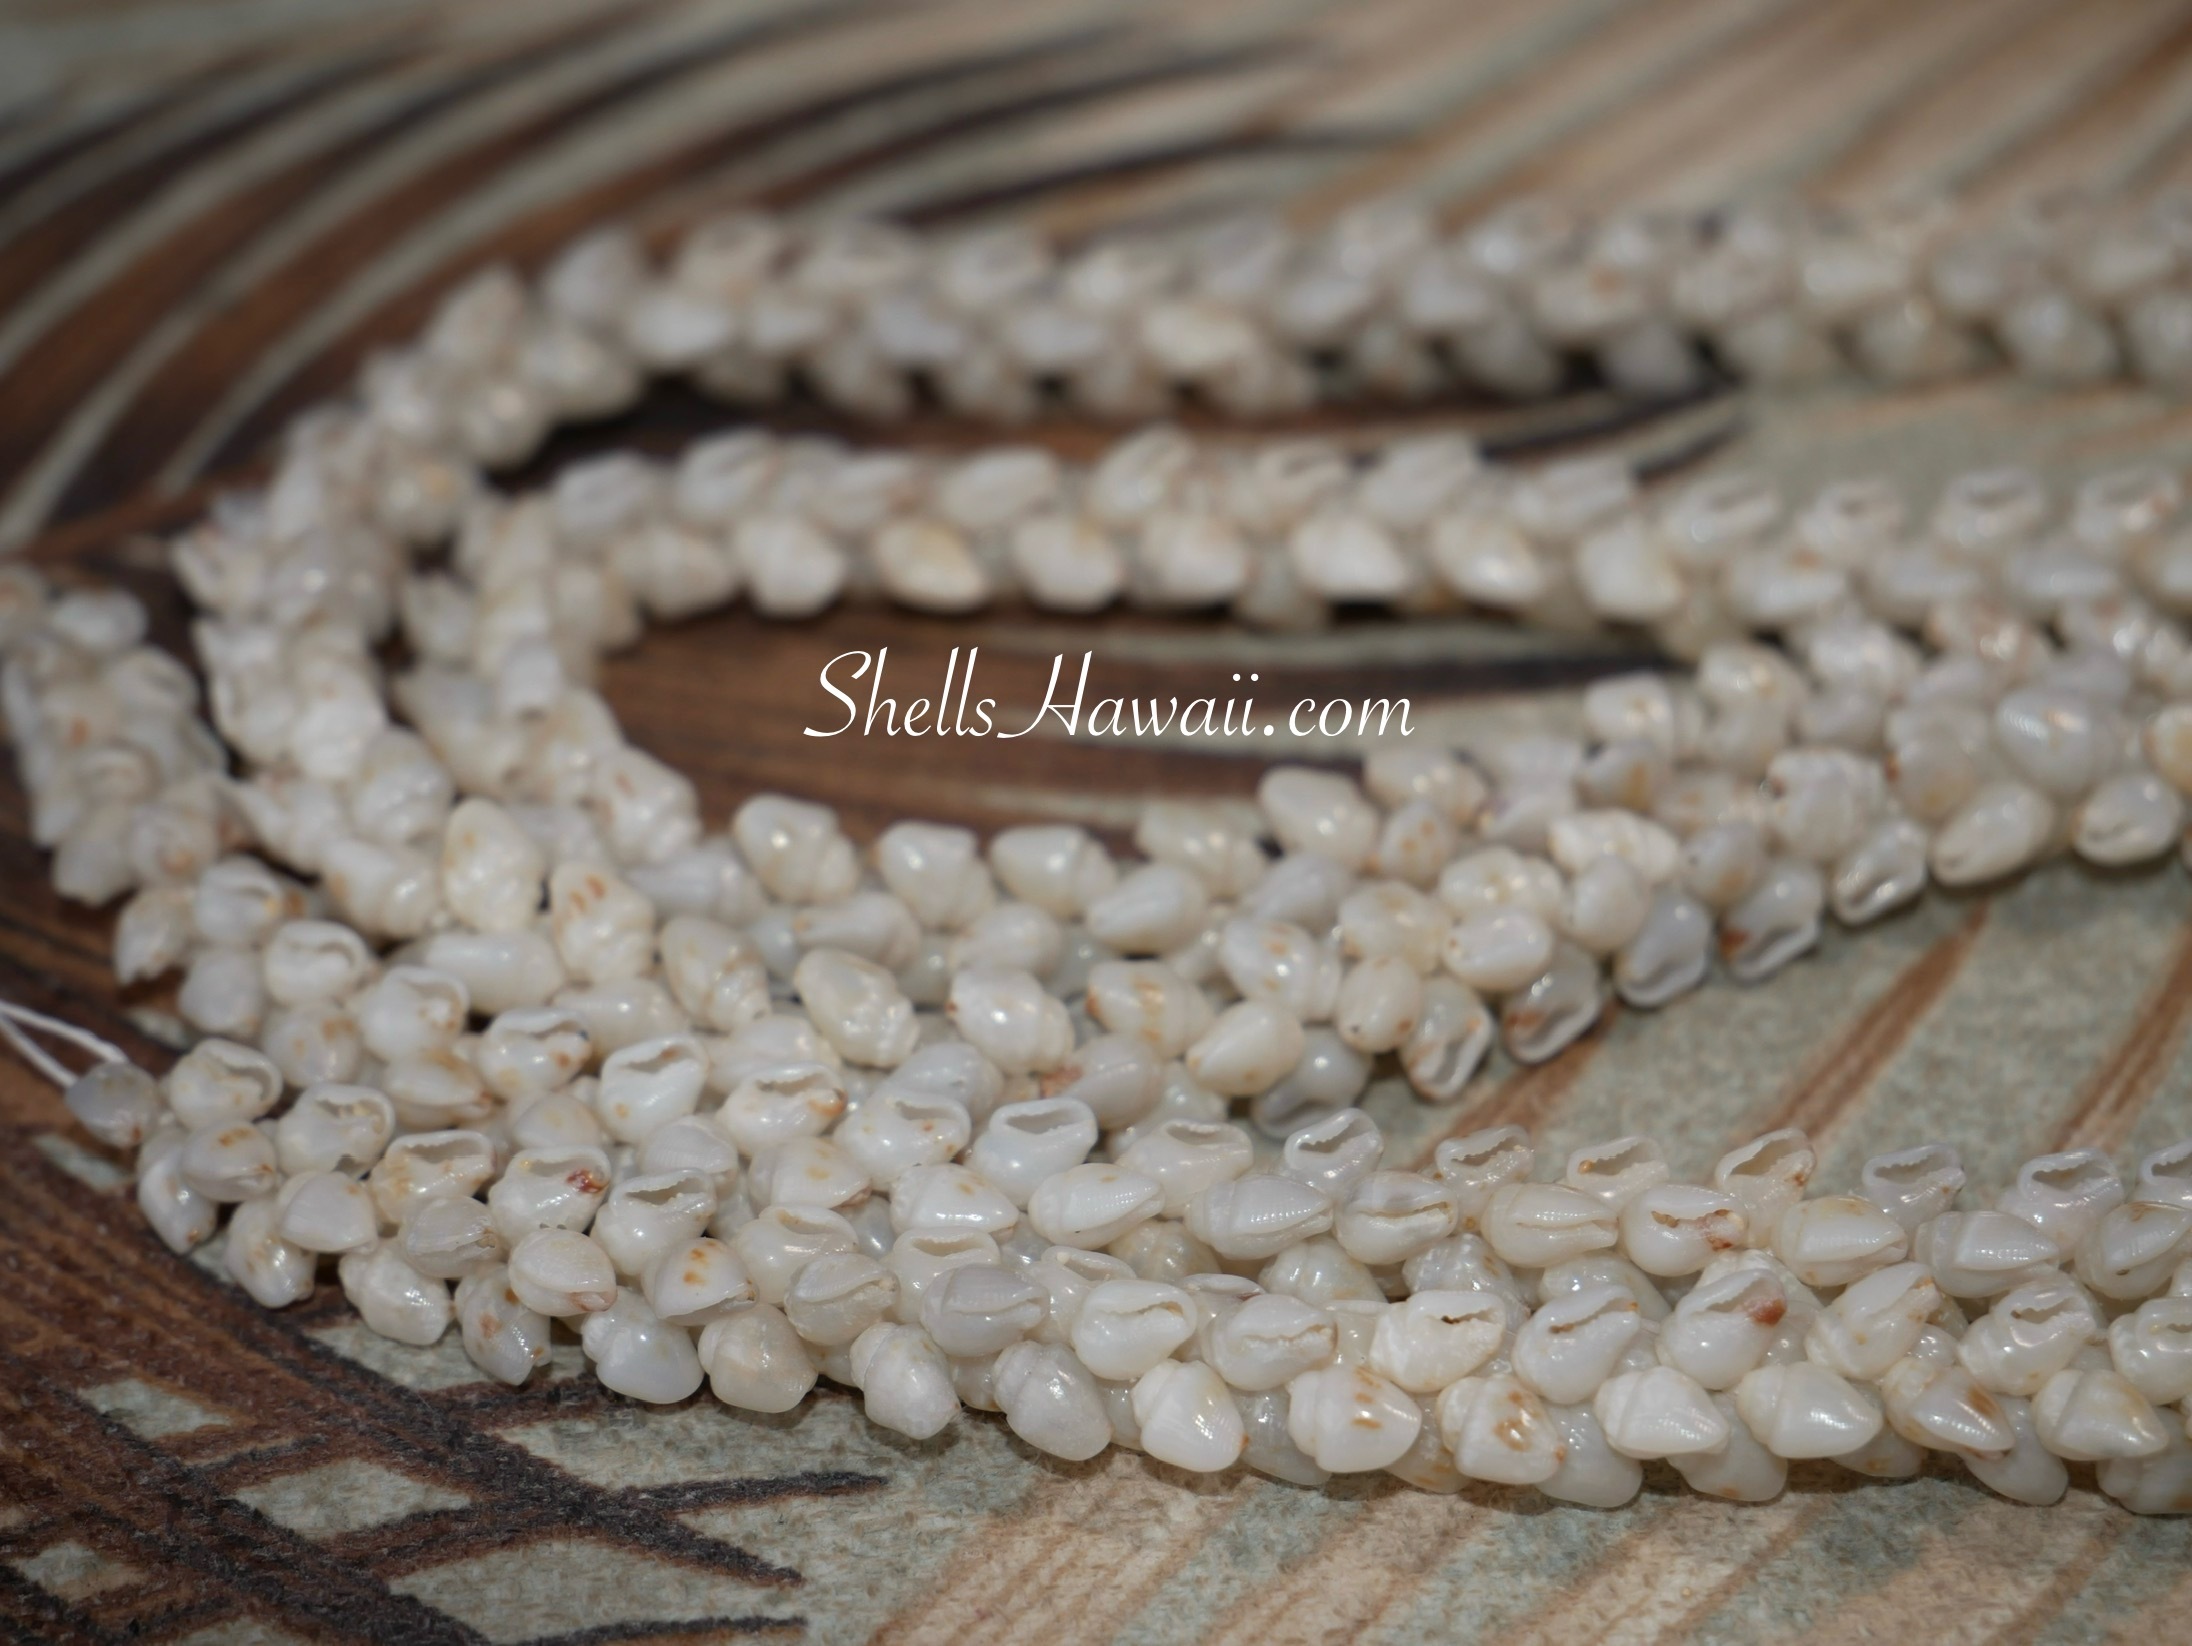
Here’s how the Single Pīkake style looks when finished — soft, balanced, and easy to recognize once you know what to look for. As you see in the photo below, this style appears smooth and gently flowing in both earrings and lei. If you’d like to learn more about the Single Pīkake style and its meaning, you can click here to read more.

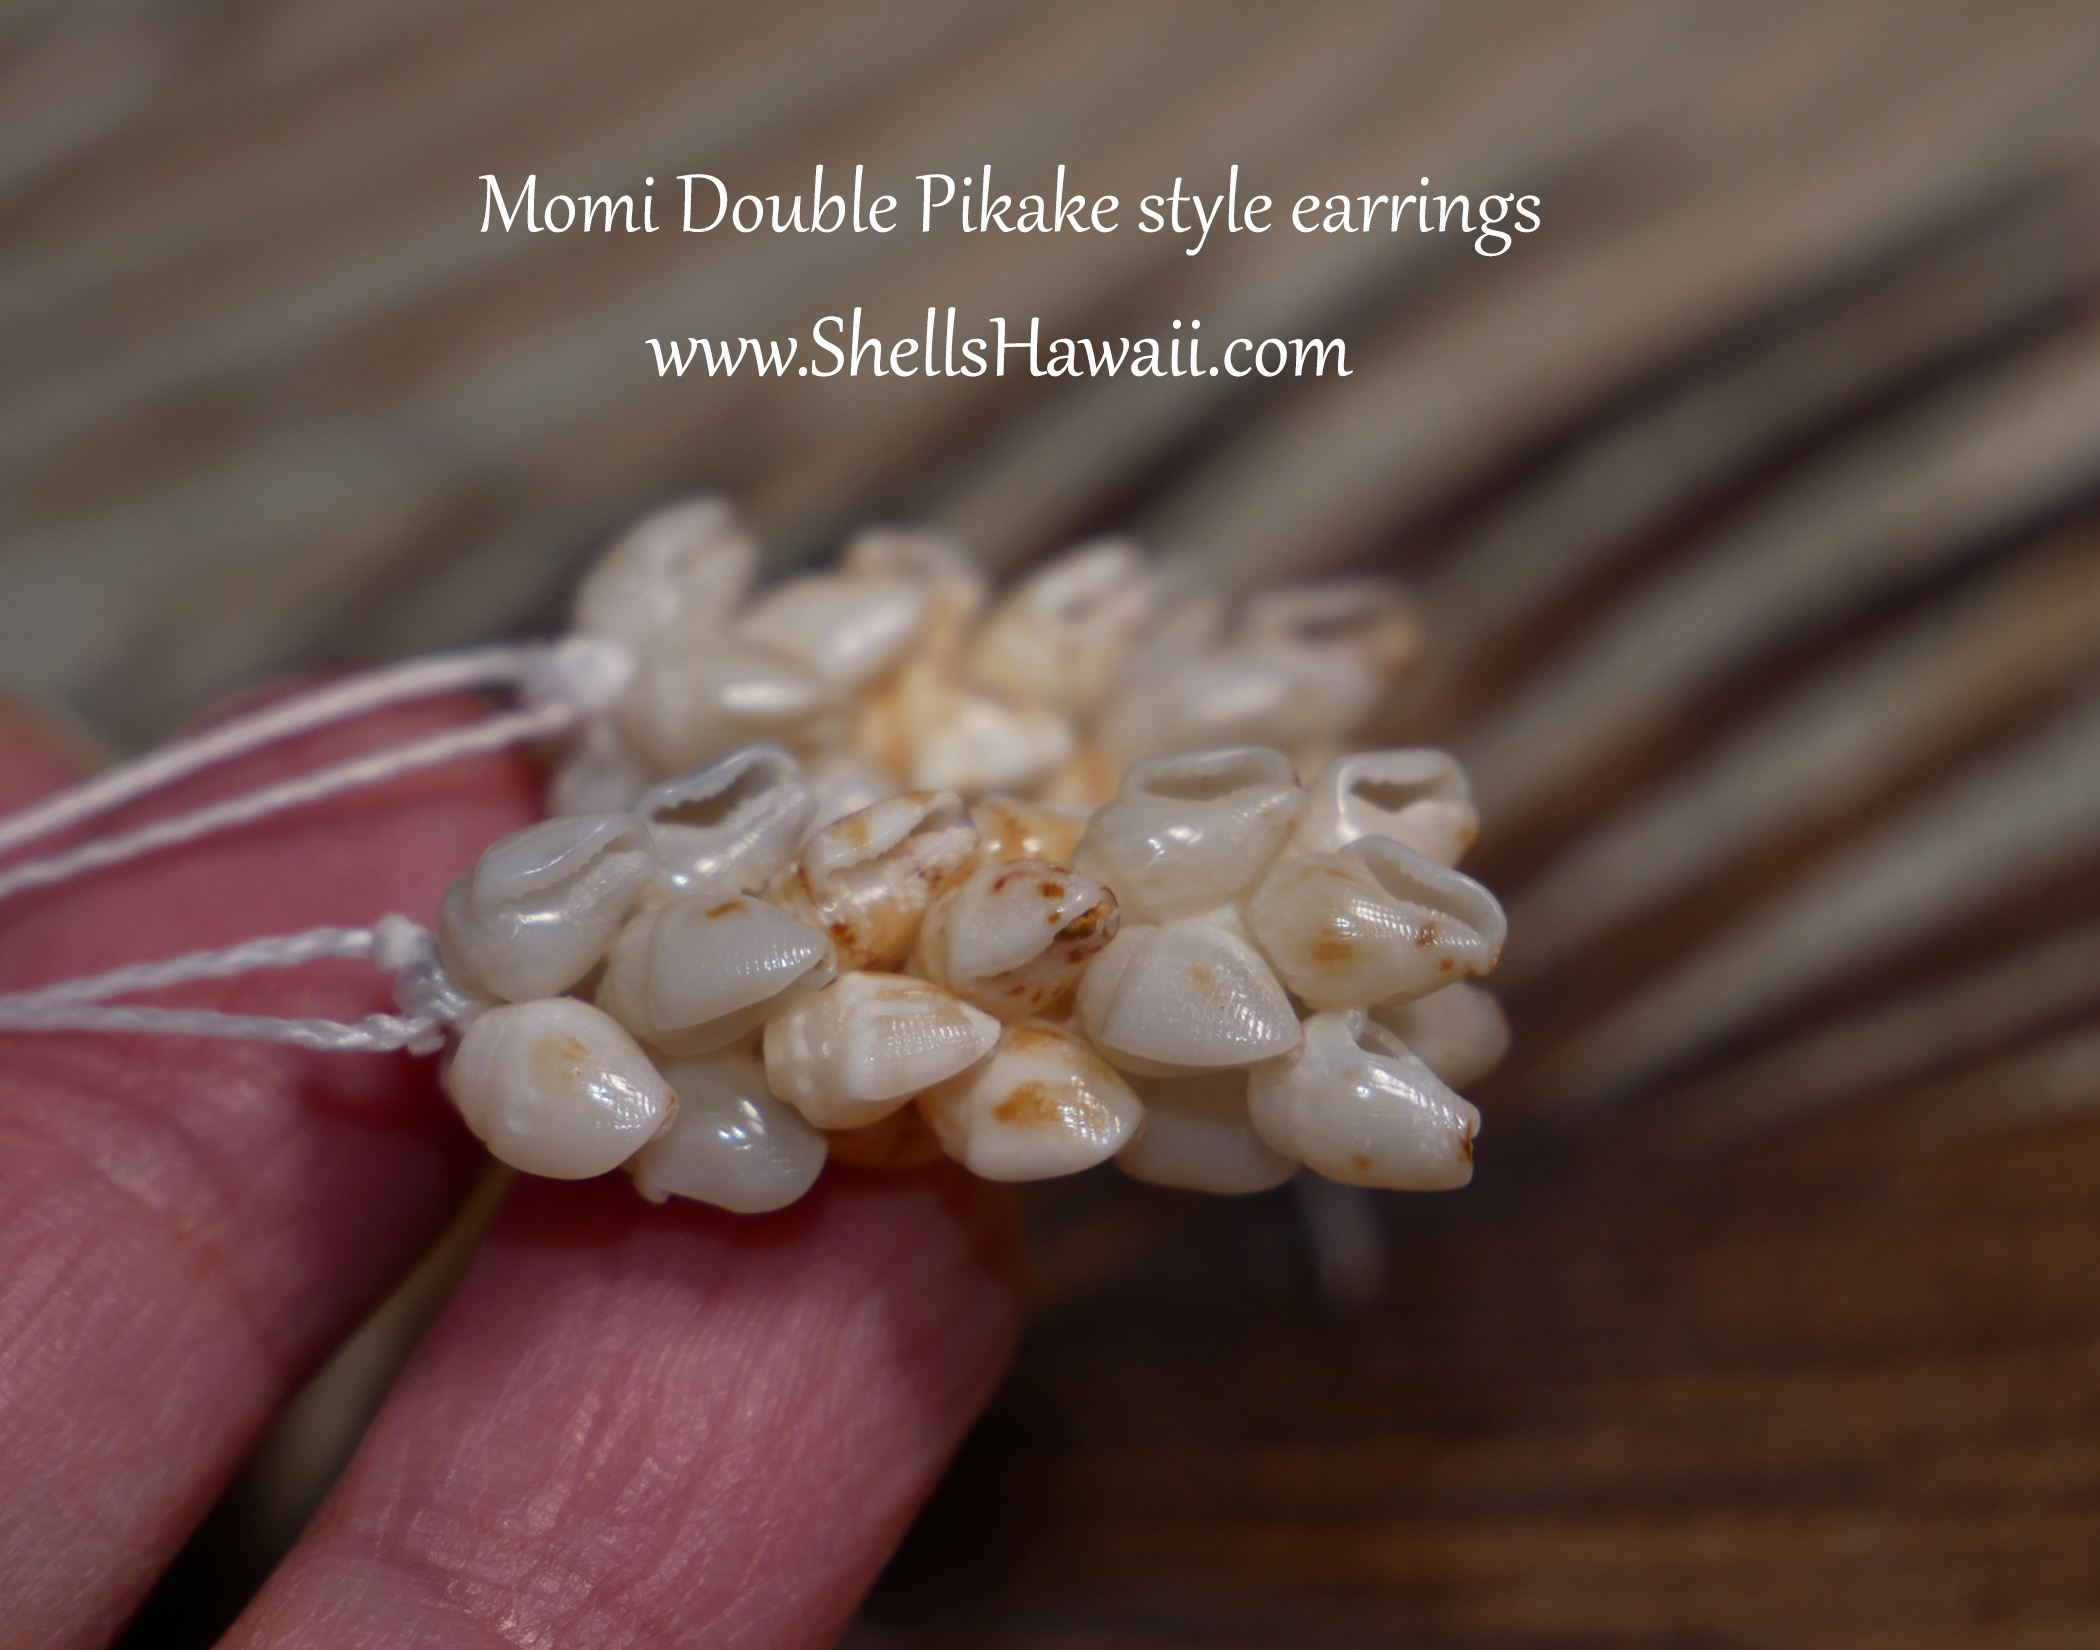
Double Pīkake — How It Looks
The Double Pīkake style has a fuller, more layered appearance compared to Single Pīkake. Visually, the shells sit closer together, creating a thicker and more dimensional look. The pattern feels richer and slightly heavier, with each cluster appearing more compact and rounded.
Even though it looks fuller, Double Pīkake still keeps the same gentle, flowing rhythm that makes the Pīkake style so recognizable. The movement is soft and continuous, but with more presence — giving the finished piece a bold yet balanced feel.
This fuller texture is what helps set Double Pīkake apart when you see it side by side with Single Pīkake. Once you recognize that added depth, it becomes easy to tell the two styles apart.
There are just so many designs, techniques, ways of poking, and ways of tying in this amazing art. Every style has its own personality, its own logic, and its own challenge. That’s why Niʻihau shell jewelry is so beautiful, so amazing, and so filled with aloha. The patience, the effort, the tradition, and the love you put into every tiny shell — all of it becomes part of the final piece.
⚓ Now that you’ve learned Single Pikake and Double Pikake, our next blog will explore the Double-Double Pikake style.
Please stay tuned — it’s another fun challenge to understand and learn!